Recent Cast Iron Acquisitions

Last month, Kathy and I took a day trip to Tennessee, and while we were in Sevierville made the required stop for any cast iron aficionado at the Lodge Cast Iron Outlet Store. This is the second time we had been to a Lodge outlet store, with the previous visit made to the store in South Pittsburg, where Lodge is headquartered. If you’re into cast iron like us (and if you’re reading this, you probably are), you know that visiting one of these stores is akin to a religious experience.

As we went along, spending about an hour in the store, Kathy and I walked up and down every aisle, making certain we had missed nothing. We called a family member as well as a friend of the family asking them if they needed us to get them anything while we were there. They both enthusiastically gave us their “orders.” Some of the items we picked up were novelties such as a Lodge baseball cap. It’s black with the Lodge logo on the front and the words “1896 * USA” on the back. I also got one of those rust eraser sticks I’d heard about, but have not had a chance to use. I’ve got a couple of old cast iron chicken fryers that need cleaning up. I’ll be certain to write about my results with the eraser when I’ve had a chance to try it out.


I’d also been wanting a lid for our cast iron wok for quite a while. I realize you may be thinking that a lid is not customarily used with a wok, and I’d have to agree with you completely. But let me explain why I wanted one.


A few months back, I emailed customer service at Lodge asking them if they made a lid for the wok. They do not, which didn’t surprise me. However, I was told that the 14” camping dutch oven lid fits perfectly. So, while in the store, I found one of these rather large lids and carried it over to a display where a few woks were sitting. I set the lid on top of the wok, and I was delighted to see that it fits perfectly! It’s almost as if the lid was especially designed for the wok.

What you see here is almost every piece of cast iron we own. Other than what you see here, I also have my main cast iron skillet that has a permanent place on the stove top. It the first cast iron piece I got back in the nineties. It is a Lodge 10.25" skillet that I received back before they began adding the extra grip handle and before everything came pre-seasoned.
I also have Kathy’s grandmother’s chicken fryers (two) in the back room waiting for me to find the time to clean them up and get them back into normal use. I don’t yet know what brand they are, but I look forward to trying to figure that out. My only other not-pictured cast iron item is a Wagnerware cornstick pan which I will have to take that rust eraser to before I can re-season it and get it back into working order.
Finally, pictured below are a few shots of the same rack above, but slightly enlarged so that you can see some of the items we have. I’m not showing these items to show off. I know of many cast iron collectors whose inventories are larger than ours. However, I also know that true cast iron aficionados enjoy looking at other folks’ cast iron. So, enjoy and feel free to post any questions or comments in the comment selection of this post.


Feel free to leave your thoughts or ask questions in the comments below, or you can contact Rick directly at rick@cookingincastiron.com.
Queenie's Peach Cobbler/Looking at the World through Cast Iron Lenses

That is, when you go to a restaurant or perhaps to dinner at a friend’s house, do you think when the food is served, “You know, I bet this would taste even better if it were cooked in cast iron”?
I admit I do this. In fact, when I make old family recipes, I chuck the directions to use a glass dish, and I usually cook in cast iron instead. You think that green bean casserole is good in a Pyrex dish? You’ve not had green bean casserole until you’ve had it cooked in cast iron. If skillet fries taste best in cast iron, think of how good your uncle’s hash brown casserole will taste. I’ve got two cast iron pans specifically for casseroles, but if you don’t, a cast iron skillet will work just as well.
My cast iron
Of course, I should point out that I never actually ate this peach cobbler at my grandmothers house when she was alive. But my mother made it regularly and always referred to it as her “Mom’s Peach Cobbler.” In the copy of the recipe I received, which had the title just mentioned at the top of the page, the directions simply called for a “casserole” dish. But this goes back to my previously mentioned point—I was certain this would go better in cast iron!
In fact, the recipe itself isn’t all that different from the cobblers we’ve made while camping, using a dutch oven placed directly on top of live coals. One of the best features of those great campout cobblers is the crust that forms in the cast iron. Therefore, I was fairly certain that I could (forgive me for saying this!) improve on my grandmother’s recipe.
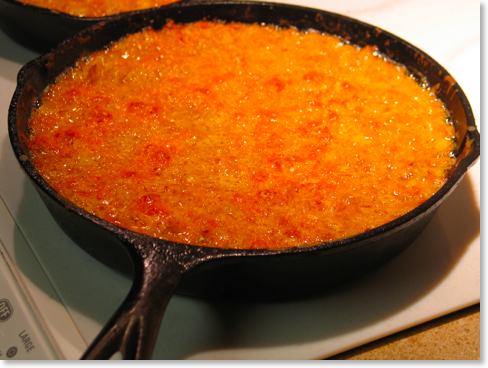
At our church, my Sunday school class has a potluck brunch every first Sunday of the month. So two weeks ago, I decided to make my grandmother’s peach cobbler, but not in a glass dish, but in cast iron! Now, my wife, Kathy, who doesn’t like peaches (odd, isn’t she?), asked if I’d also make one using apples instead. The recipe is pretty versatile, so the picture at the beginning of this post has apple on the left and peach on the right. To make the cobbler even more special, I made the original peach recipe specifically in my grandmother’s skillet that was handed down to me years ago. It is a BS&R and is at least 70 years old if not older. I used my Lodge skillet that I got in the nineties for the apple cobbler.
Needless to say, both cobblers were a hit, but the peach cobbler was completely gone when the apple cobbler was only half eaten. But by the end of our class, both pans were empty. Cast iron is definitely superior to the standard casserole dish for this recipe as you probably imagine. I encourage you to join me in looking at your world through cast iron lenses!
So, here is Queenie’s recipe for peach cobbler. It’s very easy, so very basic and so very good. Enjoy!
Queenie’s Peach Cobbler

10.25" Cast Iron Skillet
Ingredients:
- 1 stick butter
- 1 cup of sugar
- 1 cup of flour
- 1/4 teaspoon of salt
- 2 teaspoons of baking powder
- 1 cup whole milk
- 1 can of sliced peaches, don't drain
Melt a stick of butter in a cast iron skilet.
Mix a cup of sugar, a cup of flour, 1/4 teaspoon salt, two teaspoons of baking powder, 1 cup whole milk.
Pour in 10.25" cast iron skillet and add one large can of sliced peaches (don’t drain).
Bake at 350° 30-40 minutes.
Rick plans to post more of his grandmother’s recipes in the future, so check back often. Feel free to leave your thoughts or ask questions in the comments below, or you can contact Rick directly at rick@cookingincastiron.com.
Joanna Pruess on QVC Tonight
If you haven’t seen Joanna’s book, be certain to read my review. It is perhaps the best cast iron themed cookbook I’ve ever seen. We liked it so much that after we bought ours, we bought three more to give as Christmas gifts last year.
Be sure to catch Joanna on QVC tonight and if you don’t already have her book, you may want to order one.
Why Cast Iron? Five Reasons
Every now and then, someone asks me--“So what’s the big deal about cast iron?” There are plenty of other pans around. Plenty of other ways to cook. Why should someone entertain the use of cast iron cookware to begin with?
Here are a few reasons to use cast iron. Maybe you’ve been toying with the idea of cooking in cast iron for a while, and this will help to push you over.

There are also serious questions raised about the danger of cooking surfaces such as teflon when used at high temperatures (see MSNBC: “Teflon Chemical Cancer Risks Downplayed”). It is well known that fumes from teflon pans (and possibly other chemically treated non-stick surfaces) can cause the death of birds kept as family pets (see “The Silent Killer” by Joanie Doss).
Aluminum pans aren’t necessarily safe either. Though a definite causal relationship has not yet been established, a common factor seen in Alzheimer’s patients are aluminum strands found in the brain (see Alzheimer’s Society: “Aluminum and Alzheimer’s Disease”). Whether aluminum cookware is one of the factors in this is yet unknown, but some believe that heating foods at high heat in aluminum pans causes the metal to leech into foods. Note also that aluminum pans are almost universally used in restaurants where food is usually cooked quickly at very high temperatures.
On the other hand, cooking in cast iron negatively affects only an extremely small portion of the population--those who suffer from too much iron in the blood. This condition is referred to as hemochromatosis. This is not an issue for the average person, and for those who suffer from too much iron in the blood, I’d still recommend enameled cast iron for all the other reasons mentioned here.
Another healthy aspect of cooking in cast iron is that it is so enjoyable, you will be encouraged to cook at home more often, which is always healthier than eating out or warming up pre-packed foods in the oven.

Although cast iron is making a strong return to America’s kitchens, it never left the campsite. It was cast iron that sustained America from the earliest pilgrims to the pioneers who traveled west. Cast iron is hardy and very difficult to permanently damage unless it’s downright abused. I’ve easily used some of the same pans in my kitchen when we’ve gone camping as well. Although most campers will want to obtain dutch ovens specific to the campfire, a lot of us can confess to throwing regular dutch ovens in the fire, too, with no harm coming to them because of it.

Before we started using cast iron as our main cookware, there’s no telling how many other pans we eventually wore out and then threw out. Non-stick heating surfaces on those other pans eventually started flaking, so we’d throw them out. But after switching to cast iron a few years ago, I fully expect to be using the same pans--including my grandmother’s--for at least another three or four decades (assuming I live that long). After that, I will pass them on to others, which leads to the next benefit of cooking in cast iron...

We also have a couple of cast iron chicken fryers left to us from Kathy’s grandmother that I’m in the process of restoring. According to Kathy’s mother, her father used to often clean these pans by throwing them into a fire in the back yard!
Now think about it for a second. Do you really think that your aluminum pans, your chemically-treated non-stick pans, or your electric skillet will be in use too many years from now? Is there any chance you'd be able to will them to your family members? Would you even want to?
With cast iron, it's a different story.
When done with thought and care, the preparation and eating of meals together can be very intimate and memorable occasions. In today’s busy society, too often people don’t take the time to make a meal from scratch and sit around the table together. When I make my grandmother’s cornbread (see recipe here) in her skillet, I think of all the times I sat at her table eating her wonderful foods. That skillet is forever tied to her memory. I can’t use it without thinking of her. If I had to only keep one item in my cast iron collection, I would choose that one.
One day I will pass on my cast iron to others. I hope that when they use them, they will think of me and the good times we had sitting around the dinner table.
Perhaps you have a cast iron pan or pot from a family member who has now passed on. Take that pan down, relive some memories and create some new ones.
Feel free to leave your thoughts or ask questions in the comments below, or you can contact Rick directly at rick@cookingincastiron.com.
Smothered Cooking in Cast Iron (Louisiana Cookin' - February, 2010)
I’m very pleased to announce that the current (Feb. 2010) issue of Louisiana Cookin’ contains an article I wrote, “Smothered Cooking in Cast Iron.” The article discusses the history and method of smothered cooking, and I also included five recipes written by myself, family, and friends.
Recipes included:
- Pointe Coupee Smothered Potatoes
- Uncle Larry’s Smothered Deer Steak
- Smothered Chicken and Andouille Sausage
- Hamburger Steak
- Queenie’s Smothered Steak
The article begins on p. 28 and concludes on p. 33. As you can see below, there are a number of very professional photographs of my recipes that accompany the article:

The February issue of Louisiana Cookin’ is now on sale at most major national book chains. If you’re visiting our website for the first time because you discovered us in Louisiana Cookin’, we hope you’ll come back regularly and visit us.
Feel free to leave your thoughts or ask questions in the comments below, or you can contact Rick directly at rick@cookingincastiron.com.
Don't Mess with My Tabasco

I always feel the need to defend my Tabasco habit. People who see me carrying my own personal Tabasco bottles usually assume two things: (1) I like my food really hot, and (2) I must not really be able to taste my food at all with all that Tabasco on it.
Well, these assumptions are simply unfounded. First, I really don't like my food too hot. Really. I simply use Tabasco instead of the black pepper you sprinkle on your food. You'll never see me adding both to my plate. It's about flavor--flavor with a little bit of a kick.
And, for what it's worth, I don't actually put Tabasco on everything. But see, there are some foods that simply go with Tabasco. I can't imagine eating eggs without Tabasco. Tunafish without Tabasco? Unfathomable.
As I said, I carry a bottle with me. I'm trying to eat a bit healthier these days, so Kathy and I mostly cook at home. But occasionally, when I need to grab something quick, such as a night like tonight when I'm teaching in Louisville, I usually pick up a tunafish sandwich on 9 grain honey oat bread at Subway. There are actually two Subways that I frequent. One is in Simpsonville where I live, and the other is in Louisville close to where I teach. At both of these locations, I don't even have to ask anymore. After the person behind the counter puts the tuna on the bread, he or she will reach across the counter so that I can hand over my 2 oz bottle of Tabasco. Tunafish and Tabasco were simply made for each other.
Now, I know what you're thinking. You're thinking, Why don't you just put your own Tabasco on the sandwich later when you eat it? Well, I could do that, but most of the time I'm taking the sandwich with me. The Tabasco and tuna will taste best together if the two have had a few moments by themselves, to get to know each other better.
So tonight, I'm at the Subway counter getting my tunafish sandwich. I should really get to know this fellow who's making my sandwich. He's made so many of them for me. I should ask him his name. I assume he's either the manager or the owner since he's always there. He's been making me sandwiches for at least two years. He's of Indian (as in India) descent, always very nice, and, of course, he humors my Tabasco thing. I don't have to ask anymore. He simply reaches out his hand. I give him the bottle noticing tonight that there's very little left. I'll definitely have to buy some more before I travel later this week.
As he sprinkles the Tabasco on my sandwich--I don't even have to tell him when anymore; he just knows at what point to stop--I notice a new employee leaning against the door frame that leads to the back room. She's new; I've never seen her before. A lot of these folks come and go. All except my friend behind the counter who knows how to make my sandwich. He's always there.
In hindsight, I heard what she said. But I was so taken aback when she said it, I simply had to make her repeat it.
"I beg your pardon?" I said in a tone that sounded mildly offended, or possibly even insulted. She said it again, in that same matter-of-fact, I-need-to-set-you-straight tone: "You know, it's really against health department codes for you to pass an edible substance over the counter like that."
What? I knew she really said it because I made her say it twice. Did she know who I am? Did she realize that I have an "I love Tabasco" bumper sticker on my truck's rear bumper? Didn’t she know that my Indian friend and I had been following this same ritual for almost two years?
I did not lose my cool. I did not do anything unchristian. But I looked at her and said very seriously, "Well, there are plenty of Subways in this town. If this one won't put my Tabasco on my sandwich, I can easily go to another store that will."
The manager was red-faced at this point, but trying to keep his cool. He looked at me with an apologetic countenance. "It's okay," he said.
As I left, I saw him take her into the back room. There were other customers eating after all. Nevertheless, as I walked out the door, I couldn't make out anything being said, but I could clearly hear his raised voice--something I'd never, ever heard from this gentle, normally quiet man. The bumper sticker on my truck caught my eye as I rounded my way to the driver side door. Yeah, it's love.
Don't mess with my Tabasco.
Feel free to leave your thoughts or ask questions in the comments below, or you can contact Rick directly at rick@cookingincastiron.com.
Interview with Joanna Pruess, Author of The Griswold & Wagner Cast Iron Cookbook
Joanna Pruess
The Griswold & Wagner Cast Iron Cookbook
2009 Skyhorse Publishing
I first heard of Joanna Pruess' new book, The Griswold and Wagner Cast Iron Cookbook
This volume is a really nice, high quality hardbound book with a stitched spine. It lays flat on the counter which makes using it while cooking very easy. You can't begin to imagine the quality of the pictures until you see them. They were taken right in Pruess' home by a professional photographer as she prepared the recipes.
Pruess herself is no stranger to the culinary world. She has written for The New York Times Sunday Magazine, The Washington Post, Food Arts, Saveur, Food & Wine and more. Her most recent cookbooks before her cast iron book include Mod Mex: Cooking Vibrant Fiesta Flavors at Home and Seduced by Bacon: Recipes & Lore about America's Favorite Indulgence. Pruess even has her own Wikipedia entry! She is married to restaurant critic, Bob Lape.
Having been so impressed with her new cast iron cookbook (only released November 1), I contacted Joanna Pruess asking her for an interview and she graciously agreed. I've inserted page numbers from the book to go with a number of the recipes that are mentioned below.
I’ve noticed that most cast iron “aficionados” have a story to tell about how they came around to embracing cooking in cast iron. For some, it was after going through multiple sets of chemically treated non-stick pans and then remembering that pan that mom or grandma used that never wore out. What about you? How long have you been cooking in cast iron?
My earliest memories are from my mom making her potted chicken [p. 102]. The smell of that dish, like no other, takes me back to my childhood and happy, simpler times. I also remember a dish that was among my favorites as I was growing up--tamale pie [pp. 145-147]--and then updated it with ingredients that probably weren't available back then, like chipotle chiles. My mom's mac and cheese [pp. 33-34] was totally beloved in our house. With at least seven at the dinner table, it was a boisterous, fun event.
The topping is what made it special. I added the panko and while her Parmesan was most probably from a green cylinder, I use Parmigiano-Reggiano. I love touching old recipes from our families and friends. It connects us to our past. What I said last night is what Adele Davis said: "We are what we eat; I like to add that we are also the product of those we have eaten with...our relatives and friends who color and infuse our life with special meaning."
You’ve been writing about food and cooking for a while. You’ve previously written other cookbooks. Why did you think it was the right time to write a cast iron cookbook?
Because we all need comfort--both emotionally and economically. Many of these recipes are inexpensive and easy to make and appeal to a huge audience of all ages. Also, cast iron endures: it's good for our environment and even good for our bodies since the small amount of iron that is leached from the pots prevents anemia. Did you ever hear of anyone in our grandparents' generation with iron-poor blood? Nope. Also, some of the chicest chefs in town are now using cast-iron pots.
You're exactly right. I've said that I believe we're going through a bit of a cast iron "renaissance."
Also, the way home entertaining has evolved, the area of the kitchen and dining room has morphed into a great room. Cast-iron goes directly from the stove to the table.
I agree about that renaissance. We are discovering that after all those fancy pans have been used and/or abused and thus discarded, cast-iron is still viable. It can almost always be reconditioned. On that score, I was so fortunate to have the advice of David G. Smith, a.k.a. "The Pan Man," who is a real expert on caring for the pans.
Who, would you say, is this book for?
So far I am amazed at how many people tell me they adore reading it...the history, the old stories and that they LOVE the food. There seems to be a connection to both young and old; sophisticated and novice cooks. Everyone finds something they can take away because the food is really tasty, yet it doesn't take intellectualizing to appreciate it.
Your book is simply gorgeous. It can just as easily sit on a coffee table as it could sit on a kitchen counter. One of the elements of your book that really rings true to me are the pans you’ve used in the pictures. When I see, for instance, the picture of the skillet in the oven on p. 88, I notice the pan has carbonization building up on the inside. In other words, this is a pan that gets regular use and has been used for quite a while. I can relate to it because it looks like my primary cast iron skillet. This is really in contrast to some cast iron books I’ve seen in which a marketing department simply went and bought pre-seasoned pans from the store and prepared a few of the recipes in them. I can even think of one cast iron book that actually has food sitting in a gun-metal gray unseasoned cast iron Dutch oven. So, what about the pans in your book? Were they all yours? Were some of them borrowed?
I did cook in much-used pans. The food was all cooked and shot in our kitchen as it actually was prepared. I have worked as a food stylist and know that many food pictures are staged. I wanted people to see how it really looks. I have used that 13-inch skillet for at least 25 years, since my kids were young and I made pancakes. A griddle would have been great but that one was also my "showcase" pot for big parties. People always "ooh" and "ah" about it. Besides, the pictures tempt people to try dishes.
The fun thing was borrowing a chef-friend's pile of small cast-iron skillets for mini cornbreads and those to-die-for chocolate chunk-pecan cookies topped with ice cream and salted caramel sauce.
You're making me hungry! How extensive is your own collection of cast iron? What’s your oldest piece of cast iron? What’s your favorite or most used pan?
I have that 13-inch skillet (25 years old), a Dutch oven and a 10-inch skillet. Unfortunately, my mom's Dutch oven got lost. To me the lesson is "less is more." You can do almost all your cooking, with the exception of microwaving, in a few pots, including induction cooking. I also think that people should look for cast-iron at yard sales. There are lots of pots waiting to be adopted. And as you said they almost always come with a story or favorite recipe.
Agreed. And "adopting" pots is a great way to recycle and give life to these old pans. Which leads me to my next question: Why Griswold and Wagnerware? Why not simply write a general book about cooking in cast iron?
[Griswold and Wagner] were the first companies that produced and sold cast-iron cookware exclusively. Also, through Dave Smith and Joel Schiff (also a fine dealer in old cast-iron ware), I had access to their old ads and printed information which is in the public domain, but both had great collections which gives the book a lot of its charm and old fashion feeling.
When we previously corresponded, you suggested that I try out “Mom’s Mac and Cheese with Bacon” [pp. 33-34] and the “Clam-and-Corn Fritters” [pp. 52-53]. These were both exceptional recipes. What are some of the other “star” recipes in the book?
That's like asking which is your favorite child...to a mother who has a bunch. Anyway, I love the zucchini pancakes [pp. 67-68], Steak 'n' Stout [p. 138], Salted Caramel [p. 202] on anything, Raspberry-Blackberry Crisp [p. 187] is to die for, Shrimp Posole (a real surprise and from Native Americans) [p. 180], My Favorite Chile [pp. 142-143], Tamale Pie [pp. 145-147], Oven Roasted Chicken [pp. 89-90]...and the shockingly better asparagus [pp. 74-75] cooked in cast-iron. I could continue to effuse since I adore this food.
Some of these recipes, such as the previously mentioned “Mom’s Mac and Cheese” have been adapted by you. I believe you mentioned that your mom didn’t include panko bread crumbs, and my mom would have never paid for Parmigiano-Reggiono cheese as I so happily did. What other kinds of adaptations did you make to “classic” recipes?
Good question. In my mom's Potted Chicken, she used Lawry's salt, introduced in 1938 by the eponymous restaurant in Los Angeles. It had MSG in it, so I discovered a deconstructed version of the seasoning [p. 103] online and combined it with her other seasonings, and it took me immediately back to her kitchen. I took out artificial ingredients wherever I could.
Rick, I want to add that cooking and serving in cast-iron seems to be a great "ice breaker" at a meal. It's so homey and unthreateningthat people just relax and get into the food.
I agree. We love to have folks over and cook for them in cast iron. We have a baker's rack in the kitchen where some of it is displayed, and it's always great for conversation. Usually someone's grandmother and her cooking comes up in the conversation. We've also converted many of our friends to cooking in cast iron.
Another thing I think that is important is the connections between Old and New World. For example, I love my short ribs but also a Korean friend gave me her version [pp. 136-137] that spins a thread between cultures. Same can be said of paella [pp. 176-177] and jambalaya [pp. 178-179].
I agree about converting people. Last night I made 30 new converts.
Where do you live?
I live in Simpsonville, Kentucky, not too far from Louisville, but I was born and grew up in Louisiana.
Wow, that's far away but prime cast-iron country for fried chicken (read the funny story about the cornflake crusted version [p. 98]) and all those good desserts.
I appreciate your taking the time this morning for this interview. I’m certain the readers of Cooking in Cast Iron will enjoy learning more about you as well as using this wonderful cookbook. Is there anything else you’d like to mention about the book in closing?
I think we've done it...except it's not only a way to connect with the past, it's a great legacy to pass on to future generations (hopefully with this book included).
In addition to lots of great history and recipes, Joanna Pruess also includes instructions for care and restoration of cast iron pans in her book. It would make a great addition to your own collection of cookbooks and as a gift for your special someone this Christmas.
Feel free to leave your thoughts or ask questions in the comments below, or you can contact Rick directly at rick@cookingincastiron.com. Joanna Pruess has agreed to answer any questions readers might leave in the comments as she has opportunity.
General Tso's Chicken

These days there's a Chinese restaurant in every strip mall. Most are buffets. Mostly mediocre food. It seems as if there's so much potential, but so very little followthrough in these kinds of places. Really, it's difficult to find even a really good Asian restaurant anymore because of all the competitions of the strip mall variety. I've seen very good Chinese restaurants close their doors because of the cheap Chinese buffet two blocks down cutting into their business.
But there are a few good ones still out there. And I tend to judge any ethnic restaurant of any kind by whether or not I'm the minority nationality when I'm there. If I find that I'm one of the few Westerners in the place, I can generally always expect the food to be not just authentic, but very good as well.
However, as is the case nearly every time I eat out--even at good restaurants--I inevitably think to myself, I could make this taste even better if I made it myself at home.
So shortly after I got my second wok (reviewed last May), I decided I wanted a Chinese cookbook. Well, not exactly a fully authentic mainland Chinese cookbook, but more of the kind that represented the American Chinese cuisine I was used to. Yes, I know, I know, General Tso's Chicken was probably never made in China. But, hey, let me start with what I'm familiar and then I'll later branch out.
In my quest for an American Chinese cookbook, I settled on The Everything Chinese Cookbook
General Tso's Chicken
Cast Iron Required:
- Wok (I used a Lodge cast iron wok
. Any carbon steel wok will work just as well. You could even substitute a Dutch oven, remember what A. D. Livingston
said: "If you've got a Dutch oven, you don't need no damn wok!"
- 1 pound dark chicken meat
- 2 tablespoon soy sauce
- 3 teaspoons Chinese rice wine or dry sherry, divided
- 1/2 teaspoon white pepper
- 1 tablespoon corn starch
- 4 tablespoons dark soy sauce
- 2 tablespoons sugar
- 1/2 teaspoon seasame oil
- 6 dried chiles
- 4-6 cups oil for deep frying
- 1 large clove garlic, minced
- 1 teaspoon minced ginger
- 2 green onions, thinly sliced
Directions
Cut the chicken into cubes. Mix in the soy sauce, 2 teaspoons of the rice wine, white pepper, and the cornstarch, adding the cornstarch last. Marinate the chicken for 30 minutes.
Combined the dark soy sauce, sugar, sesame oil and 1 teaspoon rice wine. Set aside. Cut the red chiles in half and remove the seeds. Chop and set aside.
Heat the oil to 350° F. When the oil is hot, add the chicken cubes and deep-fry until they are lightly browned. Remove from the wok and drain on paper towels.

Raise the temperature of the wok to 400° F. Deep-fry the chicken a second time briefly, until the chicken turns a golden brown. Remove from the wok and drain on paper towels.
Drain the wok, leaving 2 tablespoons of oil for stir-frying. When the oil is hot, add the garlic, ginger, and green onions. Stir fry briefly until aromatic.

Add the chiles and cook for 1 minute. Add the sauce in the middle of the wok and bring it to a boil. Add the chicken and mix through.


Suggestions for improvement:
- Double the recipe. Kathy and I have been paying close attention to portion size lately. The recipe says that this makes four servings. This is what we were hoping for since we usually like to take leftovers for lunch the next day. This was realistically only two portions--even when trying to keep portions withing a reasonable range. The entire result would equal the average General Tso's ordered from a menu at most Chinese restaurants. I used four cups of oil for the frying. I believe this would be enough even if two pounds of chicken were cooked.
- Use honey instead of sugar. I mean, why not? Honey would give a better, more natural flavor.
- Watch your peppers. The recipe calls for six dried chile peppers. Our dish was very hot, and I was very careful to remove the seeds. Therefore, I'd scale it down to at least four peppers, and maybe even two for mixed company.
- The dish is a bit salty. Mixing it with a bit of rice helps. Most of the salt comes from the soy sauce, so compare sodium levels if you have access to different kinds of soy sauce.
Feel free to leave your thoughts or ask questions in the comments below, or you can contact Rick directly at rick@cookingincastiron.com.
Review: Cook Me Somethin' Mister! New Orleans Style Jambalaya Mix

The directions suggest 1 1/2 lbs. of skinless chicken thighs and 1 1/2 lbs. of smoked sausage. Of course, if you're already familiar with jambalaya, you know that just about any meat or seafood combination can be substituted. In my case, I grilled some chicken breasts, which I chopped up afterwards, and substituted andouille sausage for the smoked sausage. The recipe also calls for "a five quart pot." I used a Lodge Logic 5 qt. Dutch oven
The directions, which are printed on the packaging, were simple enough. After the meat was cooked in the oil, I added water and brought the pot to a boil. While boiling, I added the mix and boiled this for 3 to 5 minutes. Then, it was just a matter of waiting. The stove's heat has to be completely turned off and the food sat covered in the dutch oven for 30 minutes. Although the next-to-last step suggests testing the rice to make certain it's done, it was for us. The only remaining step was number 8 requiring the cook to "Shout, 'Yum, yum, come get you some!'" which I did, bringing both Kathy and Bessie Mae (our hound dog) running. Unfortunately, Bessie Mae did not get any.
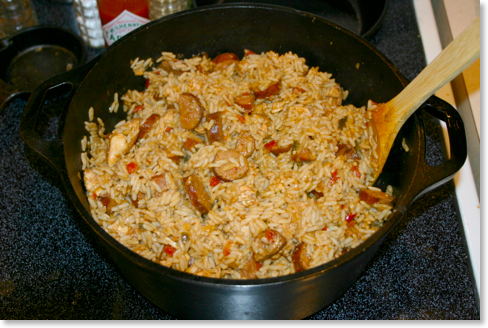
I've eaten and made many jambalaya recipes in my life and I have to admit that this one was right up there with the best of them. It's easy to be skeptical of a mix, but this one had the flavors right. Maybe part of it was Chef Paul Prudhomme's Magic Seasoning blended in--a fact advertized right on the label. I think another reason why it was so good is that unlike many mixes I've tried in the past, this particular one used vegetables large enough to see, bringing out a much richer flavor.
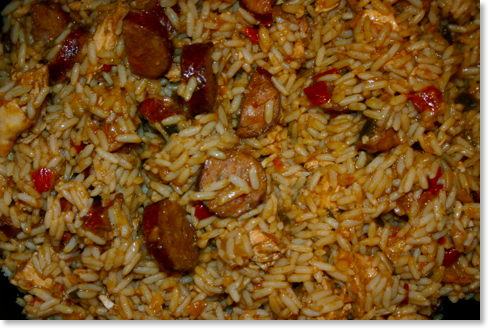
As you can see in the close up above, red and green bell peppers are easily identifiable as well as onions. The flavor was rich, and full, and my guess is that the average person would not even consider that it might be a mix.
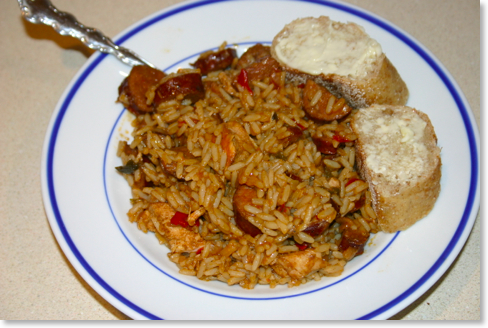
The package advertizes that once chicken and sausage is added, there's enough food for 8-10 full meals. I would say, that and maybe more. We also gave some to some friends of ours without telling them it was from a mix so as to get an unbiased reaction. They thought it was wonderful and were actually surprised when I told them it was a mix.
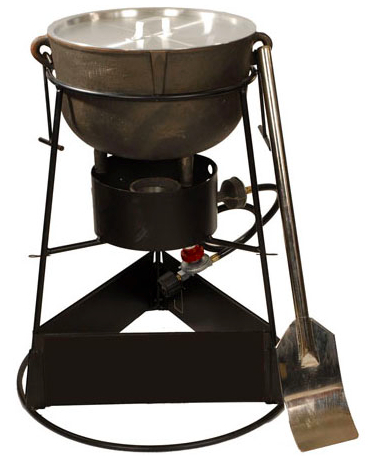
But there's even greater reason to use this mix in a whole different context. Cook Me Somethin' Mister also sells a 4 gallon or 8 gallon cast iron jambalaya pot and burner combo. The four gallon combo requires 10 lbs. of meat total and 4 bags of the jambalaya mix. The ten gallon setup uses 10 bags of the mix and 20 lbs. of meat. These will produce 32 and 80 servings respectively!
What would you use this for? Well for tailgating parties, campouts, and any other event where you might need to feed a whole lot of people. I think this would be great fun to cook this huge cast iron pot of jambalaya for a large group of friends.
The good news is that you don't have to fix multiple gallons of Cook Me Somethin' Mister New Orleans Style Jambalaya to try it. You can start with one bag which will be enough for your family, maybe a couple of friends, and who knows--you might even end up with leftovers!
Feel free to leave your thoughts or ask questions in the comments below, or you can contact Rick directly at rick@cookingincastiron.com.
Regarding the New FTC Guidelines Regarding Endorsements, Testimonials

I want to let the readers here know that I think it's a great idea. You should know up front when you're reading a review of a product, book, movie, or whatever, whether or not the reviewer has been compensated in some way--even if it's stimply a free sample or copy of the product under review.
We've only offerered a handful of these kinds of reviews in this site's short tenure, but we've stated up front, every time, when a product was given to us. Last year, a chicken fryer was given to us for review, and after we reviewed it, we gave it away. We've reviewed a couple of food products (one coming up in a day or two), and we always acknowledge this as well.
My belief is that you want to know what we think of particular products or you wouldn't come here. I don't want you to think that we're biased just because someone sends it to us, though. If it's a food product, obviously we can’t send that back. But if it's something more tangible such as a piece of cast iron, we will always either give it away or send it back afterwards. If that policy were to ever change, I'd let you know. But with the roughly 30 or so pieces of cast iron that I cook with, not one of them has been given to me by a commercial company.
I also promise that if there's ever a product that we really don't like, we'll simply tell it like it is. If it's a product that's been sent to us.... well, this is simply the risk that companies take with reviews. But we'll always be very polite, of course!
We're also open to suggestions. If you'd like to see a particular product reviewed, let us know. If it's within our budget or if we can get a review copy/sample/demo from the manufacturer, we'll be glad to give it a shot.
And if you're a company that would like to see a product reviewed here, contact me at the email address below, and we'll consider it.
Feel free to leave your thoughts or ask questions in the comments below, or you can contact Rick directly at rick@cookingincastiron.com.
Macaroni & Cheese in Cast Iron: All You Can Eat

I know I'm biased, but I really do believe that macaroni and cheese tastes better in cast iron. Most folks probably don't think about cooking dishes like this in cast iron, opting for a regular casserole dish or even a non-cast iron stove top pan if making the generic box mix from Kraft. If that's you, I have three suggestions: (1) Regardless of your recipe--whether from scratch or a mix--try it in cast iron. You will be very pleased with the texture that macaroni and cheese gets from cast iron. (2) I've yet to come across a really difficult macaroni and cheese recipes. I strongly urge you to make it from scratch rather than making it from a box. Having said that though, I realize that some folks simply like boxed macaroni and cheese. Therefore (3), if you insist on making macaroni and cheese from a box, at least try it out in cast iron--probably just a skillet--especially if you have a lid for your skillet. You will be very surprised with the results.
To test my assertion that macaroni and cheese always tastes better in cast iron, we made a number of different recipes--four to be exact--all cooked in cast iron. Some of these recipes are better than others. Since Kathy and I cooked them (and ate them!) together, she's going to add her comments. Unless you see Kathy's name next to the paragraph, assume that it's me--Rick--writing.
Supposedly, macaroni and cheese goes back to early 19th century when Thomas Jefferson served it to guests. Whether that's true or not, I don't know. What I do know is that it doesn't begin to popularly appear in cookbooks until the middle of the 20th century. Therefore in an attempt to get back to the foundations of macaroni and cheese, we started with a recipe from the original 1953 Better Homes and Garden New Cook Book
Macaroni and Cheese
1953 Better Homes and Garden New Cook Book

The recipe also calls for 2 cups of American cheese. I can't find American cheese in grocery stores these days; I can only find cheddar. I assume that I could find a block of American cheese at a specialty store, but I simply used cheddar in this recipe instead.
We used a Lodge two-quart serving pot with iron cover
Of the four macaroni and cheese dishes we made, this was the most basic and my least favorite. It's not that it was bad. Not at all. It just simply didn't stand out compared to the other three.
Kathy's comments: Although this macaroni and cheese dish was good (I can't imagine one that isn't!), it was not my favorite. The minced onions just didn't belong. I love onions, but somehow they didn't fit with this recipe. If we made this dish again, I'd try sauteed sweet onions.
Cast Iron Required:
- Two quart cast iron serving pot
- 1 6 oz. package 7-minute macaroni, (or 1 7 oz. package elbow macaroni)
- 2 cups American cheese, cubed
- 1 1/4 cups milk
- 2 tablespoons minced onion
- 1/2 teaspoon salt
- pepper
- paprika
Cook 7-minute macaroni according to directions on package. Mix with cheese, milk, onion, and salt and pepper; turn into creased two quart cast iron pot (original: 1 1/2 quart casserole). Sprinkle with paprika.
Bake mixture in moderate oven [350°] 45 minutes. Makes 6 servings.

Macaroni 'n' Cheese
1953 Better Homes and Garden New Cook Book

I used the same Lodge cast iron serving pot for this recipe as the previous one. I really liked the flavor of this version of macaroni and cheese. The onions and cream of mushroom soup give it a good flavor. It's also the only macaroni and cheese we made that was layered. It looks really nice in the serving pot once it's dipped into, and it looks simply sinful on the plate. I liked this recipe quite a bit and would like to try it again. Kathy did not care for it as much.
Kathy's comments: Of the four macaroni and cheese recipes we tried, this was my least favorite. Once again, I didn't think the onions quite belonged. Since this was the second recipe to have them as an ingredient, I assume I am simply biased against onions in my mac and cheese. I also didn't like the cream of mushroom soup. It turned this side dish into more of a casserole in its taste and feel. Don't get me wrong, I still ate plenty of it, though!
Cast Iron Required:
- Two quart serving pot
- 1 6 oz. package 7-minute macaroni
- 1 10 1/2 or 11 oz. can condensed cream of mushroom soup
- 1/2 cup milk
- 1 teaspoon grated onions
- 1/2 teaspoon salt
- dash pepper
- 1/2 pound American cheese, cubed
Cook macaroni in boiling, salted water; drain and rinse.
Combine the mushroom soup, milk, onion, and seasonings.
Alternate layers of macaroni, soup, and cheese in creased 2 quart cast iron pot (original: 1 1/2-quart baking dish). Bake in moderate oven [350°] about 45 minutes. Makes 6 servings.

Kathy's Jalapeño Macaroni and Cheese
Kathy Mansfield

Kathy's Comments: This recipe is adapted from my Mom’s delicious homemade macaroni and cheese. I live over 700 miles away from Mom, but every time I go home (usually summer and Christmas), she makes sure to have macaroni and cheese ready for me. I don’t often make the dish myself, but when I do I usually add the jalapenos for a little kick! In earlier years I used Jalapeño Cheese Whiz, but I haven’t been able to find it in my local grocery store the past few years. This dish is definitely a crowd pleaser and can even be served as a main pasta dish rather than as a side.
Cast Iron Required:
- Roaster/Casserole pan
- 1 16 oz. box macaroni noodles
- 1 8 oz. Velveeta cheese, cubed (8 oz. jar of Cheez Whiz may be substituted)
- 1-2 fresh jalapeños, chopped fine
- 1/2 stick butter
- 1 cup milk
- 2 cups grated cheddar cheese, in all
- Salt and pepper to taste
- Paprika
Cook macaroni noodles according to package directions. Butter a 9x12 cast iron baking dish. Mix noodles with Velveeta cheese, chopped jalapeños, butter, milk, and one cup of the cheddar cheese. Add salt and pepper to taste. Spread evenly in baking dish. Cover with remaining cheddar cheese. Sprinkle with paprika. Bake at 350 degrees for approximately 20 minutes, or until bubbly.
Macaroni & Cheese Supreme
Cajun Men Cook

In making it this time, we used a cup and a half of white cheddar and a cup of regular yellow cheddar. The original recipe didn't call for it, but I added a little bit of grated yellow cheddar on top for some color. With flour, butter, onions and heavy cream, this makes for one delicious recipe.
I'd also recommend having a little bit of bread handy. This recipe might leave a little bit of butter at the bottom of the bowl. A nice piece of bread can make good use of this!
Kathy's comments: Okay, okay. I know I said I was biased against onions in my mac and cheese, but in THIS recipe they are awesome! I know it's because they are sautéed first. Out of the four recipes, this was my favorite. In the past I haven't been as fond of this particular dish, but this time we used cooking wine rather than regular wine. I always thought in year's past that the wine taste was just a bit strong, but with the cooking wine, the flavor was perfect. I was sad to eat the last spoonful.
Cast Iron Required
- 10 1/4" skillet
- 1 8 oz. elbow macaroni
- 3 tablespoons butter
- 1/4 cup onion, chopped
- 3 tablespoons flour
- 1/2 teaspoon salt
- 1/8 teaspoon black pepper
- 1 cup heavy cream
- 1/2 cup white wine, (or vermouth)
- 2 1/2 cups extra sharp grated cheddar cheese
Directions:
Boil macaroni in boiling salted water according to directions. Drain. Set aside. Meanwhile melt butter, add onion, sauté till tender. Stir in flour, salt and pepper.

Slowly add cream and wine. Cook over low heat, stirring till thickened. Stir cheese until melted.

Add macaroni.

Pour into casserole dish and place in a 350° oven. Should be thoroughly heated and cheese sauce browned and bubbly—about 20 minutes.

What about you? What's your experience with macaroni and cheese in cast iron? Leave your thoughts, and if you want, your favorite recipes in the comments.
Feel free to leave your thoughts or ask questions in the comments below, or you can contact Rick directly at rick@cookingincastiron.com or Kathy at kathy@cookingincastiron.com.
Crawfish Fettuccine in Cast Iron

This coincided with the fact that we still had a pound and a half of crawfish in the freezer from our trip to Louisiana in July. Kathy had been suggesting for a while that we use them in an étouffée, but I wanted to make something with them we'd never made before. I'd been thinking about a crawfish fettuccine which I'd had in restaurants, but had never made myself. However, I'd made other fettuccine dishes before, so I figured it was time to combine the best of both worlds. Kathy and I have a hundred or so cookbooks, so I pulled out about a half dozen different books containing crawfish fettuccine recipes as well as two recipes on the internet and let her decide. I told her she could pick the recipe and I'd make the dish.
Kathy picked the recipe, "Brenda's Crawfish Fettuccine" from the Real Cajun Recipes website. This recipe looked extremely easy to prepare (and it was), and the ingredient list was fairly simple. She had also been skeptical about bell peppers in fettuccine which I thought was fine, but I wanted to make something both of us would eat. This was the only recipe that did not call for them. Plus, most of the crawfish fettuccine recipes I looked at simply had the topping placed over the cooked fettuccine. I liked this one because it baked together in one dish.
However, I noticed one problem right away. The recipe called for 12 oz. of fettuccine, but the average box sold at the grocer is 16 oz. However, I love that the Real Cajun Recipe website has a built in ability to scale recipes. The original recipes said that it would make 6-8 servings, but what I discovered was that as is, it was actually set to six servings. By increasing it to eight servings, the amount of fettuccine increased to 16 oz. However, the rest of the ingredients were at odd measurements such as one and 3/10 onions. So what you see below is my adaptation as to how I made it. All I can tell you is that it was quite good, and Kathy said it was the best meal she'd ever had (however she says things like that all the time!).
CRAWFISH FETTUCCINE
Cast Iron Required:
- 5 qt. Dutch Oven
- 1.5 medium chopped onions, (or 1 and a 1/2)
- 8 tbsp stick butter (1 stick + 3 tbsp)
- 2 chopped celery ribs
- 5 tbsp flour, heaping
- 1.5 lbs. crawfish
- 2 & ¼ cups Half and Half
- 1 8 oz. Velveeta cheese
- 16 ounces fettuccine
- salt, black and red pepper to taste or Cajun seasoning

Sauté onions and celery in butter in the bottom of a 5 quart cast iron Dutch oven.

Add flour gradually, then half and half and cheese heat until the cheese is melted.

Add crawfish and simmer for approximately 25 minutes, stirring constantly so that mixture does not begin to scorch. Season to taste. Cook fettuccine according to package directions, and add the boiled fettuccine into this mixture. Place in the oven and bake for 20 minutes at 350 degrees.

Above: the final product out of the oven. It was bubbling and quite hot.

On the plate with a nice piece of homemade bread.
A handful of notes: I used one medium-sized onion and one small onion. You could just as easily use two medium onions, and I don't believe it would overpower the recipe. Technically, after converting up to the greater number of portions, you would need more than 8 oz. of Velveeta as called for in the original recipe. It's very difficult to find the 8 oz. package these days, and we had purchased the 16 oz size. We'd already used half of that in another recipe a few days earlier, so the 8 oz. was all we had left. I don't feel that this took away from the recipe at all because of all the cream in it as well. Also, we used a pound and a half of crawfish because that's what we had. Contrary to the look of the plate above, there was almost a crawfish in every bite. If you don't want that much, scale it back to a pound.
Finally, the original recipe called for everything to be combined in a 2 quart casserole dish. I can't imagine that this would be large enough. With only slightly increasing the ingredients, we filled a five quart dutch oven with only about an inch and a half to spare as you can see in the pictures. The advantage of using one dutch oven is that everything can be cooked in the same pot (with the exception of boiling the pasta).
Feel free to leave your thoughts or ask questions in the comments below, or you can contact Rick directly at rick@cookingincastiron.com.
Tip: Baking in Cast Iron is for More than Cornbread

The other night a couple told Kathy and me, “We need to have you come over and show us how to do more with our skillet than just make corn bread.”
Oh where to even begin?
But many folks who use their cast iron regularly, don’t realize how versatile something like a skillet is for ordinary baking.
When it comes to baking and cast iron, I’m convinced of two things:
- Food tastes better in cast iron. If you’ve ever had macaroni and cheese baked in a cast iron skillet or a casserole cooked in a dutch oven instead of a traditional casserole pan of aluminum or glass, you know what I mean. Cast iron provides a texture to the outer layer of food that just can’t be duplicated in other pans.
- Baking is VERY “healthy” for your cast iron’s seasoning. If you only use your skillet on the stove top, you will probably have to re-season it (at least the inside bottom of the pan) more often than you will if you’re using it inside the oven, too.
Feel free to leave your thoughts or ask questions in the comments below, or you can contact Rick directly at rick@cookingincastiron.com.
Mamme's Chicken & Dressing (modified for cast iron!)

A Yes, I know that the holidays are now behind us, so who wants to talk about dressing? Well, I’m going to post this recipe anyway because it’s something that some of you might want to experiment with during the year before the holidays are upon us again. Frankly, I don’t know why more people don’t use cast iron to make their Thanksgiving or Christmas dressing. Think about that wonderful crust that comes from cornbread in a cast iron skillet. What’s the main ingredient in dressing--cornbread! It’s time to rethink how we make this dish.

I don’t know a whole lot about the history of this recipe, but I find it unusual that it already has chicken in it--similar to something you might find in a cafeteria. My grandmother was a single mother of three children working on a teacher’s salary in Arkansas during the mid-twentieth century, so this may have been a recipe designed to fit with a modest budget. However, this makes it a great dish to take to a potluck this time of year because it is complete in itself. My memories of my grandmother making this particular recipe are starting to fade--she died in 1988--so I was very glad to get a copy of it from a family member. It is still being made annually by my relatives as a way to keep my grandmother’s memory alive.
My grandmother’s name was Maureen Mansfield, but we simply called her “Mamme.” Even though she’s been gone over two decades, I can still remember her voice and the distinct way she would tilt her head upwards and close her eyes when she laughed. The picture of her that I have in this post would probably date from the early 1960s I would guess.
I was very excited to get my grandmother’s recipe, so that I, too, could continue the tradition of making her dressing. But as mentioned earlier, I wanted to try it in cast iron. To me it only seems to make sense that a dressing recipe would be made in cast iron; yet I don’t know anyone who does it. This is probably because most people don’t have cast iron casserole pans (which I highly recommend). I used a Lodge enameled roaster pan
Technically, you can make the gravy for this dressing in any regular pan and transfer it to a gravy boat on the table. However, I used a Lodge 2 qt. serving pot
So you’ve got plenty of time to experiment. Try making this dressing recipe or any other in cast iron in the coming months so you can perfect your method by Thanksgiving. Then, don’t be surprised if you like it cooked in cast iron so much that you don’t ever go back to those old pans again!
Mamme’s Chicken and Dressing
(modified for cast iron)
Cast iron required:
- Cast Iron Skillet
- Any cast iron roaster/casserole pan or try two skillets or one large (9 quarts or larger) dutch oven.
- 6 chicken breasts, chopped into bite-size pieces
- 1.25 quarts broth from cooking chicken, separated
- 2 tbsp butter
- 1 skillet cornbread, (not sweet)
- 10 saltine crackers, crumbled
- 4 celery stalks
- 1 onion
- 4 slices toasted bread, crumbled
- 2 can cream of chicken soup
- 4 eggs, beaten
- black pepper, to taste
- 2 tsp poultry season, (or to taste)
- 2 boiled eggs, chopped
After cooking chicken breasts, debone if necessary, and chop up into bite-size pieces.
Sauté onions and celery in a cast iron skillet.
Mix together crumbled cornbread, sautéed celery and onions, 10 crumbled crackers, 4 crumbled slices of toasted bread.
Add 1 can of cream of mushrooms soup, beaten eggs, black pepper, poultry seasoning, chicken broth, and cooked chicken pieces. Chill overnight.
Set out in the morning and let sit for a couple of hours to get some of the chill off. Pour into a casserole pan (preferably cast iron or a large cast iron dutch oven). Cook at 350° uncovered for approximately 45 minutes or until the center is set and dressing is slightly brown.
To make the gravy, combine 1 can of cream of chicken soup with 1 cup of chicken broth, chopped eggs and 1 to 2 tbsp of cooked dressing. Heat in over a medium heat. I use a Lodge 2 quart serving pot, but a sauce pan works, too. When thoroughly heated, it's ready. If you have the Lodge cast iron pot, serve it in that. Otherwise, pour into your favorite gravy boat.

Feel free to leave your thoughts or ask questions in the comments below, or you can contact Rick directly at rick@cookingincastiron.com.
Queenie's Cornbread

Most cornbread recipes are fairly easy to make whether using a pre-made mix or making it from scratch. For folks just learning to cook, cornbread is something that can easily build confidence. It's difficult to mess up cornbread unless you burn it! And even overcooked cornbread can still taste good with a little butter or in a bowl of peas or beans as long as it's not too burnt.
While cornbread mixes are okay (I can't knock them too much because they usually taste pretty good), it doesn't take much more effort to prepare cornbread from scratch. I really encourage folks to find a cornbread recipe they like and use that instead of the mixes. And as mentioned a couple of posts back, any baking in the oven, including cornbread, is very "healthy" for your cast iron skillet's seasoning.
This particular recipe belonged to my grandmother on my mother's side, Queenie Pennington. We simply called her "Mammaw." The ingredients are fairly common, and she may have simply adapted a standard recipe over time. I have the advantage of not just having her cornbread recipe, but also having the skillet she used to make cornbread in on nearly a daily basis. I recall many wonderful meals at her house accompanied by her cornbread. When cooked in her pan, there is a particular texture to the outer crust which I cannot duplicate in any other cast iron I've tried. It's not that this particular texture of the crust is superior to other cornbreads; rather, its taste and feel in my mouth so strongly reminds me of my grandmother who died last year at the age of 88. This cornbread doesn't just taste good to me; it also has sentimental value. Every time I cook Mammaw's cornbread, it's like having her back again.
Greg from the "Black Iron Dude" blog recently identified my grandmother's skillet as a product of the Birmingham Stove and Range (BS&R) company. Her skillet is at least 70-years-old and may be older than that.

Above is a picture of my grandmother, Queenie Pennington, and me--probably
taken around 1970. Doesn't she look like someone who would be named Queenie?
Doesn't she look like someone you'd call Mammaw?
And doesn't she look like someone who could just naturally make good cornbread?
My grandmother's recipe below uses a combination of both cornmeal and flour, creating a light and moist cornbread. A basic trick for making any cornbread is to allow your cast iron pan to warm up in the oven while it preheats. I grease the skillet and place it in the oven before I set the temperature. That way it heats up with the oven itself. Then when pouring the batter, the hot iron immediately starts cooking the outer layer making a perfect crust.
If you try this recipe, you'll notice that it creates a very moist batter. Don't worry that's it's too moist. After twenty minutes in a 450° oven, it will be absolutely perfect. Of course some folks like their cornbread a bit more well done, and if that's you, simply keep it in the oven a little while longer.
In the recipe below, note the occasional footnotes. I'll add the notes to the bottom of the post.
QUEENIE'S CORNBREAD
Cast Iron Required:
- 10.25" cast iron skillet1
- 1 1/2 cups white corn meal2
- 1 cup flour
- 1 tsp salt
- 1 tsp baking soda3
- 3 level tsp baking powder
- 2 cups buttermilk
- 1 egg
- 2 tbsp bacon drippings4
Sift dry ingredients into a mixing bowl. Add buttermilk and egg, stirring until combined. Grease skillet with shortening and preheat in 450 oven. Melt drippings and add to batter. Pour batter into very hot skillet and bake at 450 for 20 minutes.

My grandmother's cornbread in the same pan she used for well over six decades.

Notice how nicely the cornbread came out of the pan without sticking. This is testimony to a pan seasoned over decades of use. My mom says that when she was growing up, many times she saw my grandmother flip the cornbread straight from the pan into the air before putting it on a plate. I haven't been brave enough to try this yet.

And finally, the pièce de résistance--my grandmother's cornbread in a bowl of purple hull peas!
I have one more fond memory of my grandmother's cornbread. After we'd finished the wonderful meal she cooked, one or two slices of cornbread always remained. My grandfather would take a slice and submerge it in a glass of ice cold milk. This was essentially his dessert, or his way to cap off a good meal. When I was a boy, I tended to do everything he did when I was around him, so I'd take the other remaining piece of cornbread and ask for a glass of milk myself. I never liked this as much as he did, so I rarely finished the entire glass. But when I was young, a slice of cornbread in a glass of milk seemed like pretty exotic fare.
Notes
1If you prefer cornbread muffins, this recipe yields 12-14 muffins in a standard-sized muffin pan. I haven't experimented yet to see how many cornsticks the recipe will make. I'll determine this and update the post at a later date.
2 My mother wrote down the essential recipe when she was 18 and had just married. In the original draft, as dictated by my grandmother, it specifically says "Aunt Jemima" white cornmeal. We sometimes have difficulty finding this brand, so we often use something different. I haven't discovered any discernible difference in taste or quality.
3 The original recipe as dictated by my grandmother called for "3 pinches; 4 if buttermilk is old" in regard to the baking soda.
4 Kathy and I normally cook with olive oil and don't keep a whole lot of bacon grease around. However, I always use bacon grease for my grandmother's cornbread. I've learned through experience that cooking four slices of bacon yields about one tablespoon of grease. Cooked bacon keeps for a while, so fry up eight or so slices to use in sandwiches throughout the week.
Feel free to leave your thoughts or ask questions in the comments below, or you can contact Rick directly at rick@cookingincastiron.com.
Camp Chef's Web Presence Continues to Grow
Earlier in the summer, we ran a post titled "Lodge Manufacturing Expands Web Presence with YouTube and Twitter." Well, in the interest of equal time, we're including this post to make mention of all the ways Camp Chef communicates with its customers via the Internet.

If you haven't discovered it already, you must check out the Camp Chef website. There you will find listings of all the Camp Chef products--not only cast iron, but also lots of other grills, cooking appliances and accessories--as well as informative articles about subjects such as camping, hunting, tailgating, and more. There's so much to explore, you will want to spend a good bit of time on the Camp Chef site.
Videos
One of the newest additions to the Camp Chef is their extensive collection of videos. Videos are categorized by subject: Products, Media/Press, Recipes, How to, and Frequently Asked questions. There's lots to explore here as well, and lots of examples for using cast iron in creative ways. If you find something you really like, Camp Chef offers embed codes so that you can add the video to your own website. Camp Chef videos can also be found on YouTube.
Blog
Camp Chef has a great blog. I know because I'm a regular reader. Not only do they highlight new products, they also feature mouth-watering recipes that make me want to immediately get out my dutch oven and start a campfire. You'll also find descriptions of Camp Chef events and the occasional cartoon.
As of this writing, Camp Chef has over 800 fans on it's FaceBook page. This is a great place to hold conversations with other Camp Chef fans as well as post your own photos using Camp Chef products.
If you use Twitter, be sure to follow Camp Chef! On average, Camp Chef "tweets" once every day or two. Sometimes it's something overheard around the campfire, sometimes it's announcements about events or new products. They are also very good about responding back if you have a question for them.

You may or may not be aware that Camp Chef has a sister company, Santé. The company is described on the website as a "manufacturer of high-end cooking equipment for the ultimate home kitchen." In many ways, you can think of Camp Chef for use at the campground and Santé for use in the kitchen; however, the reality is that there's a lot of overlap as anyone who regularly uses cast iron knows. I own a couple of Santé's cast iron loaf pans and have found them to be well made and perfect for making homemade bread.
There's also a Santé blog you'll want to check out for lots of recipes and more.
So check out Camp Chef as well as Santé. They've got a great selection of cast iron cookware and a whole lot more.
Feel free to leave your thoughts or ask questions in the comments below, or you can contact Rick directly at rick@cookingincastiron.com.
Skillet Banana Cake

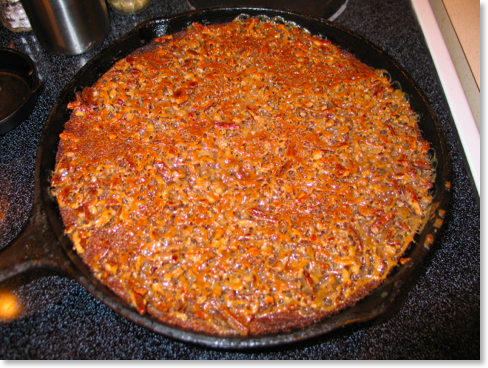
Many afternoons were spent down at the Jarrell’s house, playing with Brian (he had more games on his Atari 2600 than I did) or in the small thicket of woods between our houses where he and I built a three-level tree house (It sounds much more elaborate than the actual reality). Another advantage to hanging around the Jarrell house rested in the fact that Sharon Jarrell (pictured above) was a fantastic cook. In fact, she was well known for her cooking, often catering events and publishing her own cookbooks.
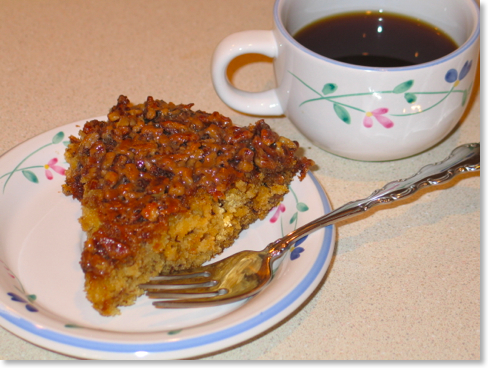
Recently, I was going through some recipes that we simply categorize as “family recipes.” When you live next to someone long enough, they count as family. This particular recipe of Sharon’s caught my eye because it specifically called for an “old iron skillet.” I had never made the recipe and couldn’t even remember if I’d ever had it before. Kathy and I have made it twice in the last month or so, and I can only tell you that it is incredible. It tastes wonderful hot out of the oven or cold out of the refrigerator.
Sadly, Sharon Jarrell is no longer physically with us, but she left behind a rich cooking legacy, and I remember her whenever I make any of her recipes such as the one below.
CAST IRON REQUIRED:
- an “old” 10.25” cast iron skillet (if yours is not old, a new cast iron skillet will work just fine).
- a second, smaller skillet (or sauce pan)
CAKE INGREDIENTS
- 1 1/4 cup sugar
- 1 1/2 cup flour
- 1 teaspoon soda
- 4 tablespoons buttermilk
- 2 eggs
- 1 stick butter
- 1/2 teaspoon salt
- 1 teaspoon vanilla
- 1 cup mashed banana
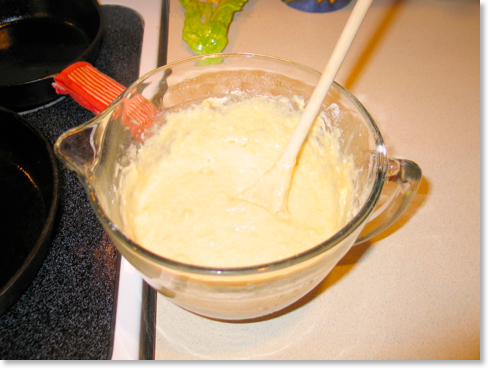
Mix all ingredients together and pour into old iron skillet. Bake at 350º for about 30 minutes.
While the cake is baking, get the topping ready.
TOPPING
- 1 cup pecans - (slightly toasted)
- 5 tablespoons brown sugar
- 3 tablespoons butter
- 3 tablespoons cream or evaporated milk
- 1 teaspoon vanilla
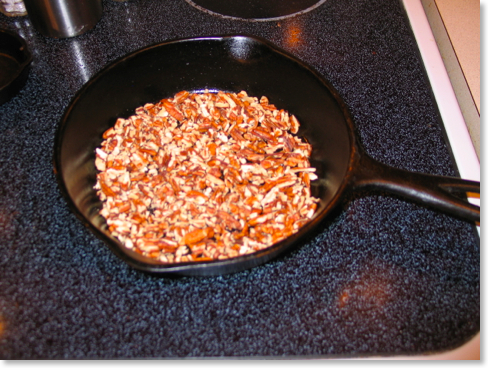
Bring all topping ingredients to a boil.
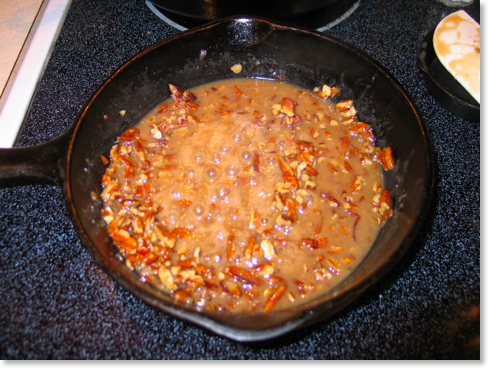
Pour over cake when it comes out of the oven. Return to oven and broil to bubbling. Watch to keep from burning.
Enjoy!![]() MacGourmet users, click image to download recipe (or simply drag image to your MacGourmet recipe box).
MacGourmet users, click image to download recipe (or simply drag image to your MacGourmet recipe box).
Feel free to leave your thoughts or ask questions in the comments below, or you can contact Rick directly at rick@cookingincastiron.com.
![]()
Can I Use Cast Iron on a Glass Top Range?

I often have people email me asking if it’s okay to use cast iron with glass top ranges. Some range manufacturers include warnings against using cast iron with their products. And the RangeKleen fryer we reviewed last year had a warning against its use on a glass surface. Of course, we ignored that, and I’ll tell you why below.
What’s the big deal about cast iron and glass (or even ceramic) surfaces? Well, glass can get scratched. We live in such an over-protective culture that we often throw the baby out with the bath water when it comes when it comes to erring on the side of judgment. For instance, many schools have gotten rid of playground equipment because some children might get hurt on it. I got hurt on playground equipment when I was a kid, but I promise you, I’d rather have had it than to not have it. Ladder companies tell us not to use that top step as a step because some people have been reckless enough to do it and have gotten hurt. I wonder how long before you can’t buy a ladder. And just try finding a diving board for a backyard pool these days. You can find one, but it’s getting difficult.
Anyway, companies that make glass top ranges don’t want you to call them up complaining about how easily their surfaces get scratched, so they simply tell you not to put anything heavy on it-- especially cast iron! By the way, the heaviness of cast iron could also cause your glass top range to break if you dropped a pan, so this is another concern with the company.
Now, I don’t want you to call me up complaining about your scratched or broken range top either, but I can tell you that IF (this is a big if) you are careful, you can use a glass top range or stovetop with no problems. In fact, if you notice in most of my pictures, such as the one above, Kathy and I have a glass range right now. In reality, I much prefer a gas range, but this is just where we live right now and we’ve made do.
I can tell you that we use cast iron all the time on our glass top range. Cast iron works great on a glass top range. In fact because a glass range heats evenly and cast iron heats evenly, it’s a pretty good match. I would even guess that today, gas ranges are probably in the minority for most kitchens even though most of us who really “get into” cooking prefer them.
If you have a glass top range, let me offer a few suggestions for keeping it unscratched (and unbroken!) and in tip-top shape.
- Keep you range top CLEAN. Usually what scratches your range top is some kind of abrasive substance between the surface and your pan. Also, make certain that your cleaner is specifically designed for the range you have. Usually the manufacturer recommends specific cleaners. If yours doesn’t, check on the label of the product you are buying. Glass range cleaners can usually be found at appliance stores, home improvement stores, discount stores and more.
- By the same token, keep the bottom of your pan clean. If you’ve got gunk building up on the bottom of that pan, know that it can damage a smooth surface range.
- Don’t slide cast iron around on the surface. Sliding any pan around--cast iron or otherwise--is going to eventually leave marks on the surface of your range. Pick it straight UP. Which, of course, leads to...
- Set cast iron down gently onto your smooth-top cooking surface. If you’ve ever been burned by a pan coming out of a 400° oven, you know how easy it is to simply drop it on the floor or your range top. Use both hands and use pot holders that are thick enough. I’ve learned the hard way that those little mitts that fit over the the skillet handle is not enough protection for a pan that has been in a hot oven for any period of time. I also feel that the short handle on newer skillets across from the regular handle is genius. This really helps the cook use both hands when handling a hot skillet.
Feel free to leave your thoughts or ask questions in the comments below, or you can contact Rick directly at rick@cookingincastiron.com.
Coming to Terms with Pre-Seasoned Cast Iron
If you have many discussions with true cast iron aficionados, you may find a wide variety of opinions on a number of subjects: the “proper” method for seasoning cast iron, soap or no soap when cleaning, old cast iron vs. new cast iron, and much more. But if you really want to start an argument in some circles, bring up the subject of manufacturer pre-seasoning. For the uninitiated, there was once a day when all “new” cast iron came gun metal gray. Nowadays, that’s almost impossible to find because nearly all new cast iron comes already nice and black since it’s been “pre-seasoned” from the manufacturer, usually with a sprayed on vegetable oil concoction.
And for the extremely uninitiated, when someone refers to seasoning in cast iron circles, it’s a reference to the black coating that builds up overtime on a cast iron pan. This coating, or patina, is the product of the carbonization of oils and creates a natural non-stick surface on a pan. This is why a cast iron skillet or other pan actually improves with age as opposed to chemically treated non-stick pans which generally get worse as they get older.
I just ran an informal inventory of our cast iron. We have roughly 29 cast iron cooking items, or 30 if you count my Sportsmans Grill. In that count, I’m not including lids (even though I bought at least one separately) or novelty items such as the little ashtray-size skillet that we use for a spoon rest. With a couple of exceptions, all of our cast iron items are pans we actually use on a fairly regular basis. In other words, we don’t get into collecting cast iron for the sake of collecting. I’m not knocking that, mind you; nor am I saying I’d never do that. We simply don’t have the room for that right now.
Now of the 29 or 30 cast iron items we have, 16 came pre-seasoned from either Lodge or Santé. But that wasn’t always the way it was. My first piece of cast iron was a Lodge 10.25” skillet given to me in the mid-nineties by my mother. it came completely unseasoned, so I had to season it myself. I can’t remember what kind of oil I used on that first attempt, but I do recall that it was a disaster. Through trial and error, I eventually got it right. As many of you can no doubt relate, the more I used that cast iron skillet, the more I wanted to use cast iron for just about all my cooking. My second cast iron item was obvious. I needed a dutch oven to cook my gumbo. Somehow, I just instinctively knew gumbo would taste better in cast iron--and I was right!
I requested a dutch oven for Christmas and I received TWO that were exactly the same with one exception. One was pre-seasoned and one was not. As pre-seasoned cast iron really just came into vogue in the early part of this decade, many companies at the time offered both pre-seasoned and bare items side-by-side in the same stores. Seeing pre-seasoning as a bit of a novelty, and remembering my initial experience with my skillet, I opted to keep the pre-seasoned dutch oven and sell the bare cast iron dutch oven. I later regretted this decision.
What’s the big deal with pre-seasoning? Well, it tends to eventually come off the pan. Take for example, the lid pictured below of my Lodge 2 qt. Serving Pot
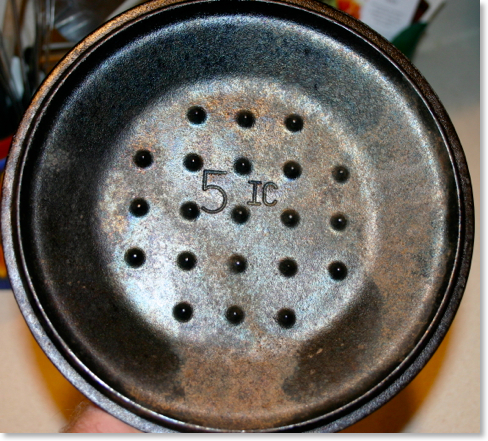
You can see how faded the pre-seasoning has become. Believe it or not, that was after only two uses! I’ve re-seasoned it myself since, and it’s doing fine. I’d also point out that in my experience, a pre-seasoned pan doesn’t normally lose its seasoning quite so quickly. But this is typical of what often happens eventually to a pre-seasoned cast iron pan. And if it doesn’t fade, the pre-seasoning chips off. Of course, pre-seasoning is not dangerous to someone’s system as a chemical non-stick surface like Teflon might be. In fact, the pre-seasoning treatment that Lodge uses is even certified Kosher!
Nevertheless, when pre-seasoning began to fade or chip in the past, I used to get very frustrated. I really felt (and still do) that I can season a pan better myself. But try finding a major cast iron brand that still offers pans that aren’t pre-seasoned. They’re near non-existant. Now my frustration is fairly mild compared to some. Since Lodge has decided to no longer sell non-pre-seasoned pans, I’ve actually heard some folks say they’ll never buy Lodge again. In my opinion, this is extreme, although no one can argue with the cooking ability of a 100-year-old Griswold skillet or other older pan which becomes the only other alternative to pre-seasoned pans.
Regardless, my frustration with pre-seasoning has become a thing of the past. Yes, I’d rather season a pan myself, but I’ve come to terms with pre-seasoning, and my acceptance has come for a number of reasons.
1. Pre-seasoned pans aren’t really a new innovation.
Not too long ago, I was looking through Smith & Wafford’s The Book of Wagner & Griswold (the red book) when something very interesting caught my eye in this photograph below on p. 9.
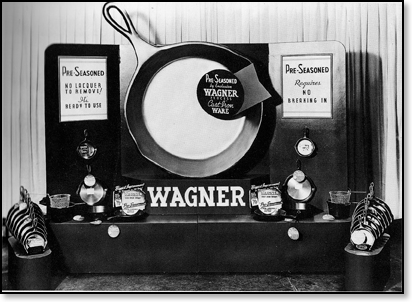
There’s no date on the picture, but I would guess that it was from the 1940s or 50s, if not earlier. Notice the advertising on these Wagnerware pans. The main selling point for these pans is that they were pre-seasoned. Thus, I find it hard to throw stones at any cast iron company that pre-seasons today--whether that’s Lodge, Camp Chef/Santé, RangeKleen or any other company--because evidently, the idea’s been around for quite a while. Who knows if your prized decades-old skillet that you obtained second hand wasn’t pre-seasoned to begin with!
2. All regularly used cast iron will (probably) have to be re-seasoned.
Let me offer a lesson I learned from my grandmother’s skillet. When my grandmother moved into an assisted living home a few years back, I inherited her 10.25” skillet pictured below.
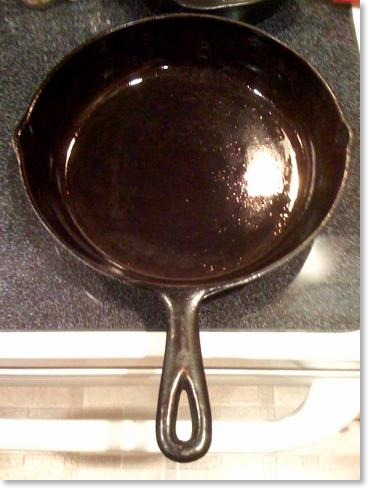
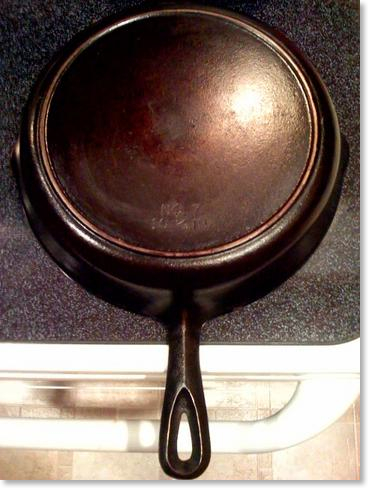
I don’t know exactly how old this skillet is. My grandfather tells me she had it their entire married life. They were married 71 years before she died in 2008. If it was brand new when they got married, it’s well over 70 years old. But if it was a hand-me-down, it’s much older. I have no idea what brand it is. It only says “NO. 7" and "10 1/4 IN.” on the back. It’s my prized possession of all my cast iron simply because it was my grandmother’s. If you told me I could only keep one piece of my cast iron, I would pick this one--even though I use it second to my Lodge skillet that was my first cast iron pan. Furthermore, when I received this skillet, it honestly had the nicest seasoning I’ve ever seen on any piece of cast iron. The inside bottom is as smooth as glass. I wish I could sit down and talk to my grandmother about this pan, but of course, I can’t now.
Now, you need to know that I take really good care of my cast iron. I never wash with soap. I treat every pan with a fresh coat of olive oil to prepare it for its next use. I never stack pans, and I’m very careful to avoid metal utensils when cooking in them.
However, one day I noticed that my grandmother’s pan was starting to lose its seasoning on the inside bottom. I was shocked! How could this happen? Then guilt set in. I felt embarrassed, ashamed. Knowing that there is no heartache in heaven, I at least found some relief in the fact that she didn’t know.
The reality is, though, that more than likely she had to re-season her pan every now and then. Granted, she and I used her pan differently. She probably didn’t cook overly acidic foods in her pan like chicken marsala (which uses red wine), and I don’t remember her cooking spaghetti sauce all that often in her skillet. Further, while I primarily use olive oil in my pan and occasionally bacon grease; my grandmother primarily used bacon grease, and if she wasn’t using that, she was probably using Crisco!
She also used her pan multiple times a day back and forth between the stovetop and the oven. In the morning, bacon and eggs were cooked for the whole family. She might use it at lunch as well. Sometime in the afternoon, the pan was used for cornbread, cooked in the oven. Then, in the evenings, it was used again for the family dinner. This constant use, multiple times a day, going back and forth between the stovetop and her oven, was incredibly “healthy” for this skillet. And frankly, none of my pans gets this kind of constant use. But I am firmly convinced that this back and forth between the stovetop and oven was a key for keeping such a quality seasoning on the pan.
Since I had to partially re-season my grandmother’s pan (I only concentrated on the inside bottom, using lard for seasoning), I’ve stopped using it for overly acidic foods. But the main point here is that even the best of pans--pre-seasoned or not--have to be re-seasoned every now and then.
3. Pre-seasoning gives folks new to cast iron a head start.
That statement isn’t original to me, and I wish I could find the source. But I remember reading those words one day on someone’s website, and it all just kind of fell into place for me. For many “modern” cooks, bare cast iron can be a real challenge. I know it was for me, but I fell in love with cast iron and was determined to persevere. But with people’s busy schedules, it’s easier for many folks to simply grab a chemically treated non-stick pan, especially if a cast iron pan is going to necessitate a lot of preparation beforehand. I’ve said it before, but I’m firmly convinced that whether one likes pre-seasoning or not, its mainstream use today has been a major factor in the cast iron renaissance that we have witnessed as home cooks (and many professional chefs and celebrity chefs) have realized grandma was right to begin with and have returned to using cast iron.
Further, when I was in South Pittsburg, Tennessee, touring the Lodge Manufacturing plant last summer, I asked a Lodge employee why they no longer offered bare cast iron. Her answer was rather interesting. She said that for a while they offered both. But she said that when put side-by-side on store shelves, the pre-seasoned iron outsold the bare iron by a wide margin. And when their pre-seasoned cast iron sold out, they found that customers would buy other brands that were pre-seasoned over their bare cast iron offerings. That was enough of an answer to make sense to me. Lodge is the last American foundry in existence. I don’t exclusively use their cookware, but I use a lot of it, and I’d hate to ever lose them the same way that other great cast iron companies disappeared over the last few decades.
Two Suggestion for Cast Iron Manufacturers
- Most cast iron cookware comes with a brief set of instructions for care and maintenance. I feel it would be a good idea to also include instructions for re-seasoning cast iron in case the pre-seasoning fades or flakes. Lodge includes re-seasoning instructions on their website, but it might not be a bad idea to include them with the product as well. I shudder to think of perfectly good pans getting thrown out, but I bet it happens.
- Since Lodge is the only cast iron company with a US factory, they might be the only ones who could actually implement this second suggestion. I think it would be a great idea if those of us who prefer bare cast iron were allowed to special order it and have a pan taken from the line before it has the pre-seasoning process applied. Although it seems a bit backwards when I really think about it, I would actually be willing to pay a few dollars more to be able to place a special order and receive my cast iron bare. Then I could season it myself.
Feel free to leave your thoughts or ask questions in the comments below, or you can contact Rick directly at rick@cookingincastiron.com.
Cajun Smoked Sausage and Andouille in Brown Gravy

One of the items I buy when in Louisiana is real andouille sausage. I’ll use it in my recipes until I run out. Then I have to use that Yankee brand (Johnsonville) until we can make another run south.
Coming back stocked up on good sausage made me sort through my old copies of Louisiana Cookin’ Magazine for the recipe that is in this post. This particular recipe is adapted from a 19th century dish. I’m pretty sure I have the older one and have made it before, but for the moment, I cannot put my finger on it. I’ve made this recipe or some form of it about three times now. Slow-cooking the sausage in a dutch oven results in very tender meat that falls apart in your mouth. Kathy is not normally much for sausage as a main ingredient; it’s fine for her in something like red beans and rice. But this is a recipe that she really enjoys, as do I.
Often with recipes that use andouille or smoked sausage, a skillet is used in combination with the main pot. One convenient aspect of this recipe is that everything can be prepared in one pot. For this recipe, I used Savoie’s andouille and Down Home medium smoked sausage (if you know of a link for the latter, contact me).
The original recipe said that this made four servings. Okay, I know some people are prone to overeating, but a person would have to have really large bowls to spread this out over only four servings. Eight or more servings is more realistic--even for hearty eaters.
CAST IRON REQUIRED:
- Dutch Oven (Lodge 5 quart pictured here)
INGREDIENTS:
- 1 pound andouille
- 6 cups water, in all
- 1 pound Cajun smoked pork sausage
- 2 tablespoons vegetable oil
- 3 cups cooked long grain white rice
- salt, to taste
- black pepper, to taste
- cayenne pepper, to taste
DIRECTIONS:
Boil the andouille in 3 cups of the water until tender, about 30 minutes. Drain, discard the water and set the andouille aside to cool.
Cut the Cajun smoked pork sausage into bite-sized pieces. Quarter the andouille lengthwise and cut into bite-sized pieces.
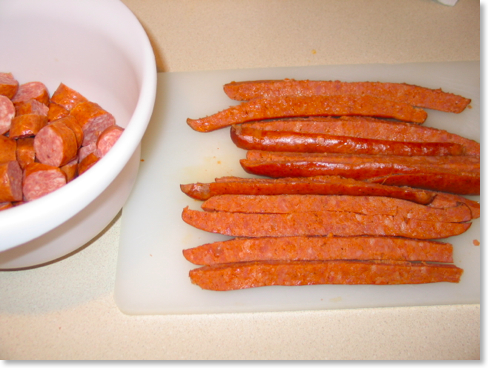
Heat the oil in a cast iron pot over a medium high heat. Add the sausage and andouille and sauté until well-browned, about 5 to 7 minutes.
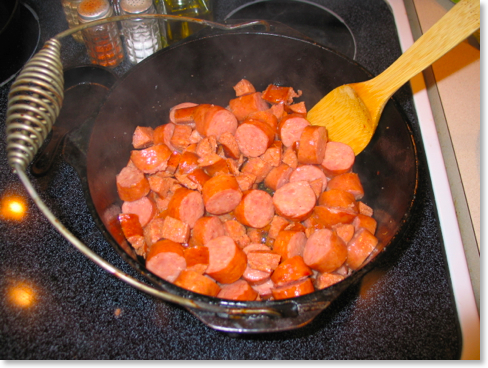
Add one cup of water to deglaze the bottom of the pot, scraping it with a wooden spoon. Add the remaining water and bring to a boil.
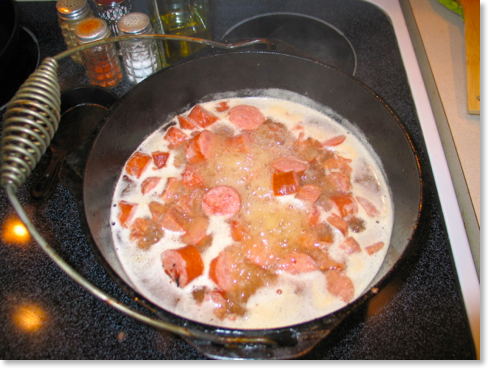
Cover, reduce the heat to low, and simmer, stirring occasionally, for 2 1/2 hours.
After two hours, taste and adjust with salt, black pepper and cayenne, if necessary (it wasn’t necessary this time due to the spice already in the sausages).
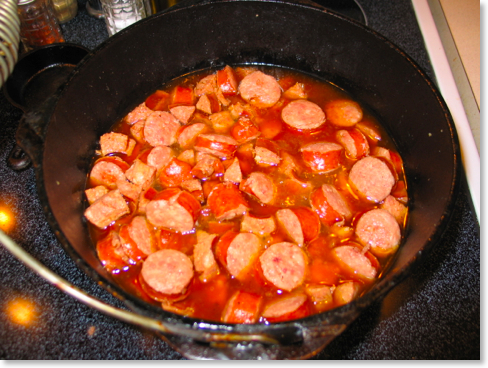
Serve over white rice.
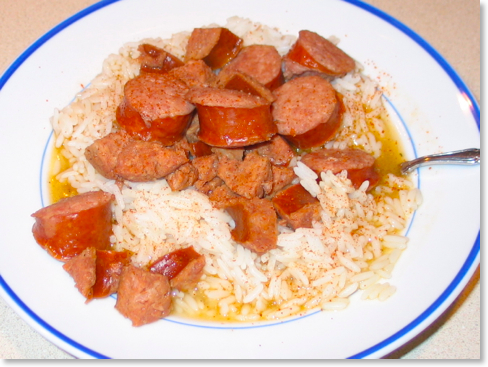
As I mentioned, I’ve made different variations of this recipe before. One of these other methods required slow cooking the dish in the oven instead of on the stovetop. I’ve had results with thicker gravy, although there’s nothing to complain about the outcome shown above. The gravy in this case was more like a broth, but a very rich one made from the juices of the sausages mixed with the water. Adding less water would result in a thicker gravy if desired.
This recipe originally appeared in the February, 2002, issue of Louisiana Cookin’ Magazine.
Feel free to leave your thoughts or ask questions in the comments below, or you can contact Rick directly at rick@cookingincastiron.com.
My Favorite Gumbo

Although I grew up in Louisiana, I never had gumbo until I was about eleven or twelve years old because I was from north Louisiana. Back then the cultures of north and south Louisiana were as different as daylight and dark. When most people outside Louisiana think of the state, they are thinking of south Louisiana. But where I grew up, we probably had more in common with folks from Mississippi, Arkansas, and east Texas.
The cultures of north and south Louisiana are still distinct, but the Cajun and Creole cultures of the south are winning out, especially when it comes to food. It’s nothing today to see signs for crawfish for sale all around north Louisiana and little restaurants with names like “Cajun Cafe.” And who can complain since it’s really good stuff?

This past week while we visited family in Louisiana, it was hot! One day it reached 100° and gumbo was the furthest thing from our mind. Then however it rained the last three or four days we were there. With the cooler temperatures upon us, I grabbed my Lodge 5 quart dutch oven
I’ve made many different gumbo recipes over the years, but this one is my all time favorite. There are all kinds of gumbos, and in spite of the fact that gumbo is an African word for okra, the recipe below does not contain any (although you could easily add it). This is also a Cajun (brown) gumbo as opposed to a Creole (red, tomato-based) gumbo. It is not a seafood gumbo, but rather, is called Chicken Sausage Filé Gumbo. Filé is a powder made from ground sassafras leaves. It is added to a serving of gumbo once it is already in the bowl to thicken it.
This particular recipe comes from a book given to me by my mother-in-law fifteen years ago. It’s called Cajun Men Cook
If you’ve ever come over to my house for gumbo, this is probably the recipe I used. One thing you’ll note if you pick up Cajun Men Cook is that many parts of what you see below is different from what’s in the book. Over the years, I’ve tweaked and adapted the recipe quite a bit.
Chicken Sausage Filé Gumbo
Cast Iron Required
- 7 Quart Dutch
- Cast Iron Skillet
- 1 cup medium brown roux
- 1 three lb. chicken, boiled in 2 1/2 quarts of water and deboned (save stock for gumbo).
- 1 lb. andouille or smoked sausage, cut in 1/2 inch slices
- 2 tablespoons water
- 2 tablespoons oil
- 2 celery ribs, chopped
- 4 cloves garlic, minced
- 2 medium onions, chopped
- 1/4 cup fresh parsley, chopped
- 1/4 cup green onions, minced
- 1 teaspoon Worcestershire sauce
- 3 tablespoons browning sauce
- 2 teaspoons corn starch
- salt and red pepper to taste
- filé powder.
Note: I always make this gumbo in a cast iron. A seven quart Dutch oven is probably the best choice, although it will fit in the five quart, leaving only about one inch of room at the top. If you make a double batch, I recommend a nine quart Dutch oven. The Dutch oven in these pictures is a five quart because that’s all that I had with me at the time.
“First, you make a roux.” This recipe like many Cajun dishes assume that you know how to make a roux already. A roux is really nothing more than flour that’s been allowed to cook so long that it begins to turn brown. Technically, it’s burning, but you want to be careful that it doesn’t burn too much. You’re also going to burn your wooden spoon, so just get over that. I don’t recommend using anything plastic to make a roux, but a silicone spatula would be up to it.

There are numerous methods for making a roux, but what I did for this recipe was to combine 3/4 cup of flour with 3/4 cup Wesson oil to equal roughly one cup of finished roux. Note that I did not measure out an exact cup afterwards. The roux cooked in the pot never left it. Also, if you’re planning for guests and making a roux from scratch add about 45 minutes to an hour to your cooking time. And keep stirring no matter what!
After the roux reaches a nice chocolate brown color, slowly stir in two quarts of broth.
Add vegetables except green onions, parsley, and garlic and bring to a boil for 5 minutes. You may want to use a whisk to blend roux with stock. Stir until everything is well blended, and be careful that the roux does not sink to the bottom of the pot and stick.

In a cast iron skillet, fry andouille sausage with water and oil, allowing water to evaporate before frying begins [skip this step if the sausage is already cooked].

When sausage is light brown put into stock pot. Put chopped up chicken, garlic, and seasonings except pepper. Cover and simmer for one hour.

I tend to come back to the pot and stir the gumbo every 15 minutes or so. The gumbo should be simmering, but not at a full boil. As always, make sure that nothing is sticking at the bottom of the pot.

Add pepper, parsley, green onions, Worcestershire sauce, browning sauce and resalt as needed to adjust taste. Dissolve corn starch in 2 tablespoons of water; stir into gumbo. Simmer 5 minutes and then turn off fire and keep covered. If necessary, skim off excess oil.


Serve over fluffy long grain rice as a soup (I prefer Zatarrain’s Enriched Long Grain Parboiled Rice for any gumbo or étouffée because when prepared correctly, it will not get mushy).
Add filé to each individual serving of gumbo. Do not cook in gumbo as it will make soup stringy.
You’ll have to pardon the fact that the bowls said “seafood gumbo.” They seemed appropriate nonetheless, and our chicken sausage filé gumbo was just as good anyway.

Alternate Method #1: To save time, I have bought rotisserie chickens and use the meat pulled from them. Then you can use two quarts of store-bought chicken stock.
Alternate Method #2: To not only save time, but also for a healthier version of this gumbo, I’ve made it with Tony Chachere’s Instant Roux Mix on a number of occasions. It won’t be as good as a real roux, but it’s still good and a smart option if you’re craving gumbo but watching your weight. If you decide to go this route, stir together one cup of the roux mix and two cups of the chicken stock. Slowly add the mixture to the rest of the stock and vegetables after they have already started boiling. This will require a good bit of stirring with a whisk to make sure the instant roux fully blends with the broth.
Feel free to leave your thoughts or ask questions in the comments below, or you can contact Rick directly at rick@cookingincastiron.com.
Experimenting with Scallops

The vast majority of my experience with scallops comes from eating them, not cooking them. I’ve also noticed that scallops are often the foil on Gordan Ramsay’s Hell’s Kitchen as he screams at the competing chefs that the scallops are either raw (undercooked) or like rubber (overcooked) before hurling them against the wall. So, in light of the fact that I do like scallops quite a bit, and because I took Ramsay’s rants on television as a bit of a personal challenge, I decided I would see if I could cook them myself.
I scanned the internet for methods as well as asking for input on the Castiron Cookware discussion list. I wanted to start out as basic as possible knowing that I can later expand from there. After reading as much as I thought was necessary, I settled on a very basic method.
First, I decided upon using a skillet a bit larger than my normal 10 1/4” that serves as my primary cast iron instrument. Having read that scallops need to have room when they cook, I chose a Lodge Pro Logic 12" skillet
The only daunting aspect to the scallops was the price. Keep in mind that we now live in Kentucky, so sea scallops are not a native resource. They have to be shipped in. Although I’ve now found a slightly less expensive source for scallops, the ones you are looking at in the picture above cost more than a dollar each!
As I mentioned, I chose a very basic method for cooking the sea scallops. I heated a couple of tablespoons of olive oil in the 12” skillet. Then I cooked the scallops about two minutes each side, lightly sprinkling them with salt and pepper. When cooked properly, the scallops will have a light golden brown color to them. The finely manicured hand in the photo above is not mine, but Kathy’s as I took the picture; but you can see the eight that have been turned and the four remaining to be turned.
On the night that I experimented with scallops, we had brave guests over for dinner who sampled them with me. I chose to make the scallops an appetizer rather than the main dish not only because of their price, but also due to the fact that I was experimenting with them. Nevertheless, they came out perfect which makes me really wonder about the competence of those competing on Hell’s Kitchen. I mean, I really cannot overemphasize how easy these were to prepare.
With the scallops, I simply provided two dishes of melted butter and garlic for dipping, one of which had a few drops of Habanero Tabasco. Everyone thought the scallops were great, even Kathy who rarely strays from steak, burgers, or catfish.
Now that I’ve successfully cooked the scallops with the most basic of methods, I can begin experimenting with new recipes. What about you? How do you prepare scallops? Do you have a favorite recipe? Please share your thoughts in the comments below.
Feel free to leave your thoughts or ask questions in the comments below, or you can contact Rick directly at rick@cookingincastiron.com.
More on the Lodge Cast Iron Grill
Last month, I posted a review on the Lodge Sportsmans Grill (LSG). Yesterday, I got an email from a reader named John. He wrote:
I recently got the Lodge grill due to my need for a grill. Your review was very handy in explaining what to expect (I ordered via Amazon). I even bought cinder blocks and tiles to create a very similar setup (see attached photo)!
Here is the picture of John’s cinder block setup and mine for comparison below it.


The LSG gets extremely hot, and it’s very important to have some kind of surface below it that cannot be damaged. If you place one of these grills on a wooden deck surface, it will definitely leave burn marks. Patio stones, cinder blocks, etc. provide good protection. Plus, it gets the grill off the ground which is easier on one’s back!
John asked a few questions in his email which are in bold below, followed by my answers.
I used it once and am trying to figure out how to clean the parts other than the grill top, which I cleaned inside. I will try the aluminum foil tip next time (I forget to line it before using). I read some guy used a shop vac.
The shop vac is ideal. Small shop vacs are available that would be perfect even if only used for the LSG (assuming you grill enough to justify the purchase). When I clean mine, though, I remove the top grill and set it aside. Usually the fire grate still has coals on it, although these are really nothing more than ash themselves. I try to carefully pick this up to include as much of the ash as possible and pour this off into a trash bag (it’s very important to make sure none of the coals are still live!). Then, I take off the draft door and the fire door and simply turn the fire bowl over, dumping out any loose ash. I also keep a little brush inside one of the cinder block holes that I use to brush out extra ash. It’s really not a big deal if there’s a coating of ash remaining on the sides. As long as the grill is not getting wet, the ash is not going to harm the inside of the fire bowl. However, ash can be very corrosive on cast iron if it gets wet. Of course, keeping any cast iron item out of a wet environment should be assumed anyway.
At the end of last summer, I gave the fire bowl a really good thorough cleaning with hot water and a scraper. Grease will build up and carbonize on the sides and in the bottom. This itself will not really hurt the grill, so I don’t worry about it during the summer months of prime grilling. At the end of this year, after two years of use, I may put the fire bowl in the oven and turn on the cleaning cycle. Afterwards, everything but the top grill can be repainted with black stovepipe paint to look as good as new.
How do you light the coals? I used a chimney starter and transferred them over when they turned gray. But I realize that probably didn't give enough time for the cast grill to get hot enough.
If you don’t use a chimney starter, the other obvious is charcoal lighter fluid. Some feel that lighter fluid can affect the taste of grilled food. This is definitely true if the lighter fluid is a cheaper brand. It may not be as true with some brands. Regardless, it’s worth the effort to experiment. Most folks like a chimney starter. When using one of these, after putting the coals on top of the fire grate, place the top grill in place and let it sit for at least ten minutes before placing anything on the grill. This should give it enough time to heat up.
Any tips on the using the draft door?
I always have the draft door slightly open to allow air to circulate underneath the coals. This allows them to stay very hot while cooking; but if the coals are too hot, I close the door to allow less oxygen to get to the coals.
This is probably completely obvious, but the product descriptions say there are 2 adjustable levels. Do they mean you flip the top grill over (so the feet are sticking up)? Or is there some other way that I didn't notice to change the height?
Yes, you’re exactly right. If the grill is turned over, it will be lower and closer to the coals. Honestly, I rarely do this because the grill gets so hot with the top grill turned up right. However, I’ve learned (the hard way) that when grilling round hot dogs, the lower setting keeps them from rolling off. However, you must use less charcoal if cooking something like hot dogs, brats, or even smoked sausages on the lower setting.
I hope that helps some. I know that John is going to enjoy his grill. I am sold on the LSG, and will never purchase any other grill unless I simply get a second one to use beside the first one!
Feel free to leave your thoughts or ask questions in the comments below, or you can contact Rick directly at rick@cookingincastiron.com.
Lodge Mfg. Expands Web Presence with YouTube & Twitter

So, if I’m going to add a new piece of cast iron cookware to what we already have, I have to justify it. That means, I have to ask if we really need it, if we really will use it. Just last week we had some guest over for dinner. I noticed one of our guests staring at the growing number of items on our baker’s rack. She turned to me and said, “I just realized--you actually use all this cast iron!” Looking at the assorted skillets, dutch ovens, cornstick pans, sizzle skillets, loaf pans, and more, I asked “What do you mean?” She said, “Well, a lot of people who collect something like this just do so to show it off, but you actually cook with all this.”
Of course I do!
What’s more, the great majority of the cast iron we own was made by Lodge Manufacturing in South Pittsburg, Tennessee. Oh, I also have a couple of Camp Chef items, and I have no idea who made my prize skillets handed down from my grandmother which are at least seventy years old if not much older. But the first skillet which was my very own was made my Lodge. In fact, the three skillets that permanently reside on our stove are the two skillets I inherited from my grandmother and my own Lodge skillet--the first cast iron I ever owned, given as a gift from my mother in the mid-nineties.
I honestly have nothing against other cast iron companies. In fact, I welcome quality cast iron in any form, regardless of its source. But Lodge has been very good to me, and I’ve been able to make food over the years that simply wouldn’t have tasted quite as good in other kinds of pans.
All that to say, I’m very pleased to notice that Lodge Manufacturing has been expanding their web presence lately. For the longest time, they’ve had a top quality website--an indispensable source for finding that right cast iron tool for a particular cooking need. My normal habit is to find it first on the Lodge site, and then I often order it from Amazon.com.
Now, Lodge has also created their own page on YouTube. Already there are videos that allow the viewer to tour the cast iron foundry (something I’ve been fortunate enough to do in person) and learn how cast iron is made. There’s a video of Johnny Nix showing off his skill with outdoor cast iron cooking. Watching Johnny Nix cook is the cast iron equivalent of seeing a high profile magician. Both have put in the time and effort to know their craft well, and it simply comes across as if it’s real magic.
Lodge has also joined in with the current Twitter craze by setting up their own Twitter account. I only allow a handful of the folks that I follow on Twitter to come directly to my iPhone and Lodge Manufacturing is one of them. Lodge has been sending out a lot of interesting tweets. Sometimes they’ve used Twitter to promote particular products or specials. Sometimes they send links to articles or internet reviews of their products. They even tweeted about my review of the Lodge Sportsman’s Grill a few days ago. Today, they posted a link about re-seasoning cast iron. I believe that Lodge has discovered that Twitter is a great way to stay in touch with their customers while allowing loyal fans to stay connected with them as well.
There are also some pages about Lodge cast iron on FaceBook, but I’m not sure if they are official or not. Perhaps someone from Lodge will let us know.
Update 9/16/09: Lodge's official Facebook page can be found at http://www.facebook.com/LodgeCastIron.
Lodge has been around since 1896, and they are still family owned. They are also the only remaining cast iron company with a foundry in the United States to my knowledge. So, I’m very impressed that a company with such traditional roots can also stay up to date with current technology in an effort to to communicate with their customers.
Feel free to leave your thoughts or ask questions in the comments below, or you can contact Rick directly at rick@cookingincastiron.com.
Confessions of a Tabasco Addict Aficionado

It’s a thin line, isn’t it?
No doubt some regular readers of this website can identify with the dilemma of distinction when it comes to cast iron. Most who are really “into” cast iron would like to think of themselves as aficionados, but deep down they know how strong the pull of “just one more piece” of the black iron can really be.
In the end, I opted for aficionado because addict has such negative connotations. An addiction to something often results in very negative results for the person directly involved and for those around him or her. I’ve never known my predilection for Tabasco to be harmful for myself or anyone around me. I don’t use enough to cause stomach ulcers. I’ve never accidentally splashed Tabasco in the eyes of the person sitting next to me at dinner. No one’s ever caught me drinking it straight from the bottle (I assure you, I’ve never done that!).
And yet, I nearly always carry it with me. Stop me any day of the week and I usually have a miniature 1/8 oz. bottle (or two) in my pocket. During winter months when I can wear a jacket, I usually carry a full 2 oz. bottle. Besides carrying it on my person and having it in plentiful supply at home, I keep a bottle in my filing cabinet at my office and during cooler months when there’s no danger of it going bad (Tabasco turns brown when it’s old or left in a hot vehicle for days), I keep a bottle stashed in my truck. In fact, my truck has its own “I Love Tabasco” sticker on the bumper. I have one bottle that always remains on my stovetop (you may have noticed it in some of the pictures on this site), and a completely separate bottle for the dinner table.
On a rare occasion away from home when I don’t have a bottle on me or if my miniature bottles are empty, I’m not beyond stopping at a supermarket or convenience store to grab a bottle before meeting a friend for lunch even knowing I have brand new, unopened bottles at home. When buying a bottle from a convenient store, I carefully open the box and hold the bottle up to the light to determine if the hue of red is just right. I’ve learned the hard way that sometimes a grocery item can sit on a convenient store shelf too long to be of quality.
Further, I’m always careful not to run out of Tabasco and keep a solid supply in stock at home. Below is a photograph taken in April of my current supply at that point. You may or may not know that Tabasco comes in six flavors. Although I prefer what is often referred to as the “original red,” every variety is represented in the picture along with Tabasco flavored soy and teriyaki sauce.

The picture above doesn’t even account for my current stock of about 50 miniatures that I have in the freezer. I keep them in the freezer because I usually buy them in large supply and I’ve noticed that the miniatures seem to expire faster than Tabasco in larger bottles.
How long have I been a Tabasco aficionado? I don’t know. That’s hard to say. That’s like asking someone when he or she started liking chocolate. I do remember as a child watching my father add Tabasco to the ketchup he ate his French fries with. I picked that habit up quick enough. Probably it was some point in the nineties that I discovered the miniature bottles and began carrying Tabasco with me regularly. But I often carried it on occasion a decade earlier. I know by college (twenty years ago), I often carried it with me--perhaps not quite obsessively as I do today. But I distinctly remember sitting around a table with some friends and one of girls said, “Rick, please put the lid on that Tabasco. It’s burning my nose!” I also remember a Texaco station (of all places!) in my hometown of Ruston, Louisiana, that offered the best biscuits and sausage gravy I could find anywhere. One day I discovered while adding black pepper to my gravy that taking a bite of the food, followed by a quick chaser of black coffee created the most unusual and exquisite sensation in my mouth. It wasn’t just taste--as good as that was--it was somatic, a physical sensation. I knew I could make my new gravy “crack” even better. The next day I came back with a bottle of Tabasco in hand. Rather than adding black pepper, I added Tabasco. Incredible! Words cannot properly describe the ecstatic sensation of Tabasco-laced biscuits and gravy with black coffee. To this day, I will only eat biscuits and gravy if Tabasco is handy.
At this point, you may be wondering a couple of things (at minimum). You might wonder why I would carry bottles with me when most restaurants carry Tabasco. Well, I’m surprised at how often some people just don’t know the difference between Tabasco and other hot sauces. Not too long ago, I was in one particular local eating establishment that serves Louisiana food, and as I looked around the tables, while I found a variety of hot sauces, there was no Tabasco to be seen. I asked the waitress, “Do you have ‘real’ Tabasco?” She looked at me dumbfounded and said, “What do you mean? All of them are real.” In her mind any hot sauce was Tabasco--no doubt a misconception that the McIlhenny Company, the makers of Tabasco, would highly object to. Some restaurants simply don’t take such things as seriously as they should. Some will opt to buy a case of whatever hot sauce their supplier sells the cheapest. And I’ve also had occasion to ask for a bottle of Tabasco in a restaurant only to be handed a bottle which although contained the Tabasco label, was filled with a noxious looking brown liquid--a telltale sign that the bottle is quite old.
Tip: if you’ve ever had your own bottle of Tabasco go brown, throw it out and buy a new bottle. I recommend that most people keep Tabasco in the refrigerator. It will definitely last longer. I don’t have this problem--even with keeping a bottle on the stove next to high temperatures. I tend to simply use it long before it would go bad.
I’m also a Tabasco purist. All those other brands simply don’t cut it for me. The McIlhenny family has been making Tabasco essentially the same way since 1868. There are only three ingredients in original red Tabasco: tabasco peppers, salt, and vinegar. There’s no “xanthan gum” (whatever that is) or food coloring added like in many other hot sauces.
While most food companies from the 19th century (such as Heinz) have been sold long ago to large corporations, Tabasco is still made by the same family. In addition to the quality of the product itself, there’s something very attractive to me about the fact that the family still runs the company, that a person can still go to Avery Island, Louisiana, to see how the sauce is produced. It’s very much like another company I admire for similar reasons: Lodge Manufacturing in South Pittsburg, Tennessee. They are the only US based cast iron foundry left, and they are still run by descendants of their founder.
You may also be wondering what my wife, Kathy, thinks of my obsession with Tabasco. A few weeks back, without her knowledge, I ordered a six-bottle Tabasco caddy--the same kind you might see in a restaurant--and put it right in the center of our dining room table before she got home.

A few years ago, before Kathy came home from work one day, I placed a lime green iMac on kitchen counter next to the bread machine. I figured it would be handy for recipes, checking email, or looking up something quickly on the internet. I created a screensaver that rotated a few hundred family pictures. I wasn’t sure what she’d think, but I was almost certain she would say, “That’s not staying in my kitchen!” However, to my surprise, when she walked in and saw it, she exclaimed, “I love it!” It’s still there to this day.
So when Kathy saw the six-bottle Tabasco caddy in the middle of our dining room table, rather than saying “That’s not staying on my dining room table!” she instead declared, “I love it!”
No, Kathy is not the Tabasco aficionado I am. While I often cook with Tabasco--something Kathy never objects to--you won’t ever see her adding an extra dash of Tabasco to her eggs on Saturday morning. In fact, the only variety of Tabasco I’ve seen her use to any significant degree is the new Tabasco Sweet & Spicy sauce. It happens to be the mildest of all the Tabasco varieties. It’s very good with Asian food or as a dipping sauce. Other than that, Kathy doesn’t use a lot of Tabasco.

Now, you may thinking “That Rick--he really likes hot food.” Really, that’s not true. I’m not a chili-head. I can’t stand to eat food that’s been spiced so much all of its flavor is lost. Believe it or not, I like the “mild” sauce at Taco Bell, simply because I prefer its flavor over the hotter varieties.
Yes, I admit that I’ve got a higher tolerance for spicy food that some. Adding Tabasco to one’s food for most of one’s life will do that. But that’s not the point. I don’t put Tabasco on everything. We made breakfast at home this past Saturday morning, and while I added Tabasco to my eggs (eggs just don’t seem right otherwise), I didn’t add them to my grits. I did, however, add cayenne pepper to my grits. What’s the difference? Well, the vinegar in Tabasco would offset the flavor of the grits, but the red pepper by itself added a little kick without overwhelming the taste.
Historically, I rarely ever add original red Tabasco to Mexican food, although I have discovered that the new Chipotle Tabasco is quite good and have added it lately. But I can’t imagine the aforementioned eggs without Tabasco. A tuna fish sandwich not flavored with Tabasco? Well, you might as well leave out the tuna as well! I find Tabasco greatly enhances any food with cream--whether clam chowder or the dressing for a Caesar salad.
Here’s the thing--Tabasco brings two qualities to food: flavor and spice. For me, I use Tabasco instead of black pepper in my food. Yes, that’s right--the same way you add pepper to your food, I simply add Tabasco. You will not see me seasoning my food first with pepper and then with Tabasco. That’s overkill. Early advertisements for Tabasco a century ago often referred to it as “liquid pepper.” That’s exactly how I use it.
There’s a scale for measuring how hot a pepper is known as Scoville units. Original Red Tabasco sauce measures only about 2500-5000 on this scale. Compare that with habanero-based sauces which can measure almost twice that (there is a habanero-flavored variety of Tabasco who indeed do like their food extremely hot). Regular Tabasco is not hot enough to hurt anyone when used properly in normal amounts. There may also be health benefits to it as seen in one recent study (scroll down to the sixth paragraph).
And here’s what’s interesting, if you read a book like Shane Bernard’s Tabasco: An Illustrated History
I like Tabasco so much that I considered creating another website devoted to Tabasco. However, keeping two websites current is enough for now. Instead of yet a third site to write for, I believe I’ll simply add the occasional Tabasco post here on Cooking in Cast Iron. After all, the subjects of Tabasco and cast iron are certainly not mutually exclusive.
For more information on the history of Tabasco I suggest the following:
• Shane Bernard’s Tabasco: An Illustrated History
• Tabasco.com: “History Tent”
Want to discuss Tabasco more? Want to share your own experiences? Feel free to leave your thoughts or ask questions in the comments below, or you can contact Rick directly at rick@cookingincastiron.com.
Review: Lodge Sportsman's Grill

Therefore, I want to revisit some of what I wrote last year on Amazon, making a few modifications and updates now that I’ve had this little cast iron wonder for a little over a year.
I've always been particular to charcoal grilling over gas. But in my adult life, I've previously been satisfied getting the cheapest charcoal grill available and using it until it fell apart. Now, however, since I have the Lodge cast iron Sportsman's Grill (from this point forward, simply LSG), I anticipate that this will be the last grill I ever own. Because it's cast iron, as long as it's well cared for, it should last a lifetime.
My wife got me this grill for an anniversary present. Having developed a passion for cooking in cast iron like many of you, I had been eyeing it for quite some time. When it arrived, it came in a box unassembled, but I had it put together within a couple of minutes. All of the pieces simply stay in place with gravity with the exception of the bottom which is screwed into the fire bowl.
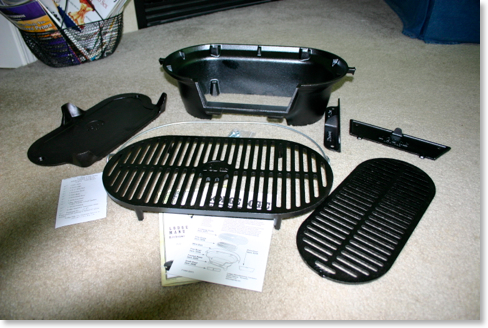
I enjoyed this grill so much last year, I believe we grilled out more last summer and fall than in the previous five or so years combined. While almost anything can be cooked to perfection on the LSG, I’ve also since discovered Omaha Steaks. We enjoyed them so much last year, we had to adjust our monthly grocery budget just to make sure we could place at least one modest order a month. I’ve known for a while that their steaks and burgers are great, but on Memorial Day earlier this week, I also discovered that Omaha Steaks also carries some of the best hot dogs and brats I’ve ever tasted. The brats were much more flavorful than many I’ve tried, and the hot dogs were three times the size of a normal frankfurter with great taste to boot.

Three brats, four burgers, and one ribeye--merely part of all that we grilled on Memorial Day this year.
Here are some things I've discovered over the last year or so cooking on my Lodge Sportsman’s Grill:
1. If you're going to use this grill a lot, you don't want to have it sitting on the ground. Or at least I don't with my sore back! So rather than finding some weatherproof pre-made table, I constructed a little grilling platform out of cinder blocks and patio stones. As you can see in the pictures, it looks much more attractive than it sounds. The materials cost me merely $17 and I guarantee you I have a more sturdy grilling area than anything I could have purchased. There’s no strong wind that’s going to blow over this grilling stand! Plus, I can temporarily stow tongs and spatulas in the open spaces of the cinder blocks.
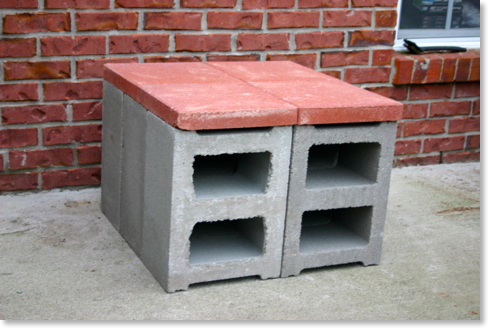
2. Because cast iron heats evenly, the entire top grill is hot. I don't have to worry about colds spots on the grill as I've had to in the past assuming that I’ve distributed the charcoal fairly evenly. I read about one user of the LSG spraying the grill with olive oil-flavored Pam, which I often do, too. And with the oil based marinade I sometimes use, food sizzles when I set it down on this grill, just like when I put it in a cast iron skillet. I never get tired of the sound of cast iron sizzle whether it comes from a skillet or the LSG.
3. Speaking of a cast iron skillet, this grill is the best of both worlds. The grates of the top grill are flat on top and the slits are fairly narrow. It really is like grilling and cooking in a skillet combined. By oiling the grill before use, I've yet to have anything stick to it. And the slots are much more narrow than grills I've used in the past, so the danger of a burger falling through into the coals are a thing of the past.
4. The LSG will cook just about anything you throw on it. I’ve cooked steaks, burgers, chicken, pork chops, brats, hot dogs and more. I really like the control I get over the food. So many times with a traditional charcoal grill, I've scorched food if I wasn't paying attention. Because this is made of cast iron and because of the flat cooking surface, it's much easier to control the cooking. Pork chops I cooked on the grill were nicely browned on the outside, but not burnt and juicy inside. The burgers were perfectly done as well. It's much easier to control the fire on this grill than others I've used.
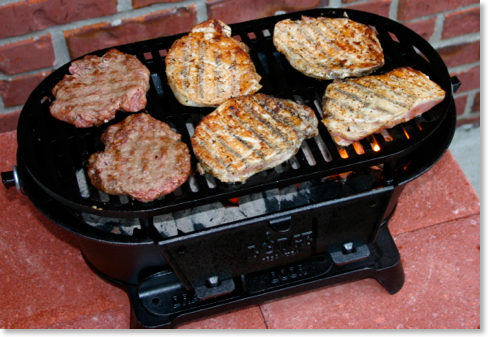
5. Warning: be careful with perfectly round hot dogs. There's no side to the grill surface and a round hot dog can simply roll off if you're not careful. Hot dogs that are a bit squared are much easier to control, and it helps to not crowd them so that they can be turned over. Notice the attractive brown (but not black and scorched!) stripes. Another solution as suggested by Greg on Black Iron Dude is to simply turn the top grill upside down so that there’s a small protrusion at the edges to keep your dogs from falling off. I haven’t tried this yet, but now I wonder why I hadn’t thought of that!

6. Don’t think that this grill is not up to cooking for large groups--it is! My wife was concerned that the grill was so small that we wouldn't be able to adequately entertain guests. As you can see here and in the pictures in our gallery, I easily fit eight quarter pound burgers from Omaha Steaks on the grill. That's perfectly adequate for any entertaining that we will do, and even if we have more folks over, two or three rounds of eight won't take that long.

7. Due to the LSG's flat surface on top, I could easily cook in a skillet or dutch oven on top of this grill without the pan wobbling. I’ve cooked food in 8” skillets, 10 1/4” skillets, sizzle skillets, and even dutch ovens. It’s the perfect grill to take camping as it allows for a wide diversity in what kinds of food can be prepared.

When camping, the LSG can be used with a dutch oven as an alternative to placing the dutch oven directly into live coals.
“Mountain Man Breakfast” made in a dutch oven on top of the LSG.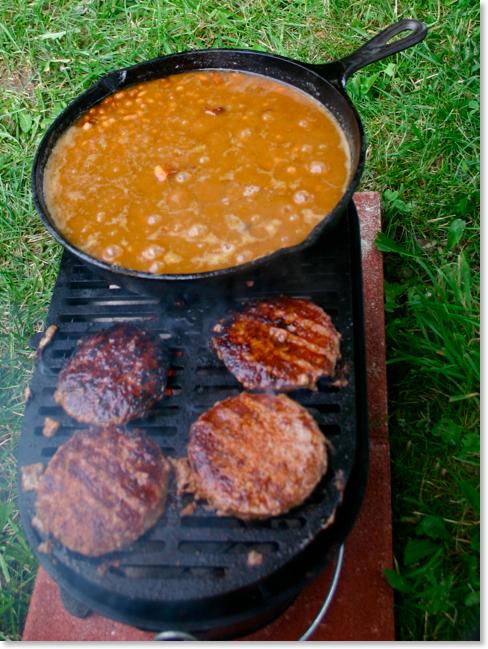
Baked beans in a rolling boil right next to hamburgers. The beans are in a 10 1/4 Lodge skillet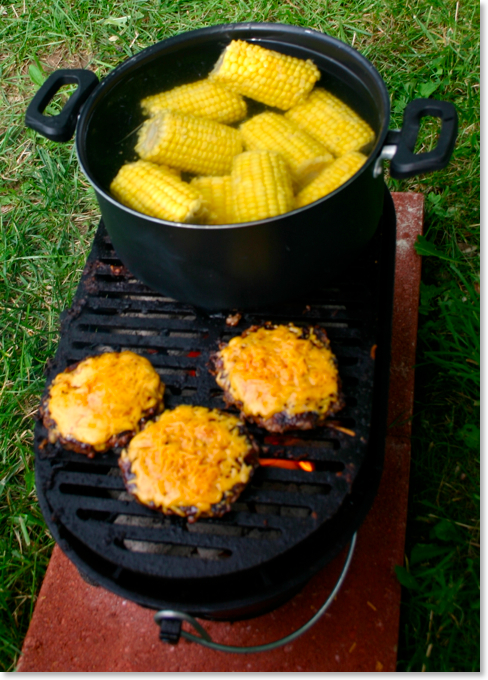
Cheeseburgers and corn on the cob (yeah, I know that’s not a cast iron pan, but it wasn’t my pan!)
Mushrooms & onions in olive oil on a sizzle skillet
8. To clean the top grill, I've used a stiff plastic brush and the nylon scrapers you can get from any Pampered Chef rep for cleaning a baking stone. As with any cast iron, you don't want to use soap as it can strip the seasoning or even leave a soap taste. I simply take the top grill to the kitchen sink and scrub it down with the brush and hot water. I use the scraper to get any food between the slots. It can be a bit tedious to clean between every groove, but it's really not difficult to clean.
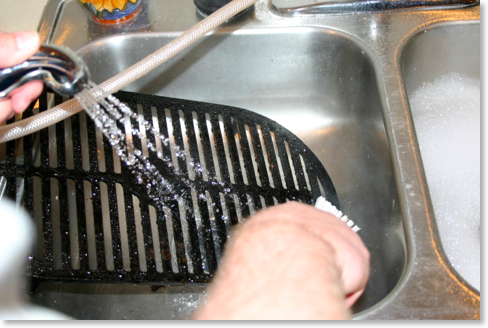
9. It may not be clear from the pictures, but the coals sit on a removable fire grate about an inch and a half above the bottom of the grill. This allows for air flow under the coals via an adjustable draft door. As the coals turn to ash, some will fall through the grate.
10. For cleaning the bottom part below the fire grate, I've experimented with lining the bottom with aluminum foil to make removing the ashes a bit easier. I did this a lot when I first bought the grill, but I do it less often now. If you try this, you want to be careful not to let the foil block the vent behind the draft door so that you can have air circulating under your coals. After I lift out the ashes, I've simply been sweeping out the ash dust that remains. As with any grill you don't want to leave heavy amounts of ash in place as it can become corrosive if it mixes with moisture.

11. As mentioned above, I clean the top grill like I would any cast iron skillet. If necessary, the grill top could even be re-seasoned in the oven or perhaps simply by covering it in a thin layer of lard or other cooking oil and placing it over hot coals. I haven’t had a need to do this yet, but I don’t see why it wouldn’t work.
12. For the start of this year’s grilling, I covered the bottom part of the grill with black stovepipe paint. The idea of painting cast iron would certainly be taboo for many, and I would agree if we were talking about the cooking surface. However, everything below the top grill--the fire bowl, the bottom, the fire grate, the fire door, the draft door--never comes into direct contact with food. Interestingly, when a LSG arrives brand new, every piece of the grill is covered in Lodge’s pre-seasoning. Again, this makes perfect sense for the top grill, but not for the rest of the grill. By this spring, the bottom part of my grill had lost all the pre-seasoning in quite a few places (the grill does get extremely hot, after all). I even had a couple of minor rust spots. While I could have simply re-seasoned it, this seemed neither practical or necessary. Instead, I cleaned everything really well before my first grilling of the year, and then I covered everything except the top grill with black stovepipe paint that is good for up to 1200° Fahrenheit. I am very pleased with the results and the painted grill makes it look brand new again. If this is something I need to do every year or two, I don’t mind at all. And my hunch is the paint will act as a better protection from weather than the mere pre-seasoning from Lodge.

This is a shot of my grill that I took last week. Even though I’ve had it for over a year, it still looks
brand new because I completely painted everything but the top grill with black stovetop paint.
13. If you're going to keep the grill outside, you must get the Lodge Sportsman's Grill Cover. The cover is long enough for the elastic bottom to fit under the legs of the grill keeping water out from all sides in the case of rain. Outside of that, I’d recommend bringing the grill inside if it’s not going to be used for a while, perhaps during the winter months.

14. For travel, I purchased a couple of extra patio stones that I'm keeping in the back of my truck. This grill is portable enough that I’ve taken it with me on a number of occasions. But what do you do if you’re through tailgating and the grill is still hot? The extra patio stones were the answer. This way when the grill is hot after I've cooked with it, I won't have to worry about the hot feet eating through the liner in the bed of my truck. I can simply set it on the patio stones.
15. Yes, you can carry it with the handle, but it’s only balanced if all extra pieces are removed. Don’t try to carry this grill by the handle for any long distance if it is fully assembled. The grill becomes much lighter and easier to carry if the top grill, fire door, and draft door are removed first. Then it remains fairly balanced simply with the wire handle itself. However, I would note that I was grilling one time last fall when a sudden downpour threatened to end our grilling all together for the day. With the careful help of a friend, we picked up the grill with live coals and carried it (protecting our hands with gloves and hot pads) through the house to the front where I had cover from the rain.
Have questions about the Lodge Sportsman’s Grill? Want to share your own experiences? Feel free to leave your thoughts or ask questions in the comments below, or you can contact Rick directly at rick@cookingincastiron.com.
Breaking in the New Wok
In his book Cast Iron Cooking: From Johnnycakes to Blackened Redfish, A. D. Livingston famously says, “If you’ve got a dutch oven, you don’t need no damn wok.” And while in essence that’s true--that you can cook just about anything in a dutch oven that you can cook in a wok--it doesn’t mean that a wok isn’t of tremendous value or even that a wok won’t be a better choice for any kind of stir-fry dish.
Kathy and I have been having our own “Asian night” for a while. A few years ago, her brother, Clark, gave me a traditional steel wok. We’ve used it for stir-fry on many occasions, almost always with rice and whatever leftovers were in the refrigerator. Lately, we added a very basic egg drop soup to the menu as well, and at this point I decided I really needed a second wok.
Of course, if I was going to buy a wok myself, knowing that Lodge makes a cast iron wok, I knew this was the one I had to have. In looking at customer comments on Amazon.com and other places, while some folks raved about the Lodge cast iron wok, I also discovered there were wok purists who decried it for being too heavy or that the cast iron was simply not the right kind of metal for stir-fry.
Whatever.
If you’re reading this post, you would probably agree with me that most food is simply better in cast iron! With this assumption in hand, I ordered the Lodge cast iron wok.
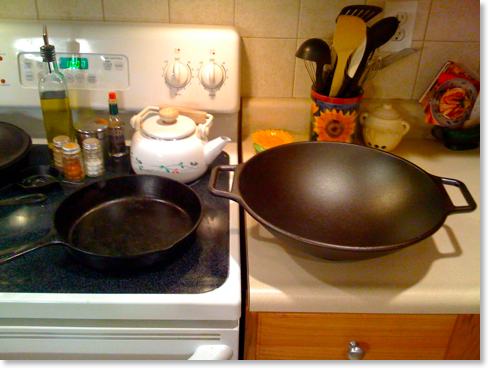
My first impression regarding the new wok was how large it was! In the picture above, you see it next to a standard 10 1/4” cast iron skillet. The weight of the cast iron makes for a pan that stays still. I don’t have to hold on to one side of it as I stir.
And as I’ve mentioned before, unfortunately, our current home has an electric range (never again!), but the diameter of the base is small enough that I can actually use the wok--as big as it is--from the smaller burner. As with any wok, by concentrating the heat at the bottom, food that needs less heat can be pushed to the sides.
STIR-FRIED RICE
Cast iron required: cast iron wok
When I make stir-fry, I usually start with sesame oil which I allow to get hot at the bottom of the pan over a medium heat. The sesame oil will give a dish a nice Asian flavor. As I mentioned, we often add whatever is available from leftovers, but if we are including ingredients like uncooked bacon, shrimp, or even raw vegetables like onions (green, white, or yellow) or broccoli, it’s best to add these ingredients first to the oil. I want to always be careful that any meat is fully cooked. Any meat or raw vegetables should be added before the rice which should already be cooked. When adding broccoli, I generally cook it to a bright green, but Kathy often wants it cooked a bit longer.
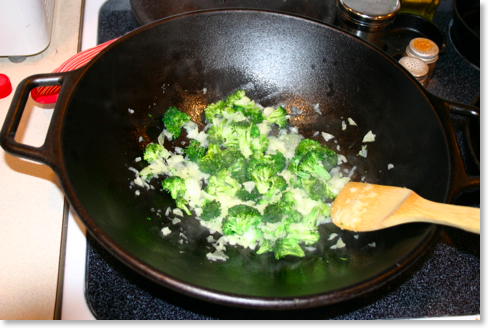
At this point, I will add in rice that is already cooked. Usually we have leftover rice from another meal, which is often our excuse for stir-fry in the first place. Soy sauce is added to taste. Now the primary purpose is to heat the rice to the same temperature as the rest of the ingredients. The final touch is to add a bit of egg. If raw egg is added to the mixture at this point, it will simply be lost. A better method is to lightly scramble a couple of eggs in another, smaller skillet and right before they are a the point I might serve them as a breakfast item, I take them and add them to the stir-fry, mixing them in without mixing them so fine that they are lost. White pepper and a little more soy sauce or even sesame oil can be added if necessary to taste.
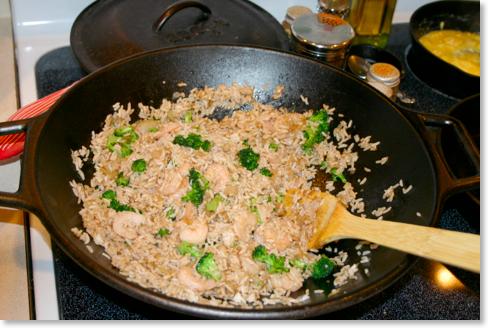
EGG DROP SOUP
Cast iron optional, but a wok (steel or cast iron) is a nice touch
We now use our original steel wok for the egg drop soup. Technically, you don’t need a wok to make egg drop soup, but it certainly seems appropriate to make it in one. The recipe is a very basic one by Rhonda Parkinson which I found a while back on the internet. Although cast iron isn’t really required, I include this recipe here for the sake of completeness. This recipe is basic and easy to make, and to us, it’s as good or better than any egg drop soup we’d get in a restaurant.
Ingredients:
- 4 cups chicken broth or stock
- 2 eggs, lightly beaten
- 1-2 green onions, minced
- 1/4 teaspoon white pepper
- Salt to taste
- A few drops of sesame oil (optional)
Directions:
In a wok or saucepan, bring the 4 cups of chicken broth to a boil. Add the white pepper and salt, and the sesame oil if using. Cook for about another minute.
Very slowly pour in the eggs in a steady stream. To make shreds, stir the egg rapidly in a clockwise direction for one minute. To make thin streams or ribbons, gently stir the eggs in a clockwise direction until they form.
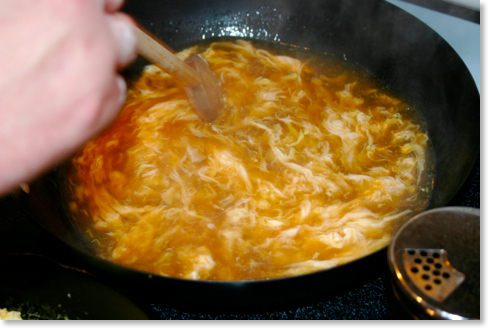
Garnish with green onion and serve.
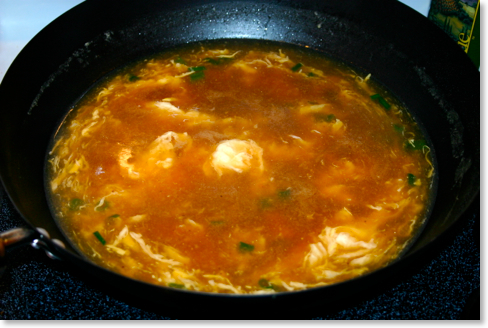
![]() MacGourmet users, click image to download recipe (or simply drag image to your MacGourmet recipe box).
MacGourmet users, click image to download recipe (or simply drag image to your MacGourmet recipe box).
THAILAND PEANUT PESTO (shown here with optional shrimp & broccoli)
Cast Iron Required: Wok
Another recipe we’ve made recently in the wok is Thailand Peanut Pesto which I found on the Tabasco website. This recipe requires one to make a homemade peanut sauce which is just as good as anything I’ve ever had in a restaurant. Kathy generally doesn’t care for peanut-flavored Asian recipes, but she loves this one.
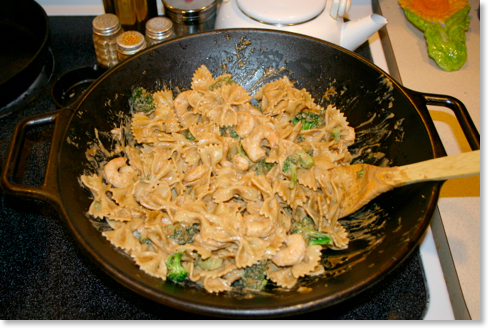
Ingredients:
- 1 cup unsalted roasted peanuts
- 1/3 cup Tabasco brand Soy Sauce
- 1 teaspoon Original Tabasco brand Pepper Sauce
- 1/4 cup honey
- 1/3 cup water
- 3 cloves garlic, minced
- 1/2 cup sesame oil
- 1 pound bowtie pasta, cooked according to package instructions
- 1/2 cup chopped green onions
Directions:
Place peanuts in the bowl of a food processor and process until finely ground. With motor running, add remaining ingredients except pasta and green onions, one at a time, through feeder tube. Process until a thick, smooth paste has formed.
Transfer mixture to a bowl; cover and refrigerate until ready to use. Toss with hot cooked pasta and garnish with green onion.
Makes 4 servings.
Try adding vegetables such as steamed broccoli or snow peas to this, or turn it into an entrée by adding cooked chicken or shrimp.
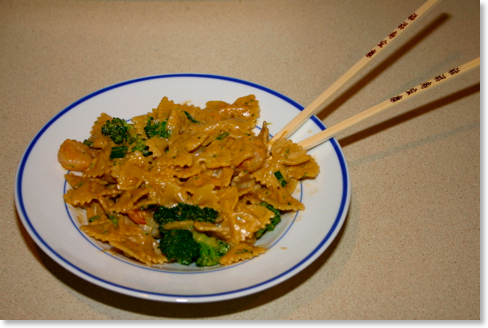
![]() MacGourmet users, click image to download recipe (or simply drag image to your MacGourmet recipe box).
MacGourmet users, click image to download recipe (or simply drag image to your MacGourmet recipe box).
Ultimately, I’m quite pleased with the cast iron wok from Lodge. It’s heavy so that it doesn’t move on the stovetop while stirring food in it, and everything I’ve cooked in it has been wonderful so far. Whether you are a cast iron aficionado or whether you simply enjoy Asian food, I highly recommend this wok for your cooking enjoyment.
Feel free to leave your thoughts or ask questions in the comments below, or you can contact Rick directly at rick@cookingincastiron.com.
Is It the Cast Iron or the Cook?
Rick is a little too humble to post this, but I have no qualms bragging on what a wonderful cook he is! For the third consecutive year, Rick has been named Chili Cook-Off Grand Prize Winner at the annual Simpsonville Baptist Church Family Football Night (because they can’t call it a Super Bowl Party!) and Chili Cook-Off. I’m a pretty finicky eater, and even more so about any tomato-based recipe, so when I say Rick makes good chili, I mean it. And, I suppose, enough other folks agree, too, since he is a three time champ in our little hometown. But, is it truly the cook? Or might it be the new enameled cast iron Dutch oven

Rick makes what he calls his “Louisiana Chili.” The “Louisiana” part comes from his use of Andouille sausage as one of the ingredients. The actual recipe is some deep, dark secret, so you won’t see it posted here. So that’s the Cook part of what makes the chili so good. The Cast Iron contribution is the new enameled Dutch oven Rick used this year. Tomato-based recipes can wreak havoc on cast iron, but the enameled pieces sold by Lodge are the perfect answer when you want the consistency and feel of cast iron without the damage to your well-seasoned cookware.

Enjoy the pictures, but don’t look for the super secret recipe anytime soon!

Feel free to leave your thoughts in the comments below, or you can contact Kathy directly at kathy@cookingincastiron.com.
Slow Cooker to Dutch Oven Conversion
Slow cookers are wonderful things. Of course where I grew up, we simply called them “Crock Pots.” But since that’s a trademarked brand name, they are usually referred to as “slow cookers” when speaking of the devices generically. They are great for cooking an entire meal by planning a few hours ahead. Just throw in the ingredients, set the temperature, and let it go. However, as any cast iron aficionado will understand, sometimes you just prefer to break out the black iron.
And as any experienced cast iron cook knows, you don’t really need special cookbooks geared to cast iron cookware--although they are certainly nice to have. In reality, most recipes (with a few exceptions) can be cooked in cast iron. This is especially true of slow cooker recipes since a slow cooker is really nothing more than an electric dutch oven if you think about it. However, some conversion of cooking time is required.
Last summer, Kathleen Purvis of The Charlotte Observer wrote an article (no direct link remaining to my knowledge) on this exact subject that I saw reprinted in a number of papers around the country. To convert from cooking times from a slow cooker to a dutch oven, she offered this basic principle:
A recipe that is cooked on the low setting in your slow cooker will take about a quarter as long in a Dutch oven in a 325-degree oven (if it cooks for 8 hours on low, it will take two to three hours in the Dutch oven). A recipe that is cooked on high setting will take about half as long. But remember, that's only an estimate, so leave yourself a little extra time.
Although the math is pretty straightforward, I thought that some of you might appreciate a quick cheat sheet, so I created one based upon Kathleen Purvis’ suggestions:
| SLOW COOKER | DUTCH OVEN |
|---|---|
12 hours/Low |
3 hours/325° F |
10 hours/Low |
2 1/2 hours/325° F |
8 hours/Low |
2 hours/325° F |
6 hours/Low |
1 1/2 hours/325° F |
5 hours/Low |
1 hour, 15 min./325° F |
4 hours/Low |
1 hour/325° F |
4 hours/High |
2 hours/325° F |
3 hours/Low |
45 min./325° F |
3 hours/High |
1 1/2 hours/325° F |
2 hours/Low |
30 min./325° F |
2 hours/High |
1 hour/325° F |
1 hour/Low |
15 min./325° F |
1 hour/High |
30 min./325° F |


