


Review: Lodge Sportsman's Grill

Therefore, I want to revisit some of what I wrote last year on Amazon, making a few modifications and updates now that I’ve had this little cast iron wonder for a little over a year.
I've always been particular to charcoal grilling over gas. But in my adult life, I've previously been satisfied getting the cheapest charcoal grill available and using it until it fell apart. Now, however, since I have the Lodge cast iron Sportsman's Grill (from this point forward, simply LSG), I anticipate that this will be the last grill I ever own. Because it's cast iron, as long as it's well cared for, it should last a lifetime.
My wife got me this grill for an anniversary present. Having developed a passion for cooking in cast iron like many of you, I had been eyeing it for quite some time. When it arrived, it came in a box unassembled, but I had it put together within a couple of minutes. All of the pieces simply stay in place with gravity with the exception of the bottom which is screwed into the fire bowl.

I enjoyed this grill so much last year, I believe we grilled out more last summer and fall than in the previous five or so years combined. While almost anything can be cooked to perfection on the LSG, I’ve also since discovered Omaha Steaks. We enjoyed them so much last year, we had to adjust our monthly grocery budget just to make sure we could place at least one modest order a month. I’ve known for a while that their steaks and burgers are great, but on Memorial Day earlier this week, I also discovered that Omaha Steaks also carries some of the best hot dogs and brats I’ve ever tasted. The brats were much more flavorful than many I’ve tried, and the hot dogs were three times the size of a normal frankfurter with great taste to boot.

Three brats, four burgers, and one ribeye--merely part of all that we grilled on Memorial Day this year.
Here are some things I've discovered over the last year or so cooking on my Lodge Sportsman’s Grill:
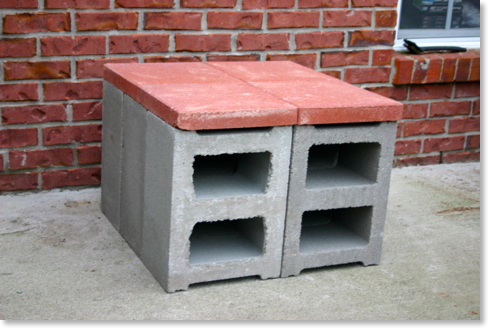
1. If you're going to use this grill a lot, you don't want to have it sitting on the ground. Or at least I don't with my sore back! So rather than finding some weatherproof pre-made table, I constructed a little grilling platform out of cinder blocks and patio stones. As you can see in the pictures, it looks much more attractive than it sounds. The materials cost me merely $17 and I guarantee you I have a more sturdy grilling area than anything I could have purchased. There’s no strong wind that’s going to blow over this grilling stand! Plus, I can temporarily stow tongs and spatulas in the open spaces of the cinder blocks.
2. Because cast iron heats evenly, the entire top grill is hot. I don't have to worry about colds spots on the grill as I've had to in the past assuming that I’ve distributed the charcoal fairly evenly. I read about one user of the LSG spraying the grill with olive oil-flavored Pam, which I often do, too. And with the oil based marinade I sometimes use, food sizzles when I set it down on this grill, just like when I put it in a cast iron skillet. I never get tired of the sound of cast iron sizzle whether it comes from a skillet or the LSG.
3. Speaking of a cast iron skillet, this grill is the best of both worlds. The grates of the top grill are flat on top and the slits are fairly narrow. It really is like grilling and cooking in a skillet combined. By oiling the grill before use, I've yet to have anything stick to it. And the slots are much more narrow than grills I've used in the past, so the danger of a burger falling through into the coals are a thing of the past.
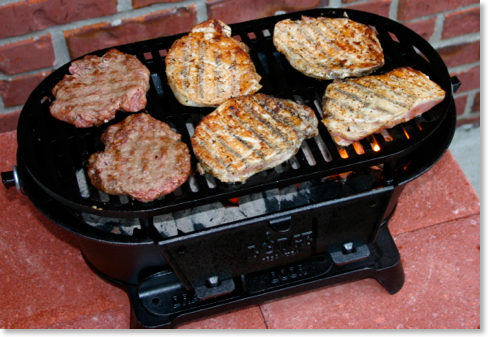
4. The LSG will cook just about anything you throw on it. I’ve cooked steaks, burgers, chicken, pork chops, brats, hot dogs and more. I really like the control I get over the food. So many times with a traditional charcoal grill, I've scorched food if I wasn't paying attention. Because this is made of cast iron and because of the flat cooking surface, it's much easier to control the cooking. Pork chops I cooked on the grill were nicely browned on the outside, but not burnt and juicy inside. The burgers were perfectly done as well. It's much easier to control the fire on this grill than others I've used.
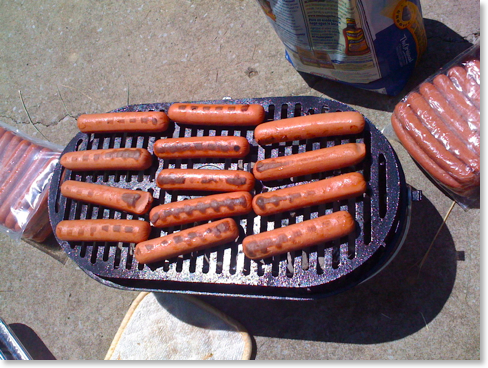
5. Warning: be careful with perfectly round hot dogs. There's no side to the grill surface and a round hot dog can simply roll off if you're not careful. Hot dogs that are a bit squared are much easier to control, and it helps to not crowd them so that they can be turned over. Notice the attractive brown (but not black and scorched!) stripes. Another solution as suggested by Greg on Black Iron Dude is to simply turn the top grill upside down so that there’s a small protrusion at the edges to keep your dogs from falling off. I haven’t tried this yet, but now I wonder why I hadn’t thought of that!
6. Don’t think that this grill is not up to cooking for large groups--it is! My wife was concerned that the grill was so small that we wouldn't be able to adequately entertain guests. As you can see here and in the pictures in our gallery, I easily fit eight quarter pound burgers from Omaha Steaks on the grill. That's perfectly adequate for any entertaining that we will do, and even if we have more folks over, two or three rounds of eight won't take that long.

7. Due to the LSG's flat surface on top, I could easily cook in a skillet or dutch oven on top of this grill without the pan wobbling. I’ve cooked food in 8” skillets, 10 1/4” skillets, sizzle skillets, and even dutch ovens. It’s the perfect grill to take camping as it allows for a wide diversity in what kinds of food can be prepared.

When camping, the LSG can be used with a dutch oven as an alternative to placing the dutch oven directly into live coals.
“Mountain Man Breakfast” made in a dutch oven on top of the LSG.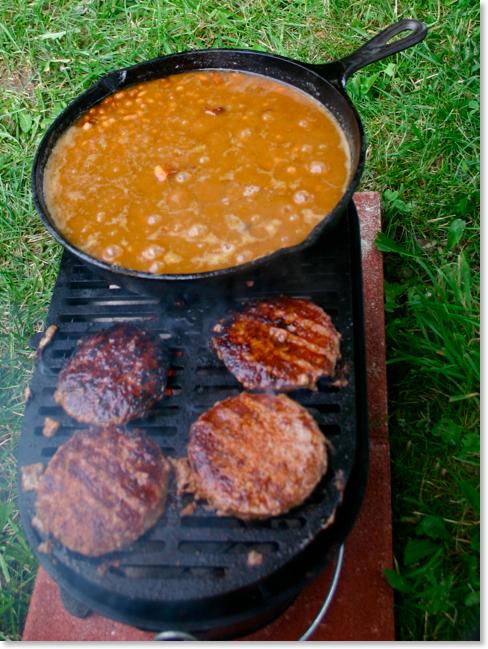
Baked beans in a rolling boil right next to hamburgers. The beans are in a 10 1/4 Lodge skillet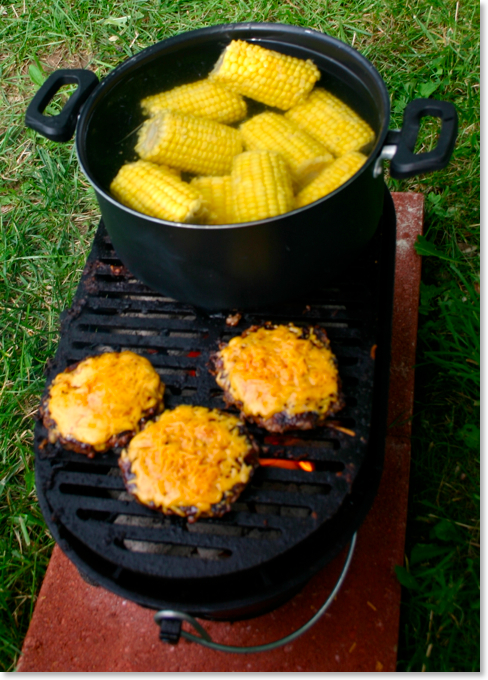
Cheeseburgers and corn on the cob (yeah, I know that’s not a cast iron pan, but it wasn’t my pan!)
Mushrooms & onions in olive oil on a sizzle skillet
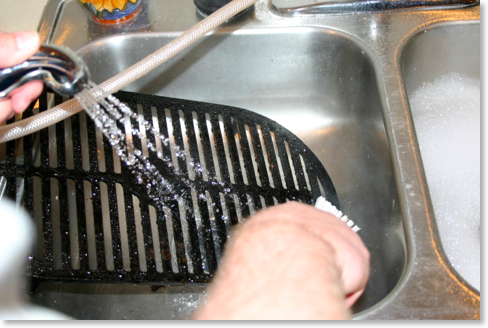
8. To clean the top grill, I've used a stiff plastic brush and the nylon scrapers you can get from any Pampered Chef rep for cleaning a baking stone. As with any cast iron, you don't want to use soap as it can strip the seasoning or even leave a soap taste. I simply take the top grill to the kitchen sink and scrub it down with the brush and hot water. I use the scraper to get any food between the slots. It can be a bit tedious to clean between every groove, but it's really not difficult to clean.
9. It may not be clear from the pictures, but the coals sit on a removable fire grate about an inch and a half above the bottom of the grill. This allows for air flow under the coals via an adjustable draft door. As the coals turn to ash, some will fall through the grate.
10. For cleaning the bottom part below the fire grate, I've experimented with lining the bottom with aluminum foil to make removing the ashes a bit easier. I did this a lot when I first bought the grill, but I do it less often now. If you try this, you want to be careful not to let the foil block the vent behind the draft door so that you can have air circulating under your coals. After I lift out the ashes, I've simply been sweeping out the ash dust that remains. As with any grill you don't want to leave heavy amounts of ash in place as it can become corrosive if it mixes with moisture.

11. As mentioned above, I clean the top grill like I would any cast iron skillet. If necessary, the grill top could even be re-seasoned in the oven or perhaps simply by covering it in a thin layer of lard or other cooking oil and placing it over hot coals. I haven’t had a need to do this yet, but I don’t see why it wouldn’t work.
12. For the start of this year’s grilling, I covered the bottom part of the grill with black stovepipe paint. The idea of painting cast iron would certainly be taboo for many, and I would agree if we were talking about the cooking surface. However, everything below the top grill--the fire bowl, the bottom, the fire grate, the fire door, the draft door--never comes into direct contact with food. Interestingly, when a LSG arrives brand new, every piece of the grill is covered in Lodge’s pre-seasoning. Again, this makes perfect sense for the top grill, but not for the rest of the grill. By this spring, the bottom part of my grill had lost all the pre-seasoning in quite a few places (the grill does get extremely hot, after all). I even had a couple of minor rust spots. While I could have simply re-seasoned it, this seemed neither practical or necessary. Instead, I cleaned everything really well before my first grilling of the year, and then I covered everything except the top grill with black stovepipe paint that is good for up to 1200° Fahrenheit. I am very pleased with the results and the painted grill makes it look brand new again. If this is something I need to do every year or two, I don’t mind at all. And my hunch is the paint will act as a better protection from weather than the mere pre-seasoning from Lodge.

This is a shot of my grill that I took last week. Even though I’ve had it for over a year, it still looks
brand new because I completely painted everything but the top grill with black stovetop paint.
13. If you're going to keep the grill outside, you must get the Lodge Sportsman's Grill Cover. The cover is long enough for the elastic bottom to fit under the legs of the grill keeping water out from all sides in the case of rain. Outside of that, I’d recommend bringing the grill inside if it’s not going to be used for a while, perhaps during the winter months.

14. For travel, I purchased a couple of extra patio stones that I'm keeping in the back of my truck. This grill is portable enough that I’ve taken it with me on a number of occasions. But what do you do if you’re through tailgating and the grill is still hot? The extra patio stones were the answer. This way when the grill is hot after I've cooked with it, I won't have to worry about the hot feet eating through the liner in the bed of my truck. I can simply set it on the patio stones.
15. Yes, you can carry it with the handle, but it’s only balanced if all extra pieces are removed. Don’t try to carry this grill by the handle for any long distance if it is fully assembled. The grill becomes much lighter and easier to carry if the top grill, fire door, and draft door are removed first. Then it remains fairly balanced simply with the wire handle itself. However, I would note that I was grilling one time last fall when a sudden downpour threatened to end our grilling all together for the day. With the careful help of a friend, we picked up the grill with live coals and carried it (protecting our hands with gloves and hot pads) through the house to the front where I had cover from the rain.
Have questions about the Lodge Sportsman’s Grill? Want to share your own experiences? Feel free to leave your thoughts or ask questions in the comments below, or you can contact Rick directly at rick@cookingincastiron.com.