


Interview with Joanna Pruess, Author of The Griswold & Wagner Cast Iron Cookbook
Joanna Pruess
The Griswold & Wagner Cast Iron Cookbook
2009 Skyhorse Publishing
I first heard of Joanna Pruess' new book, The Griswold and Wagner Cast Iron Cookbook
This volume is a really nice, high quality hardbound book with a stitched spine. It lays flat on the counter which makes using it while cooking very easy. You can't begin to imagine the quality of the pictures until you see them. They were taken right in Pruess' home by a professional photographer as she prepared the recipes.
Pruess herself is no stranger to the culinary world. She has written for The New York Times Sunday Magazine, The Washington Post, Food Arts, Saveur, Food & Wine and more. Her most recent cookbooks before her cast iron book include Mod Mex: Cooking Vibrant Fiesta Flavors at Home and Seduced by Bacon: Recipes & Lore about America's Favorite Indulgence. Pruess even has her own Wikipedia entry! She is married to restaurant critic, Bob Lape.
Having been so impressed with her new cast iron cookbook (only released November 1), I contacted Joanna Pruess asking her for an interview and she graciously agreed. I've inserted page numbers from the book to go with a number of the recipes that are mentioned below.
I’ve noticed that most cast iron “aficionados” have a story to tell about how they came around to embracing cooking in cast iron. For some, it was after going through multiple sets of chemically treated non-stick pans and then remembering that pan that mom or grandma used that never wore out. What about you? How long have you been cooking in cast iron?
My earliest memories are from my mom making her potted chicken [p. 102]. The smell of that dish, like no other, takes me back to my childhood and happy, simpler times. I also remember a dish that was among my favorites as I was growing up--tamale pie [pp. 145-147]--and then updated it with ingredients that probably weren't available back then, like chipotle chiles. My mom's mac and cheese [pp. 33-34] was totally beloved in our house. With at least seven at the dinner table, it was a boisterous, fun event.
The topping is what made it special. I added the panko and while her Parmesan was most probably from a green cylinder, I use Parmigiano-Reggiano. I love touching old recipes from our families and friends. It connects us to our past. What I said last night is what Adele Davis said: "We are what we eat; I like to add that we are also the product of those we have eaten with...our relatives and friends who color and infuse our life with special meaning."
You’ve been writing about food and cooking for a while. You’ve previously written other cookbooks. Why did you think it was the right time to write a cast iron cookbook?
Because we all need comfort--both emotionally and economically. Many of these recipes are inexpensive and easy to make and appeal to a huge audience of all ages. Also, cast iron endures: it's good for our environment and even good for our bodies since the small amount of iron that is leached from the pots prevents anemia. Did you ever hear of anyone in our grandparents' generation with iron-poor blood? Nope. Also, some of the chicest chefs in town are now using cast-iron pots.
You're exactly right. I've said that I believe we're going through a bit of a cast iron "renaissance."
Also, the way home entertaining has evolved, the area of the kitchen and dining room has morphed into a great room. Cast-iron goes directly from the stove to the table.
I agree about that renaissance. We are discovering that after all those fancy pans have been used and/or abused and thus discarded, cast-iron is still viable. It can almost always be reconditioned. On that score, I was so fortunate to have the advice of David G. Smith, a.k.a. "The Pan Man," who is a real expert on caring for the pans.
Who, would you say, is this book for?
So far I am amazed at how many people tell me they adore reading it...the history, the old stories and that they LOVE the food. There seems to be a connection to both young and old; sophisticated and novice cooks. Everyone finds something they can take away because the food is really tasty, yet it doesn't take intellectualizing to appreciate it.
Your book is simply gorgeous. It can just as easily sit on a coffee table as it could sit on a kitchen counter. One of the elements of your book that really rings true to me are the pans you’ve used in the pictures. When I see, for instance, the picture of the skillet in the oven on p. 88, I notice the pan has carbonization building up on the inside. In other words, this is a pan that gets regular use and has been used for quite a while. I can relate to it because it looks like my primary cast iron skillet. This is really in contrast to some cast iron books I’ve seen in which a marketing department simply went and bought pre-seasoned pans from the store and prepared a few of the recipes in them. I can even think of one cast iron book that actually has food sitting in a gun-metal gray unseasoned cast iron Dutch oven. So, what about the pans in your book? Were they all yours? Were some of them borrowed?
I did cook in much-used pans. The food was all cooked and shot in our kitchen as it actually was prepared. I have worked as a food stylist and know that many food pictures are staged. I wanted people to see how it really looks. I have used that 13-inch skillet for at least 25 years, since my kids were young and I made pancakes. A griddle would have been great but that one was also my "showcase" pot for big parties. People always "ooh" and "ah" about it. Besides, the pictures tempt people to try dishes.
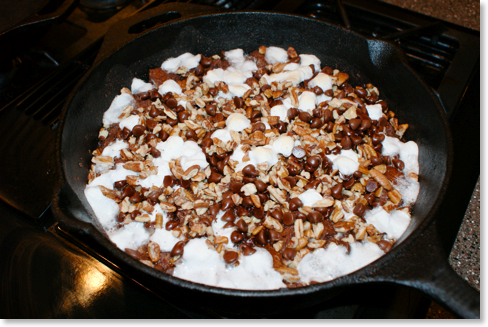
The fun thing was borrowing a chef-friend's pile of small cast-iron skillets for mini cornbreads and those to-die-for chocolate chunk-pecan cookies topped with ice cream and salted caramel sauce.
You're making me hungry! How extensive is your own collection of cast iron? What’s your oldest piece of cast iron? What’s your favorite or most used pan?
I have that 13-inch skillet (25 years old), a Dutch oven and a 10-inch skillet. Unfortunately, my mom's Dutch oven got lost. To me the lesson is "less is more." You can do almost all your cooking, with the exception of microwaving, in a few pots, including induction cooking. I also think that people should look for cast-iron at yard sales. There are lots of pots waiting to be adopted. And as you said they almost always come with a story or favorite recipe.
Agreed. And "adopting" pots is a great way to recycle and give life to these old pans. Which leads me to my next question: Why Griswold and Wagnerware? Why not simply write a general book about cooking in cast iron?
[Griswold and Wagner] were the first companies that produced and sold cast-iron cookware exclusively. Also, through Dave Smith and Joel Schiff (also a fine dealer in old cast-iron ware), I had access to their old ads and printed information which is in the public domain, but both had great collections which gives the book a lot of its charm and old fashion feeling.
When we previously corresponded, you suggested that I try out “Mom’s Mac and Cheese with Bacon” [pp. 33-34] and the “Clam-and-Corn Fritters” [pp. 52-53]. These were both exceptional recipes. What are some of the other “star” recipes in the book?
That's like asking which is your favorite child...to a mother who has a bunch. Anyway, I love the zucchini pancakes [pp. 67-68], Steak 'n' Stout [p. 138], Salted Caramel [p. 202] on anything, Raspberry-Blackberry Crisp [p. 187] is to die for, Shrimp Posole (a real surprise and from Native Americans) [p. 180], My Favorite Chile [pp. 142-143], Tamale Pie [pp. 145-147], Oven Roasted Chicken [pp. 89-90]...and the shockingly better asparagus [pp. 74-75] cooked in cast-iron. I could continue to effuse since I adore this food.
Some of these recipes, such as the previously mentioned “Mom’s Mac and Cheese” have been adapted by you. I believe you mentioned that your mom didn’t include panko bread crumbs, and my mom would have never paid for Parmigiano-Reggiono cheese as I so happily did. What other kinds of adaptations did you make to “classic” recipes?
Good question. In my mom's Potted Chicken, she used Lawry's salt, introduced in 1938 by the eponymous restaurant in Los Angeles. It had MSG in it, so I discovered a deconstructed version of the seasoning [p. 103] online and combined it with her other seasonings, and it took me immediately back to her kitchen. I took out artificial ingredients wherever I could.
Rick, I want to add that cooking and serving in cast-iron seems to be a great "ice breaker" at a meal. It's so homey and unthreateningthat people just relax and get into the food.
I agree. We love to have folks over and cook for them in cast iron. We have a baker's rack in the kitchen where some of it is displayed, and it's always great for conversation. Usually someone's grandmother and her cooking comes up in the conversation. We've also converted many of our friends to cooking in cast iron.
Another thing I think that is important is the connections between Old and New World. For example, I love my short ribs but also a Korean friend gave me her version [pp. 136-137] that spins a thread between cultures. Same can be said of paella [pp. 176-177] and jambalaya [pp. 178-179].
I agree about converting people. Last night I made 30 new converts.
Where do you live?
I live in Simpsonville, Kentucky, not too far from Louisville, but I was born and grew up in Louisiana.
Wow, that's far away but prime cast-iron country for fried chicken (read the funny story about the cornflake crusted version [p. 98]) and all those good desserts.
I appreciate your taking the time this morning for this interview. I’m certain the readers of Cooking in Cast Iron will enjoy learning more about you as well as using this wonderful cookbook. Is there anything else you’d like to mention about the book in closing?
I think we've done it...except it's not only a way to connect with the past, it's a great legacy to pass on to future generations (hopefully with this book included).
In addition to lots of great history and recipes, Joanna Pruess also includes instructions for care and restoration of cast iron pans in her book. It would make a great addition to your own collection of cookbooks and as a gift for your special someone this Christmas.
Feel free to leave your thoughts or ask questions in the comments below, or you can contact Rick directly at rick@cookingincastiron.com. Joanna Pruess has agreed to answer any questions readers might leave in the comments as she has opportunity.
Review: Cook Me Somethin' Mister! New Orleans Style Jambalaya Mix

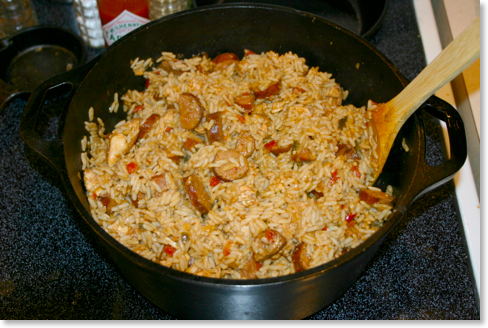
The directions suggest 1 1/2 lbs. of skinless chicken thighs and 1 1/2 lbs. of smoked sausage. Of course, if you're already familiar with jambalaya, you know that just about any meat or seafood combination can be substituted. In my case, I grilled some chicken breasts, which I chopped up afterwards, and substituted andouille sausage for the smoked sausage. The recipe also calls for "a five quart pot." I used a Lodge Logic 5 qt. Dutch oven
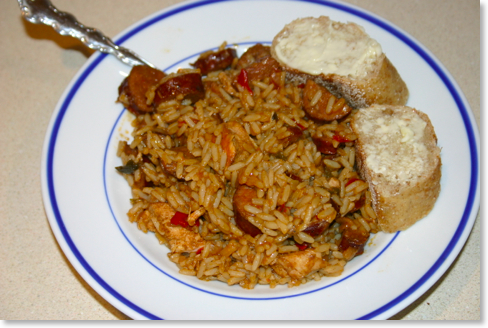
The directions, which are printed on the packaging, were simple enough. After the meat was cooked in the oil, I added water and brought the pot to a boil. While boiling, I added the mix and boiled this for 3 to 5 minutes. Then, it was just a matter of waiting. The stove's heat has to be completely turned off and the food sat covered in the dutch oven for 30 minutes. Although the next-to-last step suggests testing the rice to make certain it's done, it was for us. The only remaining step was number 8 requiring the cook to "Shout, 'Yum, yum, come get you some!'" which I did, bringing both Kathy and Bessie Mae (our hound dog) running. Unfortunately, Bessie Mae did not get any.
I've eaten and made many jambalaya recipes in my life and I have to admit that this one was right up there with the best of them. It's easy to be skeptical of a mix, but this one had the flavors right. Maybe part of it was Chef Paul Prudhomme's Magic Seasoning blended in--a fact advertized right on the label. I think another reason why it was so good is that unlike many mixes I've tried in the past, this particular one used vegetables large enough to see, bringing out a much richer flavor.
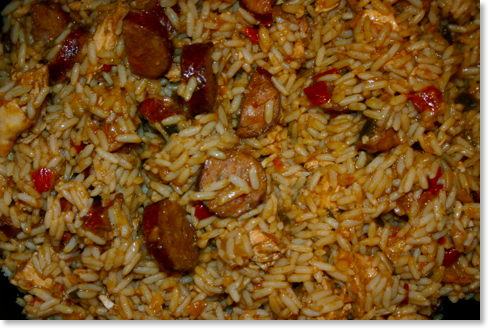
As you can see in the close up above, red and green bell peppers are easily identifiable as well as onions. The flavor was rich, and full, and my guess is that the average person would not even consider that it might be a mix.
The package advertizes that once chicken and sausage is added, there's enough food for 8-10 full meals. I would say, that and maybe more. We also gave some to some friends of ours without telling them it was from a mix so as to get an unbiased reaction. They thought it was wonderful and were actually surprised when I told them it was a mix.
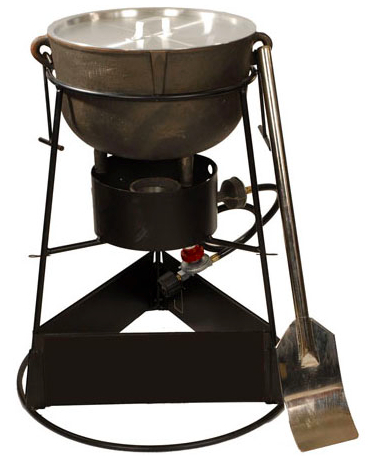
But there's even greater reason to use this mix in a whole different context. Cook Me Somethin' Mister also sells a 4 gallon or 8 gallon cast iron jambalaya pot and burner combo. The four gallon combo requires 10 lbs. of meat total and 4 bags of the jambalaya mix. The ten gallon setup uses 10 bags of the mix and 20 lbs. of meat. These will produce 32 and 80 servings respectively!
What would you use this for? Well for tailgating parties, campouts, and any other event where you might need to feed a whole lot of people. I think this would be great fun to cook this huge cast iron pot of jambalaya for a large group of friends.
The good news is that you don't have to fix multiple gallons of Cook Me Somethin' Mister New Orleans Style Jambalaya to try it. You can start with one bag which will be enough for your family, maybe a couple of friends, and who knows--you might even end up with leftovers!
Feel free to leave your thoughts or ask questions in the comments below, or you can contact Rick directly at rick@cookingincastiron.com.
Julie & Julia: A Cooking Movie Review

The screenplay, penned by director Nora Ephron, is not just the biography of Julia Child--it is mingled with a year long cooking/blogging adventure undertaken by Julie Powell in 2002. Powell challenged herself to spend a year cooking all the recipes from Julia Child’s first cookbook, Mastering The Art of French Cooking
I knew going in to the theater that I would see some semblance of a biographical tale, but I was surprised to walk out having enjoyed a romantic comedy. Meryl Streep’s Julia Child and Stanley Tucci’s Paul Child were depicted as very much in love with each other and with life. Their ability to laugh at life’s twists and turns and at Julia’s culinary mistakes made for an inspirational piece.
The dishes depicted in the movie were all real recipes from Julia Child’s cookbook, and I mentioned to Rick several times in the movie that I wanted to try particular recipes, especially the beef bourguignon. I wonder how it would taste in cast iron?
If you enjoy cooking, whether in cast iron or not, I think you’ll enjoy the delightfully charming Julie and Julia.
Rick's note: If you look closely at the pans Julia Child's character is using in the movie, in addition to her trademark copper pots, she also uses quite a few Le Creuset enameled cast iron dutch ovens.
Feel free to leave your thoughts in the comments below, or you can contact Kathy directly at kathy@cookingincastiron.com.
Review: The Cast Iron Skillet Cookbook (Part 1)
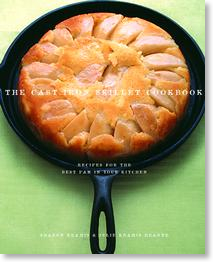
By Sharon Kramis & Julie Kramis Hearne
2004, Sasquatch Books. ISBN 1570614253
Our household is not only filled with cast iron cookware, but also with a variety of cookbooks specifically aimed at aspiring cast iron chefs. This multi-part review will cover my experiments with six of the recipes from The Cast Iron Skillet Cookbook: Recipes for the Best Pan in Your Kitchen. The book was published in 2004 by Sasquatch Books, and it features six categories of recipes: “Breakfast & Brunch,” “Appetizers,” “Entrées,” “Sides,” “Outdoor Cookery,” and “Desserts.”
The authors, a mother/daughter duo, penned a terrific introduction that tells the history of cast iron cooking through four generations of their family, making for interesting reading. A section on how to care for cast iron is an added bonus that will serve cast iron newbies well.
Recipe #1: Monday Night Meatloaf (Entrées, p. 47)
Cast Iron Required:
• 10.25” or 12” skillet

What I liked about the recipe:
- Simple ingredient list
- Very little prep work
- Pork combined with beef
- No bell peppers
What I didn’t like about the recipe:
- No glaze
- Ketchup suggested for dipping
Ingredients:
- 2 tablespoons salted butter
- 1 cup chopped yellow onion (about 1 medium-sized onion)
- 1 cup fresh bread crumbs
- 1 pound extra-lean ground beef
- 1/2 pound ground pork
- 1 can (8 ounces) tomato sauce
- 2 large eggs
- 1 cup grated cheddar cheese
- 1 teaspoon salt
- 1/2 teaspoon freshly ground black pepper
- 2 teaspoons dried Italian herb seasoning
- Ketchup, for serving
Directions:
Position a rack in the center of the oven and preheat to 350°
In a 10- or 12-inch cast iron skillet, melt the butter over medium heat. Stir in the chopped onion and cook for 3 minutes.

Transfer to a large mixing bowl. Place all of the remaining ingredients in the bowl with the onions, and mix together with your hands until well blended.
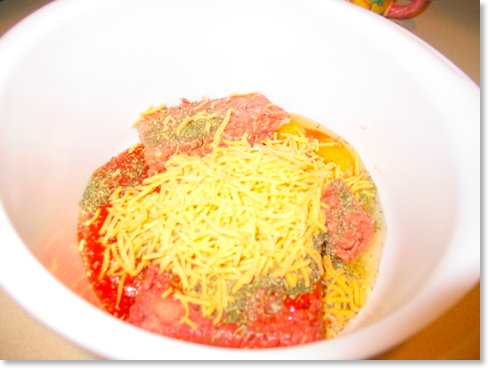
Form into a football-shaped loaf in the same skillet in which you cooked the onions.

Place the skillet in the oven and bake until the center is no longer pink, about 1 hour. Let cool for 10 minutes.

Pour off the excess fat and juices. Slice and serve hot, with ketchup for dipping [we opted not to use Ketchup, although Rick used Country Bob’s on his second helping].![]() MacGourmet users, click image to download recipe (or simply drag image to your MacGourmet recipe box).
MacGourmet users, click image to download recipe (or simply drag image to your MacGourmet recipe box).
Recipe #2: Horseradish Mashed Potatoes (“Entrées,” p. 51)
This recipe, although listed in the cookbook, is not a featured dish. It is listed as an “accompaniment” to the “Braised Spareribs in Merlot Sauce” (p. 50-51) I plan to make that dish for a later review, but I wanted some sort of mashed potato side for the meatloaf, so I chose to use it this time, too. It does not use cast iron cookware, however.
Ingredients:
- 2 pounds russet or Yukon Gold potatoes, peeled and quartered
- 1/2 teaspoon salt, plus more for seasoning
- 6 tablespoons heavy cream or half-and-half3 tablespoons unsalted butter
- 3 tablespoons mascarpone or sour cream
- 1 tablespoon creamy horseradish
- Freshly ground black pepper
Directions:
Place the potatoes in a large stockpot with the 1/2 teaspoon salt and enough water to cover.
Bring to a rapid boil over high heat. Reduce the heat to medium and cook until soft: drain. Return the potatoes to the pot and cook over medium heat for 3 to 5 minutes, allowing them to absorb some of the moisture. Reduce the heat to low and shake the potatoes over the heat for 3 minutes. Mash with a potato ricer, using medium-wide holes.
In a small saucepan over low heat, mix together the cream, butter, mascarpone, and horseradish. Cook for 5 minutes. Be careful not to let this mixture come to a boil.
Slowly pour the cream mixture into the potatoes while whipping the potatoes with a fork or a whisk. Mix until light and fluffy. Season to taste with salt and pepper and serve hot.
Final Results:

Wow! This meatloaf is definitely a keeper! And, although Rick was wary of the horseradish potatoes, he was pleasantly surprised. I look forward to trying more dishes during the next few weeks. Look for reviews of “Braised Spareribs in Merlot Sauce,” “Slow-Roasted Beef Brisket with Apple Cider-Ginger Barbecue Sauce and Caramelized Sweet Onions,” “Herbed Skillet Bread,” and “Brown Sugar Coffee Cake.” I can’t wait!
You can also follow one of The Cast Iron Skillet’s co-writers, Julie Kramis Hearne on her website, blog and on Twitter.
Feel free to leave your thoughts in the comments below, or you can contact Kathy directly at kathy@cookingincastiron.com.
More on the Lodge Cast Iron Grill
Last month, I posted a review on the Lodge Sportsmans Grill (LSG). Yesterday, I got an email from a reader named John. He wrote:
I recently got the Lodge grill due to my need for a grill. Your review was very handy in explaining what to expect (I ordered via Amazon). I even bought cinder blocks and tiles to create a very similar setup (see attached photo)!
Here is the picture of John’s cinder block setup and mine for comparison below it.


The LSG gets extremely hot, and it’s very important to have some kind of surface below it that cannot be damaged. If you place one of these grills on a wooden deck surface, it will definitely leave burn marks. Patio stones, cinder blocks, etc. provide good protection. Plus, it gets the grill off the ground which is easier on one’s back!
John asked a few questions in his email which are in bold below, followed by my answers.
I used it once and am trying to figure out how to clean the parts other than the grill top, which I cleaned inside. I will try the aluminum foil tip next time (I forget to line it before using). I read some guy used a shop vac.
The shop vac is ideal. Small shop vacs are available that would be perfect even if only used for the LSG (assuming you grill enough to justify the purchase). When I clean mine, though, I remove the top grill and set it aside. Usually the fire grate still has coals on it, although these are really nothing more than ash themselves. I try to carefully pick this up to include as much of the ash as possible and pour this off into a trash bag (it’s very important to make sure none of the coals are still live!). Then, I take off the draft door and the fire door and simply turn the fire bowl over, dumping out any loose ash. I also keep a little brush inside one of the cinder block holes that I use to brush out extra ash. It’s really not a big deal if there’s a coating of ash remaining on the sides. As long as the grill is not getting wet, the ash is not going to harm the inside of the fire bowl. However, ash can be very corrosive on cast iron if it gets wet. Of course, keeping any cast iron item out of a wet environment should be assumed anyway.
At the end of last summer, I gave the fire bowl a really good thorough cleaning with hot water and a scraper. Grease will build up and carbonize on the sides and in the bottom. This itself will not really hurt the grill, so I don’t worry about it during the summer months of prime grilling. At the end of this year, after two years of use, I may put the fire bowl in the oven and turn on the cleaning cycle. Afterwards, everything but the top grill can be repainted with black stovepipe paint to look as good as new.
How do you light the coals? I used a chimney starter and transferred them over when they turned gray. But I realize that probably didn't give enough time for the cast grill to get hot enough.
If you don’t use a chimney starter, the other obvious is charcoal lighter fluid. Some feel that lighter fluid can affect the taste of grilled food. This is definitely true if the lighter fluid is a cheaper brand. It may not be as true with some brands. Regardless, it’s worth the effort to experiment. Most folks like a chimney starter. When using one of these, after putting the coals on top of the fire grate, place the top grill in place and let it sit for at least ten minutes before placing anything on the grill. This should give it enough time to heat up.
Any tips on the using the draft door?
I always have the draft door slightly open to allow air to circulate underneath the coals. This allows them to stay very hot while cooking; but if the coals are too hot, I close the door to allow less oxygen to get to the coals.
This is probably completely obvious, but the product descriptions say there are 2 adjustable levels. Do they mean you flip the top grill over (so the feet are sticking up)? Or is there some other way that I didn't notice to change the height?
Yes, you’re exactly right. If the grill is turned over, it will be lower and closer to the coals. Honestly, I rarely do this because the grill gets so hot with the top grill turned up right. However, I’ve learned (the hard way) that when grilling round hot dogs, the lower setting keeps them from rolling off. However, you must use less charcoal if cooking something like hot dogs, brats, or even smoked sausages on the lower setting.
I hope that helps some. I know that John is going to enjoy his grill. I am sold on the LSG, and will never purchase any other grill unless I simply get a second one to use beside the first one!
Feel free to leave your thoughts or ask questions in the comments below, or you can contact Rick directly at rick@cookingincastiron.com.
Review: Lodge Sportsman's Grill

Therefore, I want to revisit some of what I wrote last year on Amazon, making a few modifications and updates now that I’ve had this little cast iron wonder for a little over a year.
I've always been particular to charcoal grilling over gas. But in my adult life, I've previously been satisfied getting the cheapest charcoal grill available and using it until it fell apart. Now, however, since I have the Lodge cast iron Sportsman's Grill (from this point forward, simply LSG), I anticipate that this will be the last grill I ever own. Because it's cast iron, as long as it's well cared for, it should last a lifetime.
My wife got me this grill for an anniversary present. Having developed a passion for cooking in cast iron like many of you, I had been eyeing it for quite some time. When it arrived, it came in a box unassembled, but I had it put together within a couple of minutes. All of the pieces simply stay in place with gravity with the exception of the bottom which is screwed into the fire bowl.

I enjoyed this grill so much last year, I believe we grilled out more last summer and fall than in the previous five or so years combined. While almost anything can be cooked to perfection on the LSG, I’ve also since discovered Omaha Steaks. We enjoyed them so much last year, we had to adjust our monthly grocery budget just to make sure we could place at least one modest order a month. I’ve known for a while that their steaks and burgers are great, but on Memorial Day earlier this week, I also discovered that Omaha Steaks also carries some of the best hot dogs and brats I’ve ever tasted. The brats were much more flavorful than many I’ve tried, and the hot dogs were three times the size of a normal frankfurter with great taste to boot.

Three brats, four burgers, and one ribeye--merely part of all that we grilled on Memorial Day this year.
Here are some things I've discovered over the last year or so cooking on my Lodge Sportsman’s Grill:
1. If you're going to use this grill a lot, you don't want to have it sitting on the ground. Or at least I don't with my sore back! So rather than finding some weatherproof pre-made table, I constructed a little grilling platform out of cinder blocks and patio stones. As you can see in the pictures, it looks much more attractive than it sounds. The materials cost me merely $17 and I guarantee you I have a more sturdy grilling area than anything I could have purchased. There’s no strong wind that’s going to blow over this grilling stand! Plus, I can temporarily stow tongs and spatulas in the open spaces of the cinder blocks.

2. Because cast iron heats evenly, the entire top grill is hot. I don't have to worry about colds spots on the grill as I've had to in the past assuming that I’ve distributed the charcoal fairly evenly. I read about one user of the LSG spraying the grill with olive oil-flavored Pam, which I often do, too. And with the oil based marinade I sometimes use, food sizzles when I set it down on this grill, just like when I put it in a cast iron skillet. I never get tired of the sound of cast iron sizzle whether it comes from a skillet or the LSG.
3. Speaking of a cast iron skillet, this grill is the best of both worlds. The grates of the top grill are flat on top and the slits are fairly narrow. It really is like grilling and cooking in a skillet combined. By oiling the grill before use, I've yet to have anything stick to it. And the slots are much more narrow than grills I've used in the past, so the danger of a burger falling through into the coals are a thing of the past.
4. The LSG will cook just about anything you throw on it. I’ve cooked steaks, burgers, chicken, pork chops, brats, hot dogs and more. I really like the control I get over the food. So many times with a traditional charcoal grill, I've scorched food if I wasn't paying attention. Because this is made of cast iron and because of the flat cooking surface, it's much easier to control the cooking. Pork chops I cooked on the grill were nicely browned on the outside, but not burnt and juicy inside. The burgers were perfectly done as well. It's much easier to control the fire on this grill than others I've used.
5. Warning: be careful with perfectly round hot dogs. There's no side to the grill surface and a round hot dog can simply roll off if you're not careful. Hot dogs that are a bit squared are much easier to control, and it helps to not crowd them so that they can be turned over. Notice the attractive brown (but not black and scorched!) stripes. Another solution as suggested by Greg on Black Iron Dude is to simply turn the top grill upside down so that there’s a small protrusion at the edges to keep your dogs from falling off. I haven’t tried this yet, but now I wonder why I hadn’t thought of that!

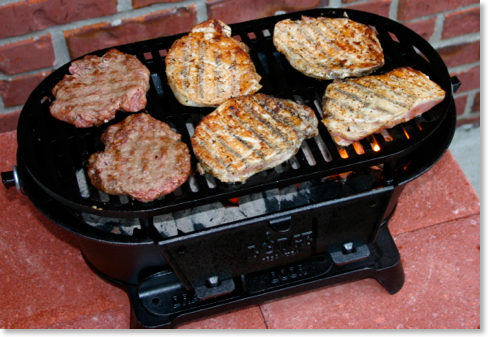
6. Don’t think that this grill is not up to cooking for large groups--it is! My wife was concerned that the grill was so small that we wouldn't be able to adequately entertain guests. As you can see here and in the pictures in our gallery, I easily fit eight quarter pound burgers from Omaha Steaks on the grill. That's perfectly adequate for any entertaining that we will do, and even if we have more folks over, two or three rounds of eight won't take that long.

7. Due to the LSG's flat surface on top, I could easily cook in a skillet or dutch oven on top of this grill without the pan wobbling. I’ve cooked food in 8” skillets, 10 1/4” skillets, sizzle skillets, and even dutch ovens. It’s the perfect grill to take camping as it allows for a wide diversity in what kinds of food can be prepared.

When camping, the LSG can be used with a dutch oven as an alternative to placing the dutch oven directly into live coals.
“Mountain Man Breakfast” made in a dutch oven on top of the LSG.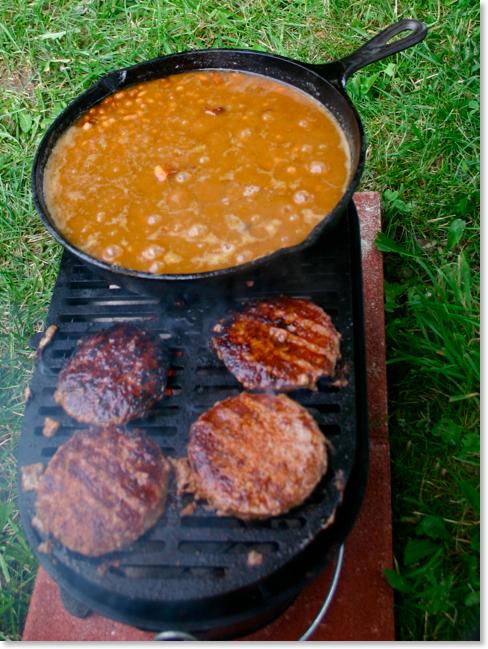
Baked beans in a rolling boil right next to hamburgers. The beans are in a 10 1/4 Lodge skillet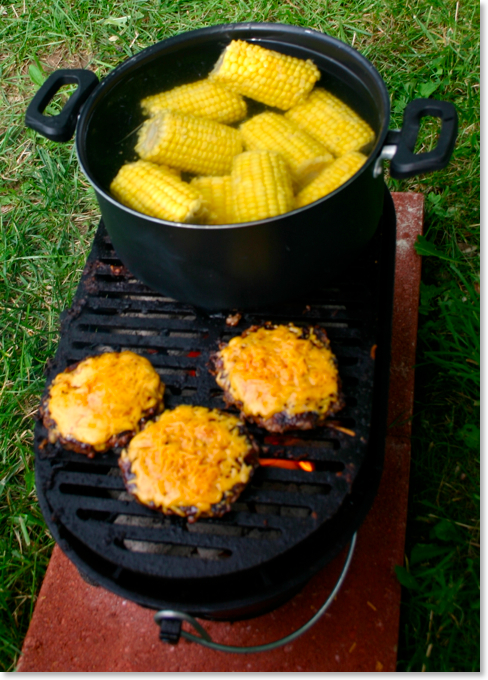
Cheeseburgers and corn on the cob (yeah, I know that’s not a cast iron pan, but it wasn’t my pan!)
Mushrooms & onions in olive oil on a sizzle skillet
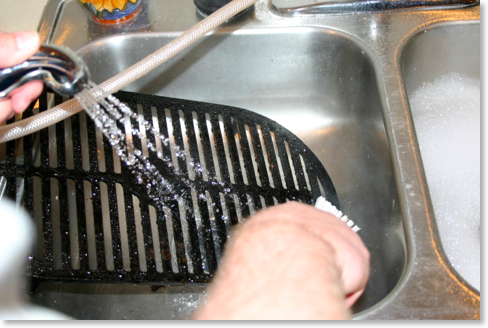
8. To clean the top grill, I've used a stiff plastic brush and the nylon scrapers you can get from any Pampered Chef rep for cleaning a baking stone. As with any cast iron, you don't want to use soap as it can strip the seasoning or even leave a soap taste. I simply take the top grill to the kitchen sink and scrub it down with the brush and hot water. I use the scraper to get any food between the slots. It can be a bit tedious to clean between every groove, but it's really not difficult to clean.
9. It may not be clear from the pictures, but the coals sit on a removable fire grate about an inch and a half above the bottom of the grill. This allows for air flow under the coals via an adjustable draft door. As the coals turn to ash, some will fall through the grate.
10. For cleaning the bottom part below the fire grate, I've experimented with lining the bottom with aluminum foil to make removing the ashes a bit easier. I did this a lot when I first bought the grill, but I do it less often now. If you try this, you want to be careful not to let the foil block the vent behind the draft door so that you can have air circulating under your coals. After I lift out the ashes, I've simply been sweeping out the ash dust that remains. As with any grill you don't want to leave heavy amounts of ash in place as it can become corrosive if it mixes with moisture.

11. As mentioned above, I clean the top grill like I would any cast iron skillet. If necessary, the grill top could even be re-seasoned in the oven or perhaps simply by covering it in a thin layer of lard or other cooking oil and placing it over hot coals. I haven’t had a need to do this yet, but I don’t see why it wouldn’t work.
12. For the start of this year’s grilling, I covered the bottom part of the grill with black stovepipe paint. The idea of painting cast iron would certainly be taboo for many, and I would agree if we were talking about the cooking surface. However, everything below the top grill--the fire bowl, the bottom, the fire grate, the fire door, the draft door--never comes into direct contact with food. Interestingly, when a LSG arrives brand new, every piece of the grill is covered in Lodge’s pre-seasoning. Again, this makes perfect sense for the top grill, but not for the rest of the grill. By this spring, the bottom part of my grill had lost all the pre-seasoning in quite a few places (the grill does get extremely hot, after all). I even had a couple of minor rust spots. While I could have simply re-seasoned it, this seemed neither practical or necessary. Instead, I cleaned everything really well before my first grilling of the year, and then I covered everything except the top grill with black stovepipe paint that is good for up to 1200° Fahrenheit. I am very pleased with the results and the painted grill makes it look brand new again. If this is something I need to do every year or two, I don’t mind at all. And my hunch is the paint will act as a better protection from weather than the mere pre-seasoning from Lodge.

This is a shot of my grill that I took last week. Even though I’ve had it for over a year, it still looks
brand new because I completely painted everything but the top grill with black stovetop paint.
13. If you're going to keep the grill outside, you must get the Lodge Sportsman's Grill Cover. The cover is long enough for the elastic bottom to fit under the legs of the grill keeping water out from all sides in the case of rain. Outside of that, I’d recommend bringing the grill inside if it’s not going to be used for a while, perhaps during the winter months.

14. For travel, I purchased a couple of extra patio stones that I'm keeping in the back of my truck. This grill is portable enough that I’ve taken it with me on a number of occasions. But what do you do if you’re through tailgating and the grill is still hot? The extra patio stones were the answer. This way when the grill is hot after I've cooked with it, I won't have to worry about the hot feet eating through the liner in the bed of my truck. I can simply set it on the patio stones.
15. Yes, you can carry it with the handle, but it’s only balanced if all extra pieces are removed. Don’t try to carry this grill by the handle for any long distance if it is fully assembled. The grill becomes much lighter and easier to carry if the top grill, fire door, and draft door are removed first. Then it remains fairly balanced simply with the wire handle itself. However, I would note that I was grilling one time last fall when a sudden downpour threatened to end our grilling all together for the day. With the careful help of a friend, we picked up the grill with live coals and carried it (protecting our hands with gloves and hot pads) through the house to the front where I had cover from the rain.
Have questions about the Lodge Sportsman’s Grill? Want to share your own experiences? Feel free to leave your thoughts or ask questions in the comments below, or you can contact Rick directly at rick@cookingincastiron.com.
Breaking in the New Wok
In his book Cast Iron Cooking: From Johnnycakes to Blackened Redfish, A. D. Livingston famously says, “If you’ve got a dutch oven, you don’t need no damn wok.” And while in essence that’s true--that you can cook just about anything in a dutch oven that you can cook in a wok--it doesn’t mean that a wok isn’t of tremendous value or even that a wok won’t be a better choice for any kind of stir-fry dish.
Kathy and I have been having our own “Asian night” for a while. A few years ago, her brother, Clark, gave me a traditional steel wok. We’ve used it for stir-fry on many occasions, almost always with rice and whatever leftovers were in the refrigerator. Lately, we added a very basic egg drop soup to the menu as well, and at this point I decided I really needed a second wok.
Of course, if I was going to buy a wok myself, knowing that Lodge makes a cast iron wok, I knew this was the one I had to have. In looking at customer comments on Amazon.com and other places, while some folks raved about the Lodge cast iron wok, I also discovered there were wok purists who decried it for being too heavy or that the cast iron was simply not the right kind of metal for stir-fry.
Whatever.
If you’re reading this post, you would probably agree with me that most food is simply better in cast iron! With this assumption in hand, I ordered the Lodge cast iron wok.
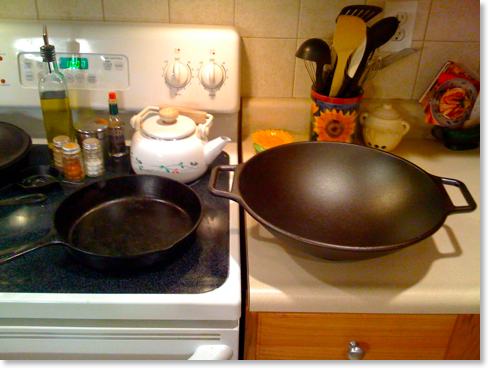
My first impression regarding the new wok was how large it was! In the picture above, you see it next to a standard 10 1/4” cast iron skillet. The weight of the cast iron makes for a pan that stays still. I don’t have to hold on to one side of it as I stir.
And as I’ve mentioned before, unfortunately, our current home has an electric range (never again!), but the diameter of the base is small enough that I can actually use the wok--as big as it is--from the smaller burner. As with any wok, by concentrating the heat at the bottom, food that needs less heat can be pushed to the sides.
STIR-FRIED RICE
Cast iron required: cast iron wok
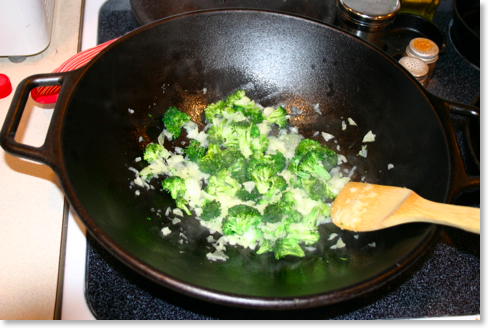
When I make stir-fry, I usually start with sesame oil which I allow to get hot at the bottom of the pan over a medium heat. The sesame oil will give a dish a nice Asian flavor. As I mentioned, we often add whatever is available from leftovers, but if we are including ingredients like uncooked bacon, shrimp, or even raw vegetables like onions (green, white, or yellow) or broccoli, it’s best to add these ingredients first to the oil. I want to always be careful that any meat is fully cooked. Any meat or raw vegetables should be added before the rice which should already be cooked. When adding broccoli, I generally cook it to a bright green, but Kathy often wants it cooked a bit longer.
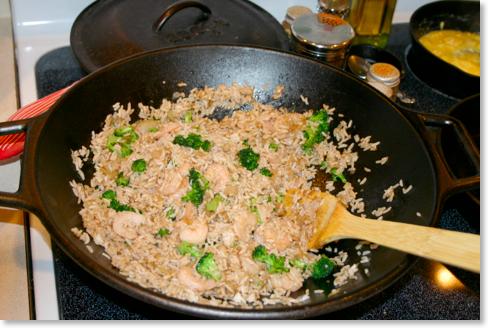
At this point, I will add in rice that is already cooked. Usually we have leftover rice from another meal, which is often our excuse for stir-fry in the first place. Soy sauce is added to taste. Now the primary purpose is to heat the rice to the same temperature as the rest of the ingredients. The final touch is to add a bit of egg. If raw egg is added to the mixture at this point, it will simply be lost. A better method is to lightly scramble a couple of eggs in another, smaller skillet and right before they are a the point I might serve them as a breakfast item, I take them and add them to the stir-fry, mixing them in without mixing them so fine that they are lost. White pepper and a little more soy sauce or even sesame oil can be added if necessary to taste.
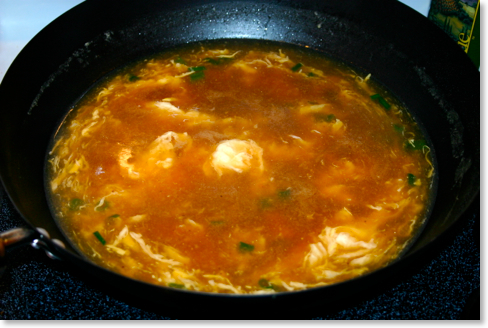
EGG DROP SOUP
Cast iron optional, but a wok (steel or cast iron) is a nice touch
We now use our original steel wok for the egg drop soup. Technically, you don’t need a wok to make egg drop soup, but it certainly seems appropriate to make it in one. The recipe is a very basic one by Rhonda Parkinson which I found a while back on the internet. Although cast iron isn’t really required, I include this recipe here for the sake of completeness. This recipe is basic and easy to make, and to us, it’s as good or better than any egg drop soup we’d get in a restaurant.
Ingredients:
- 4 cups chicken broth or stock
- 2 eggs, lightly beaten
- 1-2 green onions, minced
- 1/4 teaspoon white pepper
- Salt to taste
- A few drops of sesame oil (optional)
Directions:
In a wok or saucepan, bring the 4 cups of chicken broth to a boil. Add the white pepper and salt, and the sesame oil if using. Cook for about another minute.
Very slowly pour in the eggs in a steady stream. To make shreds, stir the egg rapidly in a clockwise direction for one minute. To make thin streams or ribbons, gently stir the eggs in a clockwise direction until they form.

Garnish with green onion and serve.
![]() MacGourmet users, click image to download recipe (or simply drag image to your MacGourmet recipe box).
MacGourmet users, click image to download recipe (or simply drag image to your MacGourmet recipe box).
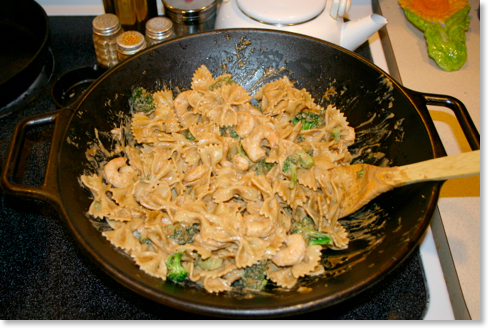
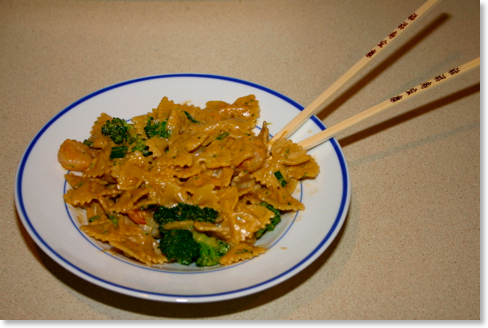
THAILAND PEANUT PESTO (shown here with optional shrimp & broccoli)
Cast Iron Required: Wok
Another recipe we’ve made recently in the wok is Thailand Peanut Pesto which I found on the Tabasco website. This recipe requires one to make a homemade peanut sauce which is just as good as anything I’ve ever had in a restaurant. Kathy generally doesn’t care for peanut-flavored Asian recipes, but she loves this one.
Ingredients:
- 1 cup unsalted roasted peanuts
- 1/3 cup Tabasco brand Soy Sauce
- 1 teaspoon Original Tabasco brand Pepper Sauce
- 1/4 cup honey
- 1/3 cup water
- 3 cloves garlic, minced
- 1/2 cup sesame oil
- 1 pound bowtie pasta, cooked according to package instructions
- 1/2 cup chopped green onions
Directions:
Place peanuts in the bowl of a food processor and process until finely ground. With motor running, add remaining ingredients except pasta and green onions, one at a time, through feeder tube. Process until a thick, smooth paste has formed.
Transfer mixture to a bowl; cover and refrigerate until ready to use. Toss with hot cooked pasta and garnish with green onion.
Makes 4 servings.
Try adding vegetables such as steamed broccoli or snow peas to this, or turn it into an entrée by adding cooked chicken or shrimp.
![]() MacGourmet users, click image to download recipe (or simply drag image to your MacGourmet recipe box).
MacGourmet users, click image to download recipe (or simply drag image to your MacGourmet recipe box).
Ultimately, I’m quite pleased with the cast iron wok from Lodge. It’s heavy so that it doesn’t move on the stovetop while stirring food in it, and everything I’ve cooked in it has been wonderful so far. Whether you are a cast iron aficionado or whether you simply enjoy Asian food, I highly recommend this wok for your cooking enjoyment.
Feel free to leave your thoughts or ask questions in the comments below, or you can contact Rick directly at rick@cookingincastiron.com.
Review: Country Bob's All Purpose Sauce

I’ve jokingly said before that I never met a barbecue sauce I didn’t like. But technically, Country Bob’s All Purpose Sauce is not the same as a regular barbecue sauce. In fact, the company makes a separate product called Country Bob’s Barbecue Sauce (which is not the product reviewed here). But to put the All Purpose Sauce to the test, we decide to use it as a marinade for grilled chicken.
As I opened the bottle, I caught a whiff of the sweet smell of molasses. I had not expected that. I put just a drop of the sauce on my finger and tasted it, and WOW, I knew we were in for something incredible. This was definitely not like any steak sauce, barbecue sauce, or marinade I’d tried before. In fact, Country Bob’s All Purpose Sauce is literally in a category all by itself.
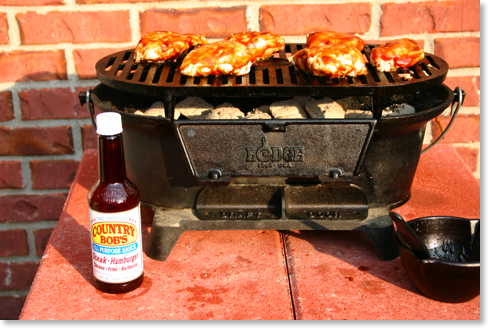
The first thing I did was to heat Country Bob’s sauce in a Lodge cast iron melting pot on top of my cast iron Sportsman's Grill
. I wanted to apply the sauce while hot to the chicken breasts to immediately “shock” the outer layer and seal in the natural juices.
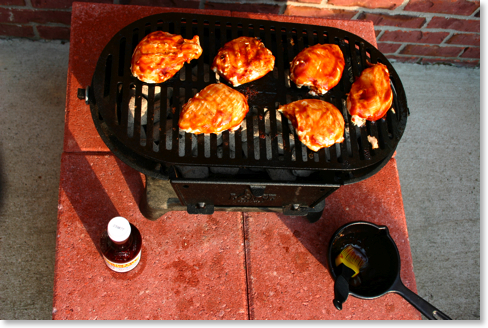
We had invited some friends over who also brought their twin four-year-olds. After we set down at the table, everyone marveled at the unique flavor of the chicken. Again, I think everyone expected this to be just another barbecue sauce, but Country Bob’s has its own distinct taste. One of children who is sometimes finicky with new foods, quickly said “More sauce!” So, I retrieved the bottle from outside, and everyone passed it around the table adding more of the sweet sauce to their chicken.
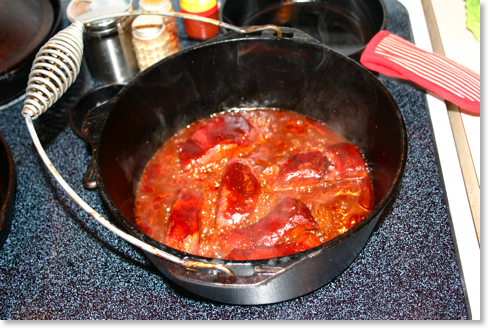
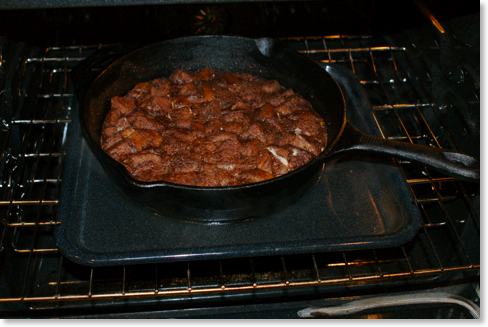
Again, although I now knew that the All Purpose Sauce wasn’t the same as a barbecue sauce, I now wanted to know what it would taste like on pork ribs. So I bought some boneless baby back ribs at the grocery store, and dropped them in a Lodge 5 qt dutch oven and then smothered them with Country Bob’s. I cooked them at a low 250° for two or three hours (see picture above taken after I pulled them from the oven). They were incredible! I don’t know if I can go back to “normal” barbecue ribs again.
There’s no way I can adequately describe how good this sauce is. And I’m not saying that because they sent me two free bottles. Actually, they’ve now made a paying customer out of me. But you can get a free bottle, too. Right now, if you go to Country Bob’s website, there is an offer for a coupon for a FREE bottle of sauce simply for signing up for their email newsletter. While you’re at the site, click on the link for “Retail Locations” to see where your nearest supplier is located. I was very pleased that all of our local stores near us here in Kentucky supply Country Bob’s.
If your stores don’t carry it yet, you can place an order on their website or get a six pack of Country Bob’s All Purpose Sauce at Amazon.com. You may be thinking to yourself that could never use six bottles. But that’s only because you haven’t tried it yet!
Feel free to leave your thoughts or ask questions in the comments below, or you can contact Rick directly at rick@cookingincastiron.com.
Review: RangeKleen 12" Deep Fryer

Kathy: We don’t actually have a deep fryer, and when we occasionally do fry something, I have to use either one of our cast iron skillets (which isn’t deep enough) or a dutch oven (which can sometimes be too deep). I was immediately drawn to the RangeKleen deep fryer, and could think of nothing better for it’s initial use than to fry chicken in the same manner that my mother taught me years ago.
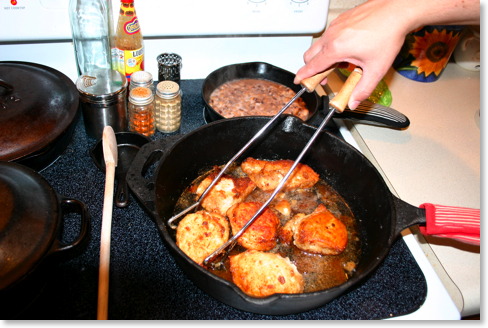
Turning the chicken with tongs helps to hold in the juices.
Rick made delicious milk gravy for the rice. (I have no clue how to make gravy!)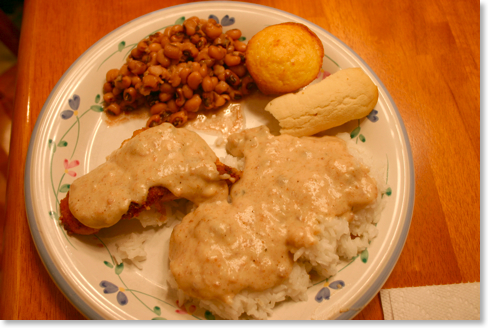
The final meal: Fried chicken, rice, milk gravy, black-eyed peas, cornbread. Yum!
I really liked the heaviness of this skillet. I don’t want to have to hold the handle while I stir things or move food around, and this skillet was just the right weight to allow me to concentrate on the food, not the cookware. The deep sides also allowed me to fry in more oil than what I would in a shallow skillet. This made the chicken much more crispy -- just like it should be!
Rick: Since Kathy used the deep fryer for it’s normal intended use, I decided to do something different. I love the little cast iron cookbook, A Skillet Full

Sautéing the onions, celery and bell pepper in butter.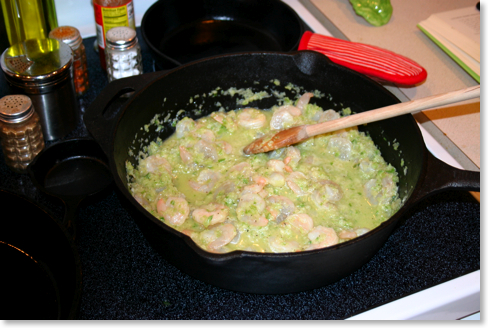
Adding in the shrimp.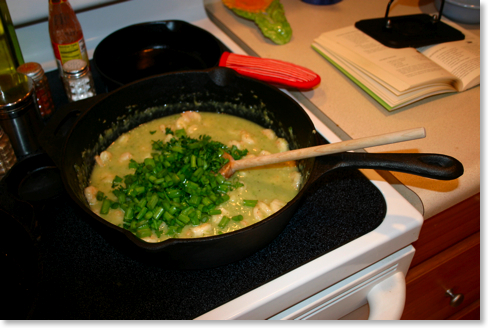
Adding in the green onions and parsley 
Essentially the final product. Note height of residue on the sides from stirring.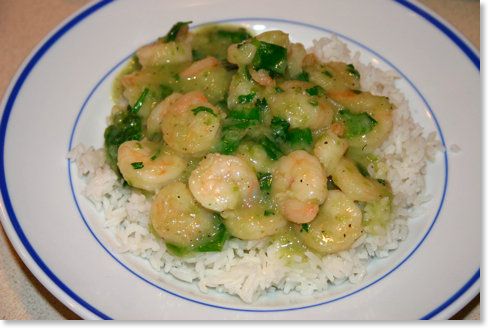
Seafood and Rice in the bowl.
I discovered something similar to what Kathy had enjoyed about the RangeKleen deep fryer: it’s weight kept my left hand free from the handle as I often have to do with a regular skillet. But my real question had to do with the need for a deep fryer to begin with. Although the ingredients would have easily fit into a traditional 10 1/4” cast iron skillet, the advantage of the deep fryer came in the stirring, which I had to do frequently for this recipe. As you can see two pictures up, I needed that extra inch or two for all the stirring. Although this recipe could be done in a regular skillet, it is easier to cook it in a deep fryer such as this one from RangeKleen. Incidentally, the lid to my Lodge 7 qt dutch oven fit the RangeKleen deep fryer perfectly.
JT: For the price, cast iron’s versatility is unmatched in my estimation. The RangeKleen 12” Deep Fryer, like most cast iron cookware works in the oven as well as on the stovetop. We used the RangeKleen pan in the oven for several baked items, and while the pan functions well, the diameter was too large for cakes and bread puddings. The combined ingredients spread out too far making the baked item too thin, and for bread pudding the liquid portion spreads too low allowing the bread to sit too high. This is more a use of the wrong tool for the wrong application than a problem with the pan. For other applications, like potatoes, or sautéing vegetables then finishing them in the oven, the pan will work extremely well.
One of the comfort elements was evident when picking up the pan for the first time. The handle is rounded more than most pans, so there is less edge pressure on the users hand when gripping the handle. This is especially beneficial considering the size and weight of the pan.
From an esthetic standpoint the pan has a rougher texture than most pans, which may be a result of the sand mould used to cast the pan. This doesn’t impact the cooking function of the pan, but does effect the clean up and appearance.
Below are pictures of two variations of bread pudding that JT’s wife, Jenn, made in the RangeKleen Deep Fryer:
A Final Note: [Rick writing here]-- Accompanying the RangeKleen 12” Deep Fryer was a warning not to use it on smooth top ranges. Kathy and I currently have a smooth top range (much to our chagrin), but we decided to use the fryer anyway. The reason for the warning is obvious upon holding the pan: it is heavy and the exterior a bit rough as JT noted above. It could easily put scratches on a flat surface stovetop if it was moved around a good bit. We were both very careful not to move it. And it’s weight kept it from easily being jostled.
Unfortunately, by the time we finally posted this review, this particular pan is no longer in production. But you can find the current RangeKleen selection of cast iron frying pans and dutch ovens at their website.
Click here for all pictures taken of the RangeKleen 12” Deep Fryer in action.
Your comments and questions, as always are welcome.
Review: MacGourmet Deluxe

Click on image above for larger view.
Recipe database programs have been around in one form or another as long as personal computers have been in homes. Some of these are standalone programs dedicated to recipes, but even standard database programs such as FileMaker Pro come with recipe templates. I’ve been using personal computers since 1982, and I’ve kept recipes saved electronically (in word processing documents or PDF files) since the first computer we had with a hard drive, way back in 1988. But I’ve never been impressed with recipe database software...until now.
Now, let me say up front: yes, you can see a MacGourmet Deluxe (MGD from this point forward) advertisement in the sidebar. But what you must realize is that I first contacted Mariner Software in regard to their advertising with us because I was incredibly impressed with this software. In fact, as I already mentioned, recipe database software is nothing new, but in reality, MGD seems to me to be the mature end result of nearly three decades of this kind of software that has gone before it. I strongly encourage you to download the MGD user manual as I will not be able to nearly touch upon all of MGD’s features in this review. I’ve jokingly said to a friend that MGD seems to do everything except cook the meal for you, but maybe that’s projected for version 2.0.
Of course, MGD does what you would expect--it allows you to keep a database of your recipes. The interface is iTunes-esque, allowing you to create your own categories in the left sidebar. And like an iTunes smart playlist that automatically expands as new songs meet pre-set criteria, MGD allows the user to create “smart recipe lists” that look for certain criteria as the user adds new recipes.
One of the most impressive features of MGD is the multiple ways that recipes can be added to the database. Certainly, the user can enter ingredients and directions manually, but there are also a number of ways to add them automatically from other sources. There are “supported” websites such as allrecipes.com, epicurious.com, foodnetwork.com, williams-sonoma.com, cookinglight.com and food.yahoo.com in which all a user has to do is select the URL on a recipe’s webpage, go to the services menu: MaGourmet, and choose “Import Recipe from Web Page.” 
MGD automatically parses the information, separating the ingredients from the directions, the description of the recipe and even includes the picture:
But what if a website is not supported? Well, to test this out, I went to one of my favorite cast iron related websites, “Black Iron Dude.” About a month ago, there was a recipe at this website for Arbol Chile Salsa. To import the recipe from Greg’s website, I first highlighted all the text in his post and then I dragged it to the “Clippings” window in MGD. This is a great little window in MGD that allows the user to drag over recipe after recipe and then go back and format them later. After I had dragged over the text for the salsa, I double-clicked on it to import it in my recipe database. 
All of my captured text is gathered at the top of the import window. From the drop down menu, I can select “Ingredients” and MGD knows that this information is separate from the preparation directions. And of course, I can do the same with the directions, information about the recipe, etc.
What impressed me further is that in parsing the list of ingredients, MGD could distinguish between number, actual item and special instructions. Notice for example in the list below, taken from this recipe, that “25” is separated from “dried Arbol chiles” which is separated from “remove stems and shake out some seeds”:
For those watching what they eat (and who isn’t these days?) MGD comes with the abbreviated USDA National Nutrient Database. Ingredients are automatically evaluated by this database and if MGD is unsure about a particular ingredient, the user can open up the USDA database and manually map ingredients. Once all ingredients are mapped and servings are figured, MGD calculates an extremely accurate breakdown of nutritional data.
This information is calculated for 45 separate items:
And when printing out recipes for personal use or to share an abbreviated box with nutritional information is included such as this breakdown for JT’s Family Pancake Recipe:
This kind of information would be extremely helpful not only for the person watching what he or she eats, but also for the personal chef or any person in charge of providing meals for groups of people. MGD includes a weekly meal planner that can be exported to iCal, and shopping lists can be created from planned recipes.
Kathy and I have an older iMac we keep in the kitchen for easy access to recipes we’ve collected electronically over the years. Whether you have a dedicated kitchen computer or simply a laptop on the counter, MGD offers a “Chef’s View” that enlarges ingredients and directions for easy access:
Almost every church group or civic organization has produced a cookbook at one time or another. There are publishers who specialize in this. These publishers should be a bit concerned for their future because MGD includes tools for creating one’s own cookbook with pictures, section dividers, chapters, and more. Once a cookbook has been created it can be exported to PDF ready for publication from a company such as Lulu.com.
And of course, when someone asks you for your Garlic Beef Enchiladas recipe after the church potluck, you can print out your recipe according to a variety of attractive built in templates.
As the name implies, MacGourmet Deluxe only runs on Macintosh computers, but the program is so sophisticated, it might be reason enough to switch from Windows if you aren’t already a Mac user. Regardless, MGD can import files in a number of formats: MasterCook, MasterCook Mac, Meal-Master, CookWare Deluxe, Cook’n text, RecipeML, and Yum XML. It can export to iPod notes, MasterCook, MealMaster, RTF and text files.
Our Cooking in Cast Iron website is still fairly new, but as we add recipes in the future, we will also make them available in MGD format which means that if you want to add one of them to your own collection, it will be as easy as dragging an icon from our website directly into your MGD database.
MacGourmet Deluxe is available from Mariner Software for $44.95.
Feel free to leave your thoughts or ask questions in the comments below, or you can contact Rick directly at rick@cookingincastiron.com.
Cast Iron Accessories


No, I don't sell Pampered Chef, but I sure am pleased with the great products I've discovered through that company to help keep our cast iron looking fabulous in every season!
Feel free to leave your thoughts in the comments below, or you can contact Kathy directly at kathy@cookingincastiron.com.