Who Cares about the Cold? It's Grilling Time!


So, fast-forwarding a little piece of summer into the bleak frigid cold of March’s desperate weeks might sound blasphemous, and we don’t take it lightly, but there are times when a lift to the spirit is necessary in order to loosen the stranglehold of cold bitterness around our souls.
One simple, yet effective means of brightening these dark days is to bring the pop and sizzle of meat on the grill indoors with our cast iron grill pan or griddle. Our collection includes a round grill pan and a two burner, two-sided griddle. Each has its own advantages and a drawback or two. The round pan isn’t large enough to cook for all four members of our family at one time, and the surface of the griddle side will suffer the direct flame of the gas grill when flipped to use the grill. However, the sharp ridges accomplished with cast iron far out-class the paltry bumps the aluminum pans attempt to pass-off as grill ridges. Do we really expect those pseudo-ridges to provide the grill lines necessary to bring the taste of summer to our mouths? This is where the cast iron grill pans cook like no other. So we have the grill, next comes the fare.

An early frustration in our grill pan experience was having the food stick to the grill ridges when trying to turn the food. This frustration was overcome through having properly oiled ridges, technique, and patience; the most important being patience. Using a basting brush aids in the application and maintenance of oiling the ridges, and is the practice I typically follow. However, the oil can quickly drain away from the ridges. Alternately, apply a thin layer of oil to the meat in addition to the grill.


Feel free to leave your thoughts in the comments below, or you can contact JT directily at ironman@cookingincastiron.com.
Review: RangeKleen 12" Deep Fryer

Kathy: We don’t actually have a deep fryer, and when we occasionally do fry something, I have to use either one of our cast iron skillets (which isn’t deep enough) or a dutch oven (which can sometimes be too deep). I was immediately drawn to the RangeKleen deep fryer, and could think of nothing better for it’s initial use than to fry chicken in the same manner that my mother taught me years ago.
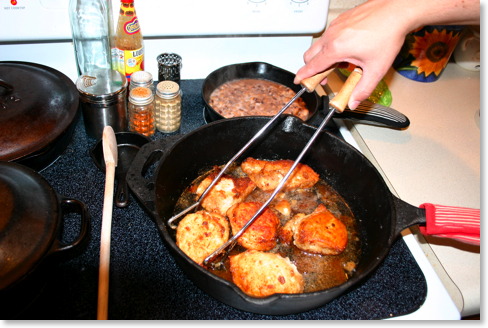
Turning the chicken with tongs helps to hold in the juices.
Rick made delicious milk gravy for the rice. (I have no clue how to make gravy!)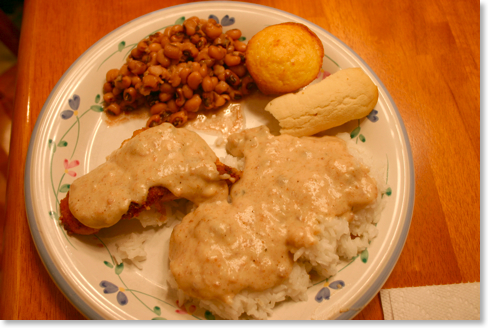
The final meal: Fried chicken, rice, milk gravy, black-eyed peas, cornbread. Yum!
I really liked the heaviness of this skillet. I don’t want to have to hold the handle while I stir things or move food around, and this skillet was just the right weight to allow me to concentrate on the food, not the cookware. The deep sides also allowed me to fry in more oil than what I would in a shallow skillet. This made the chicken much more crispy -- just like it should be!
Rick: Since Kathy used the deep fryer for it’s normal intended use, I decided to do something different. I love the little cast iron cookbook, A Skillet Full

Sautéing the onions, celery and bell pepper in butter.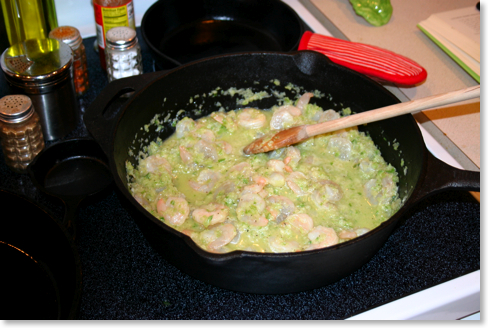
Adding in the shrimp.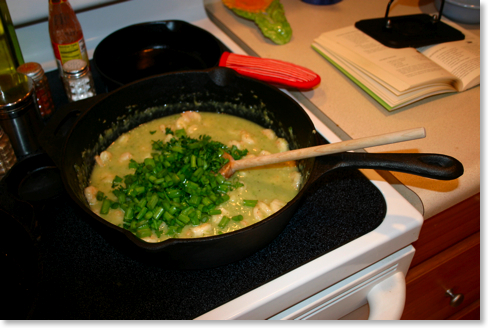
Adding in the green onions and parsley 
Essentially the final product. Note height of residue on the sides from stirring.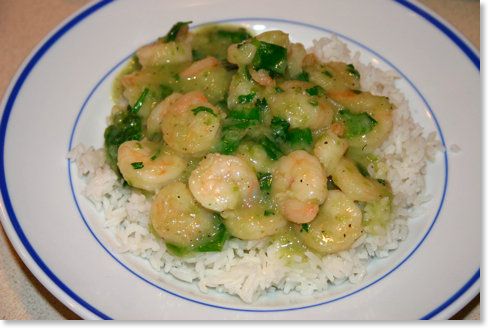
Seafood and Rice in the bowl.
I discovered something similar to what Kathy had enjoyed about the RangeKleen deep fryer: it’s weight kept my left hand free from the handle as I often have to do with a regular skillet. But my real question had to do with the need for a deep fryer to begin with. Although the ingredients would have easily fit into a traditional 10 1/4” cast iron skillet, the advantage of the deep fryer came in the stirring, which I had to do frequently for this recipe. As you can see two pictures up, I needed that extra inch or two for all the stirring. Although this recipe could be done in a regular skillet, it is easier to cook it in a deep fryer such as this one from RangeKleen. Incidentally, the lid to my Lodge 7 qt dutch oven fit the RangeKleen deep fryer perfectly.
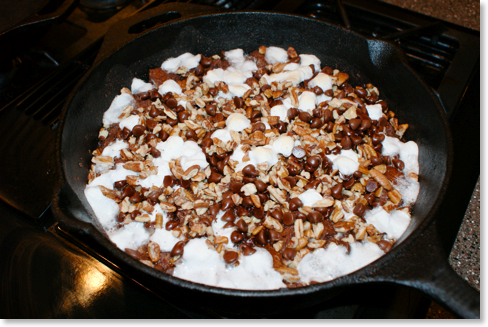
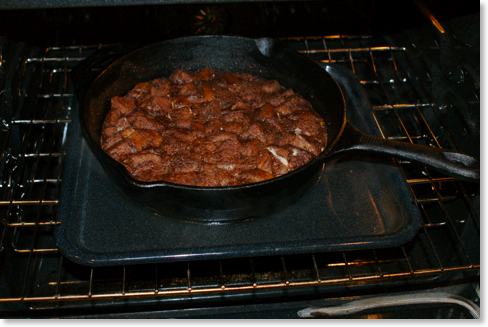
JT: For the price, cast iron’s versatility is unmatched in my estimation. The RangeKleen 12” Deep Fryer, like most cast iron cookware works in the oven as well as on the stovetop. We used the RangeKleen pan in the oven for several baked items, and while the pan functions well, the diameter was too large for cakes and bread puddings. The combined ingredients spread out too far making the baked item too thin, and for bread pudding the liquid portion spreads too low allowing the bread to sit too high. This is more a use of the wrong tool for the wrong application than a problem with the pan. For other applications, like potatoes, or sautéing vegetables then finishing them in the oven, the pan will work extremely well.
One of the comfort elements was evident when picking up the pan for the first time. The handle is rounded more than most pans, so there is less edge pressure on the users hand when gripping the handle. This is especially beneficial considering the size and weight of the pan.
From an esthetic standpoint the pan has a rougher texture than most pans, which may be a result of the sand mould used to cast the pan. This doesn’t impact the cooking function of the pan, but does effect the clean up and appearance.
Below are pictures of two variations of bread pudding that JT’s wife, Jenn, made in the RangeKleen Deep Fryer:
A Final Note: [Rick writing here]-- Accompanying the RangeKleen 12” Deep Fryer was a warning not to use it on smooth top ranges. Kathy and I currently have a smooth top range (much to our chagrin), but we decided to use the fryer anyway. The reason for the warning is obvious upon holding the pan: it is heavy and the exterior a bit rough as JT noted above. It could easily put scratches on a flat surface stovetop if it was moved around a good bit. We were both very careful not to move it. And it’s weight kept it from easily being jostled.
Unfortunately, by the time we finally posted this review, this particular pan is no longer in production. But you can find the current RangeKleen selection of cast iron frying pans and dutch ovens at their website.
Click here for all pictures taken of the RangeKleen 12” Deep Fryer in action.
Your comments and questions, as always are welcome.
JT's Family Tradition Pancake Recipe

CAST IRON REQUIRED:
- Griddle or skillet
- Melting Pot
INGREDIENTS
- 1 cup unbleached flour
- 2 tsp baking soda
- pinch of salt
- 3/4 cup milk
- 1 Tbs sunflower oil
- 1 Tbs honey
- 1 egg, brown of course
- 1/2 tsp vanilla, or 1/4 tsp almond extract
DIRECTIONS
Combine dry ingredients. In a separate bowl, combine milk, oil, honey, egg and vanilla (or Almond).
(Hint 1: measure the oil first, then the honey in the same measuring spoon. The honey slips right out yielding the entire tablespoon with no sticking).
(Hint 2: warm the milk in the microwave for 45 seconds. The honey will dissolve more readily, and the pancakes will cook more evenly because the batter isn’t cold)
Mix the liquids into the dry with a spoon or wisk, it’s okay to leave a few small lumps of batter rather than over mix.
Pour the batter (1/4 to 1/2 cup amounts depending on desired size) onto an oiled, cast iron griddle or skillet. I use low heat, because the cast iron conducts efficiently, and I don’t want the cooking process to begin until I have finished the pour. When bubbles start to rise to the top, check the bottom surface and flip when the right amount of golden brown is apparent. Serve right off the griddle and top with real maple syrup from the melting/warming pot.
Variation:
Immediately after pouring the batter, drop chocolate chips or blueberries on top and tap in with the spatula. This works much better than trying to mix them into the batter bowl, and it gives you the option to arrange them in fun designs.
Rule:
Never, which means not ever, use a pancake mix. This isn’t complicated. You can do it, and you and your kids will appreciate it.
Feel free to leave your thoughts in the comments below, or you can contact JT directily at ironman@cookingincastiron.com.
Memories Born Out of Simplicity (Cast Iron Traditions)

A few years ago, as a father of two toddlers, I rebelled against any notion that I should have to get up on a Saturday morning and make breakfast for the family. It was the only day in the week when sleeping-in was plausible. Rising early was required the other six days of the week; why could I not have this one day to experience that simple exhilaration--that one joyous moment--when one wakes up without external prodding.
Amidst my whining and self-complain--because the only one who listens to my complaint is the self--I started to become more reflective. I began to justify my resistance by considering how breakfast was not that important to me when I was a kid. Well, except for breakfast at Grandma’s. The smell and sizzle of ham in the skillet and the eggs--brown eggs from the chickens in the back yard, made-to-order, scrambled or sunny-side-up. Oh, and the toast, with homemade jam and jelly, three or four flavors made from the fruit trees right outside. Waffles, butter, syrup, of course this was only tradition in the sense that we visited Grandma and Grandpa’s one or two weeks out of the year.
It wasn’t only the food, but also listening to the conversation of adults as a child. Grandma shared the neighborhood gossip, recalling early years with siblings, and reminiscing about farm life--the good ol’ days.
That’s one thing about childhood memories: we all have them, and our children will have them too; but it is up to us to influence what positive emotional value they might have. In my reflection I realized I wanted to create some of these memories for my children. Memories born out of simplicity, which my kids could look back to and gain insight about their father, and of traditions they could continue and build upon.
Will I get up early and make breakfast for my kids? Yes, of course I will, and I have nearly every Saturday for the last six years. The Saturday morning event has, along with my recipe for pancakes, undergone a few tweaks as time has gone by. A few months ago I eschewed the anodized-aluminum in favor of a cast iron skillet (just like Grandma’s), and more recently implemented a cast iron griddle. The cast iron probably enhances the memory aspect more for me than for my children. Only time will tell. But for me it connects me to the way my mother and grandmother prepared breakfast and many other meals.

I become reflective again. Is this really making an impact on my kids? Do they take comfort in the ritual? Is there security in the knowing of what to expect when they wake up on Saturday? Do they care? Every once in a while I get a glimpse of a connection. One Friday evening as the kids were headed off to bed, perhaps in a mental lapse, my daughter asked, “What’s for breakfast tomorrow?”
I was almost hurt. “What do you think is for breakfast,” came my retort.
“Oh, tomorrow is Saturday--pancakes and maple links. Yes!”
A smile emerged on my face--she gets it.
Feel free to leave your thoughts in the comments below, or you can contact JT directily at ironman@cookingincastiron.com.
And watch for JT’s Saturday morning pancake recipe in an upcoming post.


